· Elira Thomsen · Appliance Repair · 21 min read
How To Repair Upper Rack Of Kitchenaid Dishwasher
Repair Your KitchenAid Dishwasher Upper Rack: A Simple Guide
Having a dishwasher makes kitchen chores easy. A broken upper rack in your KitchenAid dishwasher can cause frustration. Dishes do not sit right. They might even get damaged. You want your KitchenAid dishwasher to work well.
I understand this problem. Many people face it. You do not need to buy a new dishwasher. Most upper rack problems are easy to fix. This guide will help you understand how to repair upper rack of KitchenAid dishwasher. We will cover common issues and provide clear steps. You will save money. You will get your dishwasher back to working order.
Takeaway
- Identify specific upper rack problems (e.g., broken wheels, adjusters, rails).
- Gather the correct tools and replacement parts for the job.
- Follow safety steps before starting any repair work.
- Perform targeted repairs for wheels, adjusters, and rails.
- Implement simple maintenance to prevent future issues.
How to repair upper rack of KitchenAid dishwasher? You can repair a KitchenAid dishwasher upper rack by identifying the broken part. Common issues include faulty wheels, damaged adjusters, or worn rails. You simply remove the old part and install a new one. This often saves you from needing professional service.
Understanding Your KitchenAid Dishwasher Upper Rack System
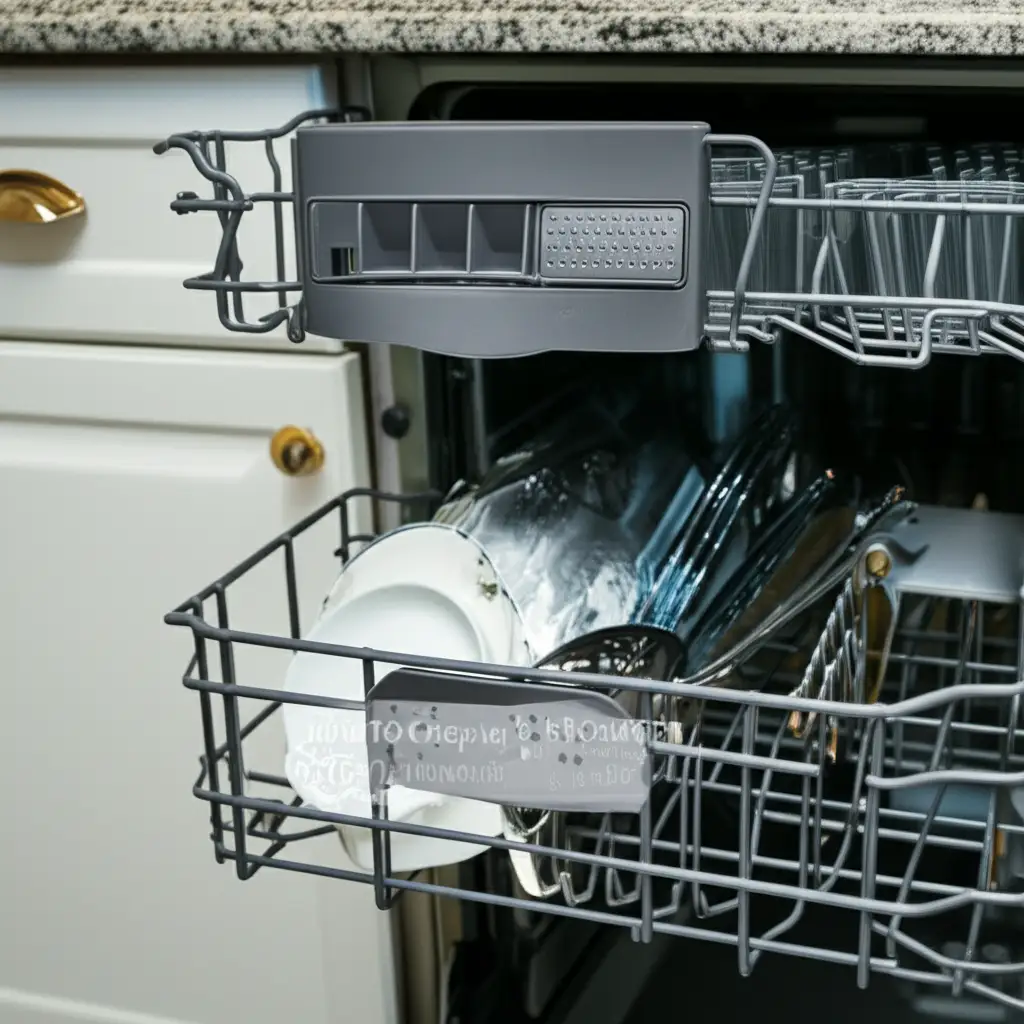
Your KitchenAid dishwasher upper rack is a key component. It holds your glasses and smaller dishes. The rack needs to move smoothly. It also needs to stay at the right height. This ensures proper cleaning.
The upper rack system includes several parts. You have wheels or rollers. These help the rack slide in and out. There are also adjuster mechanisms. These allow you to change the rack’s height. Side rails support the rack’s movement. Small clips or stops keep the rack from pulling out too far. Understanding these parts helps you identify the problem. A common problem is when the rack does not slide smoothly. Another issue is when it sags on one side.
KitchenAid dishwashers are known for good design. Still, parts can wear out over time. Heavy use or overloading the rack can cause damage. Sometimes, a part simply breaks. Knowing what each part does makes repairs easier. I find that most issues are with the rollers or the height adjusters. You can often find replacement parts specific to your KitchenAid model.
I check my own dishwasher’s rack system regularly. I look for cracks in the plastic. I also check for rust on metal parts. These early checks can prevent bigger problems. A smooth-gliding rack means your dishes will get clean. It also prevents broken items during loading or unloading.
Common Issues with KitchenAid Upper Racks and Their Causes
KitchenAid dishwasher upper racks can experience several common problems. Recognizing these issues helps you fix them quickly. The most frequent issues involve the rack’s movement or stability. You want your rack to move smoothly and stay level.
One common problem is broken or worn wheels. The small plastic wheels on the rack wear down. They can also snap off. This makes the rack jump or fall off its track. If your rack feels rough when you pull it out, check the wheels first. Sometimes, food debris gets stuck in the wheel axles, making them stiff.
Another issue involves the rack height adjusters. KitchenAid dishwashers often have a system to raise or lower the upper rack. This helps fit taller items on the bottom rack. These adjusters can break. If one side of your rack sags, the adjuster on that side is likely broken. This means the rack cannot sit level. It might interfere with the spray arm. A common sign is difficulty in adjusting the rack height.
Damaged rails or stops are also possible. The rails inside the dishwasher support the rack. If these rails bend or get damaged, the rack will not slide correctly. Plastic stops at the end of the rails prevent the rack from coming out entirely. If these stops break, the rack can fall out. This creates a safety hazard. Always check the full length of the rails for any damage.
Finally, rust or corrosion on metal parts can cause problems. While less common for the rack itself, rust on rollers or pins can hinder movement. This often happens in older dishwashers. Excessive moisture or certain detergents can worsen this. Identifying the exact problem part is the first step to a successful repair. You can find replacement parts by checking your KitchenAid dishwasher model number. For example, understanding what KitchenAid dishwasher model numbers mean helps you order correct parts.
Gathering Tools and Safety Precautions for Dishwasher Repair
Before you start any repair on your KitchenAid dishwasher, you need the right tools. You also must follow safety steps. Safety ensures you do not get hurt. It also protects your appliance. I always gather my tools first. This prevents interruptions during the repair.
First, disconnect power to the dishwasher. This is the most important safety step. You can turn off the circuit breaker that supplies power to the dishwasher. Look for the breaker in your home’s electrical panel. It is often labeled “Dishwasher” or “Kitchen.” Pulling the plug from the wall is also an option if accessible. Never work on a powered appliance. This prevents electric shock.
Next, gather your tools. Most KitchenAid upper rack repairs are simple. You usually need basic tools.
- Screwdriver set: Phillips head and flathead screwdrivers are often needed.
- Pliers: Needle-nose pliers can help with small clips or stubborn parts.
- Gloves: Protect your hands from sharp edges or old dirt.
- Small container: For holding screws or small parts so they do not get lost.
- Flashlight or headlamp: Helps you see inside dark areas of the dishwasher.
- Towel or rags: For cleaning up any spills or moisture.
You will also need the replacement parts. Make sure you have the correct parts for your KitchenAid model. You can find these parts online or at appliance parts stores. Ordering the right part ensures a good fit. Check the part number on the old component if possible. If you are ever working on general dishwasher issues, such as a leak, similar safety precautions apply. You can learn more about how to repair a leaking dishwasher for broader repair knowledge.
Always work in a well-lit area. Take your time. Do not force parts. If something feels stuck, check for hidden clips or screws. Following these preparation steps makes the repair process smooth and safe.
Step-by-Step Guide: Replacing Upper Rack Wheels and Rollers
Replacing upper rack wheels or rollers on your KitchenAid dishwasher is a common fix. This job is straightforward. It makes a big difference in how your rack moves. If your rack wobbles or gets stuck, new wheels are likely the answer. I will walk you through the process.
1. Prepare the Dishwasher:
- Disconnect power: Turn off the circuit breaker for your dishwasher. This is a critical safety step.
- Remove the upper rack: Gently pull the upper rack out. Some models have stops that prevent full removal. You might need to press small tabs on the rails to release it. Set the rack on a clean, flat surface.
2. Inspect and Locate Damaged Wheels:
- Examine each wheel on the rack. Look for cracks, missing pieces, or excessive wear.
- Note how the existing wheels are attached. They usually snap into place or slide onto a small axle.
- Sometimes, only one or two wheels are broken. It is a good idea to replace all of them if they are old. This ensures smooth movement for a longer time.
3. Remove Old Wheels:
- Snap-on wheels: Use a flathead screwdriver or your fingers to gently pry off the old wheel. Be careful not to break the plastic mounting post if you are only replacing the wheel itself.
- Axle-mounted wheels: Some wheels slide onto a small metal or plastic axle. You might need pliers to pull a retaining cap off the end of the axle. Then, slide the old wheel off.
- Dispose of the broken parts properly.
4. Install New Wheels:
- Snap-on wheels: Align the new wheel with the mounting post. Push firmly until it snaps into place. You should hear a click.
- Axle-mounted wheels: Slide the new wheel onto the axle. Push the retaining cap back onto the axle end. Make sure it is secure.
- Test each newly installed wheel. It should spin freely.
5. Reinstall the Upper Rack:
- Carefully slide the upper rack back into the dishwasher rails.
- Ensure it sits properly on both sides.
- Test the rack’s movement. It should glide smoothly without catching or wobbling.
- Reconnect power to the dishwasher.
- Run a short test cycle to ensure everything works correctly.
This repair often takes less than 30 minutes. It significantly improves your dishwasher’s function. Maintaining good rack movement prevents other issues. For example, a smooth rack helps ensure the spray arm is not obstructed. This helps with proper dish drying. If you are having issues like why your KitchenAid dishwasher is not drying, checking rack movement is a good step.
Fixing Upper Rack Adjuster Problems on KitchenAid Dishwashers
KitchenAid dishwashers often feature adjustable upper racks. This allows you to fit tall items like wine glasses or large platters. When the adjuster breaks, the rack sags. It might even hit the lower spray arm. Fixing this problem brings your rack back to level. I will guide you through this specific repair.
1. Diagnose the Adjuster Problem:
- First, pull the upper rack out completely.
- Inspect the adjusters on both sides of the rack. These are usually plastic mechanisms. They clip onto the side of the rack and ride on the rail.
- Look for cracks in the plastic, broken levers, or disconnected springs.
- Often, one side breaks, causing the rack to tilt.
2. Access the Adjuster Mechanism:
- The adjuster mechanism usually clips onto the rack. Sometimes, you might need to remove a decorative cap or side panel first.
- Use a flathead screwdriver to carefully pry open any clips. Be gentle with plastic parts. They can break easily.
- Take note of how the old adjuster is connected. This helps you install the new one correctly. Snap a photo with your phone if needed.
3. Remove the Damaged Adjuster:
- Once clips are released, gently pull the broken adjuster off the rack.
- Some adjusters have a small roller or wheel that remains on the rail. Make sure to remove all parts of the old adjuster.
- Check the rack itself for any damage where the adjuster was attached. The rack might have small mounting pegs. Ensure they are intact.
4. Install the New Adjuster:
- Align the new adjuster with the mounting points on the upper rack.
- Push firmly until it snaps into place. Make sure all clips engage.
- If your adjuster has a spring or lever, ensure it moves freely.
- Test the height adjustment feature. The new adjuster should click through its different height settings smoothly.
- Some KitchenAid models might have slightly different adjuster designs. Always refer to your specific model’s parts diagram if available. You can often find this with your dishwasher’s model number.
5. Reinstall and Test:
- Slide the upper rack back into the dishwasher.
- Ensure both sides of the rack are level.
- Test the height adjustment on both sides. It should move up and down easily.
- Run a short cycle to confirm the rack is stable and does not interfere with the spray arms.
This repair restores the functionality of your adjustable rack. It also prevents dishes from breaking. You can then continue to optimize your dishwasher use. For example, knowing can glasses go on bottom rack of dishwasher becomes more relevant when your upper rack is perfectly functional again.
Addressing Damaged Rails and Stops: A Repair Walkthrough
The upper rack slides on rails. These rails are fixed inside the dishwasher tub. Small plastic stops at the end of the rails prevent the rack from pulling out too far. If these rails bend or the stops break, the rack cannot slide smoothly. It might even fall out completely. This section covers fixing these rail and stop problems.
1. Inspect the Rails and Stops:
- First, pull the upper rack out as far as it can go. If possible, remove it completely.
- Examine the metal or plastic rails on both sides of the dishwasher tub. Look for bends, kinks, or cracks.
- Check the plastic stops at the very end of these rails. Are they broken or missing? Sometimes, these stops are small plastic clips. Other times, they are molded into the rail.
- If the entire rail is bent, you may need to replace the whole rail assembly. If only the plastic stop is broken, you might replace just that piece.
2. Removing Damaged Rails (if needed):
- Disconnect power: Turn off the circuit breaker for your dishwasher.
- Rails are usually held by screws or clips to the dishwasher tub.
- Use a screwdriver to remove any visible screws.
- Some rails might have plastic clips that secure them. Gently pry these open with a flathead screwdriver.
- Carefully pull the damaged rail away from the tub. Be mindful of any wiring or hoses nearby.
3. Replacing Broken Stops (if separate):
- If your stops are separate plastic pieces that clip onto the rail, remove the broken piece.
- Line up the new stop with the slot or hole on the rail.
- Push it firmly until it snaps into place. Ensure it is secure and cannot easily come off.
- Test the stop by trying to slide the rack past it. It should prevent the rack from over-extending.
4. Installing New Rails:
- Align the new rail with the mounting holes or clips inside the dishwasher tub.
- If there are screws, insert and tighten them. Do not overtighten, especially if screwing into plastic.
- If there are clips, press the rail firmly until the clips engage.
- Make sure the rail is level and securely attached to the tub. Wobbly rails will cause problems.
- Install the rail on both sides if you replaced both. Ensure they are at the same height.
5. Reinstall the Upper Rack and Test:
- Slide the upper rack back onto the newly installed or repaired rails.
- Test the rack’s full range of motion. It should slide smoothly without binding.
- The stops should prevent the rack from coming out too far.
- Reconnect power to the dishwasher.
- Run a short test cycle. Make sure the rack stays in place during washing.
Repairing rails and stops is crucial for safety. It also improves overall dishwasher function. It ensures your upper rack stays put. This helps prevent items from falling. It keeps your spray arms clear for efficient cleaning.
Deep Cleaning and Maintenance Tips for Your KitchenAid Dishwasher Rack
Repairing a broken part is only half the battle. Regular cleaning and maintenance prevent future issues. This is especially true for your KitchenAid dishwasher’s upper rack. Dirt, food particles, and hard water deposits can cause wear and tear. A clean rack system works better and lasts longer. I make sure to clean mine regularly.
1. Regular Wipe-Downs:
- After each wash cycle, quickly wipe down the rack.
- Pay attention to the wheels, rails, and adjusters.
- Use a damp cloth to remove any visible food debris or grease. This prevents buildup that can impede movement.
2. Deep Cleaning the Rack:
- At least once a month, remove the upper rack completely from the dishwasher.
- Wash the rack with warm, soapy water. Use a brush to get into crevices.
- Pay special attention to the wheel axles and adjuster mechanisms. Food particles can get trapped there.
- Rinse the rack thoroughly. Let it air dry before reinstalling. This prevents water spots and mold.
3. Cleaning the Rails and Rollers Inside the Tub:
- While the rack is out, wipe down the rails inside the dishwasher tub.
- Use a cloth dampened with a mild detergent solution.
- Check the tracks where the wheels run. Remove any gunk or buildup.
- You can also use a small brush or even an old toothbrush for hard-to-reach areas.
- Regular cleaning helps keep parts moving freely. It prevents wear caused by friction.
4. Checking for Signs of Wear:
- During cleaning, inspect all plastic parts for cracks or signs of fatigue.
- Check the wheels for flat spots or excessive wobble.
- Look at the adjuster levers to ensure they are not stiff or broken.
- Early detection of wear allows you to order replacement parts before they completely break.
5. Using Dishwasher Cleaner:
- Periodically, use a dedicated dishwasher cleaner. These products help remove grease, lime, and other deposits from the entire dishwasher.
- Follow the product instructions. This cleans spray arms, filters, and the tub. A clean dishwasher means cleaner racks and better function. For tips on general cleaning, you can refer to how often you should clean your dishwasher filter and how to use dishwasher cleaner.
By following these maintenance tips, your KitchenAid dishwasher upper rack will remain in good working condition. This prevents future repairs. It keeps your dishes clean and safe. This simple care extends the life of your appliance.
When to Call a Professional for Your KitchenAid Dishwasher
While many KitchenAid upper rack repairs are DIY-friendly, some situations call for professional help. Knowing when to step back saves you time and prevents further damage. I understand the desire to fix things yourself. But sometimes, a skilled technician is the best choice.
One reason to call a pro is if you cannot identify the problem. You have inspected the rack, wheels, and adjusters. But the rack still does not work right. A technician has specialized tools and experience. They can diagnose complex issues quickly. This saves you from guessing and potentially ordering wrong parts.
Another reason is if the repair seems too difficult. Some dishwasher models have unique designs. Accessing certain parts might require disassembling more of the dishwasher. If you are uncomfortable with the steps, or if the repair involves electrical components beyond simply unplugging, call a professional. Safety is always first. Messing with wiring without proper knowledge is dangerous.
If the repair involves major structural damage to the dishwasher tub or internal components, a pro is needed. For example, if the metal mounts for the rails are rusted through or bent, it is a bigger job. This type of damage may require welding or major component replacement. This is beyond typical DIY skills.
Also, consider calling a professional if your dishwasher is under warranty. Attempting a repair yourself might void the warranty. Check your KitchenAid warranty terms first. If the repair is covered, let the manufacturer’s authorized service do the work. It saves you money. You can check how long is the warranty on a KitchenAid dishwasher to see if you are still covered.
Finally, if you have tried a repair and it did not work, it is time for a professional. Sometimes, seemingly simple problems have underlying causes. A technician can spot these hidden issues. They can also ensure the repair is done correctly. This gives you peace of mind. Investing in a professional repair can prolong the life of your appliance. It is often cheaper than buying a whole new dishwasher.
Maintaining Optimal Dishwasher Performance Beyond the Rack
Ensuring your KitchenAid dishwasher’s upper rack works well is important. But maintaining its overall performance means looking at the whole system. A well-maintained dishwasher cleans dishes better. It also lasts longer. I always recommend these steps to keep your entire appliance running smoothly.
One key area is the dishwasher filter. Your dishwasher has a filter that catches food particles. If this filter gets clogged, water cannot drain properly. This leads to dirty dishes and bad smells. You should clean your dishwasher filter regularly. For specific guidance, you can refer to how often you should clean your dishwasher filter. I try to clean mine once a month. This keeps water flowing freely.
Another aspect is proper loading. How you load your dishwasher affects cleaning performance. Do not overload the racks. Overloading blocks water spray. It also puts stress on the racks themselves. Make sure larger items do not block the spray arms. For example, consider can glasses go on bottom rack of dishwasher to optimize space. Proper loading also helps prevent damage to dishes.
Using the correct detergent is vital. Dishwasher detergent is specially formulated for dishwashers. Using hand dish soap will create too many suds. This can cause leaks or damage. Always use automatic dishwasher detergent. Also, check if you need a rinse aid for better drying results. If you accidentally used the wrong soap, check what to do if you put Dawn in dishwasher for immediate steps.
Regular cleaning of the entire dishwasher interior prevents buildup. Food residue and hard water minerals can accumulate. This affects performance. Use a dishwasher cleaner or white vinegar to run an empty cycle. This removes grease and odors. Learning where to put vinegar in dishwasher to clean can be helpful here.
Finally, check for drainage issues. If your dishwasher is not draining, it could be a simple clog. Or it could be a pump problem. A fully draining dishwasher prevents standing water. This stops smells and mold growth. You can find out more about how to get the dishwasher to drain if you face this issue. Keeping all parts of your dishwasher in good shape ensures optimal cleaning every time.
Preventing Future Upper Rack Issues and Extending Dishwasher Life
Once you have repaired your KitchenAid dishwasher upper rack, you want to keep it working well. Prevention is always better than repair. Simple habits can extend the life of your rack and your entire dishwasher. I follow these tips myself. They keep my appliance running smoothly.
One important step is to avoid overloading the upper rack. The upper rack is designed for lighter items like glasses, cups, and small bowls. Putting heavy pots, pans, or too many plates on the upper rack stresses the wheels and adjusters. This can cause them to break prematurely. Always distribute the weight evenly. This protects the rack components from unnecessary strain.
Pre-scraping dishes helps a lot. Remove large food particles from plates before loading them. While dishwashers can handle some food, excessive debris can clog the filter. It also leaves residue on rack parts. This residue can lead to sticky wheels or gunk in the adjusters. A quick scrape into the trash is enough.
Regularly inspect the rack components. Make it a habit to quickly check the wheels, adjusters, and rails. Look for any signs of wear, cracks, or stiffness. Early detection means you can replace a worn part before it breaks completely. This prevents the rack from falling or jamming. I usually do this when I am emptying the dishwasher.
Clean the rack and its components often. Food and soap scum can build up on the wheels and inside the adjuster mechanisms. This buildup can make parts stiff or cause them to stick. Wipe down the rack, especially the moving parts, with a damp cloth. This prevents gunk from accumulating. Sometimes, using a small brush can help reach tight spots.
Be gentle when sliding the rack. Do not yank the upper rack in or out. Pull it smoothly and evenly. Forcing it can bend rails or break clips. If the rack feels stiff, check for obstructions or damaged wheels first. Do not just use more force. Gentle handling preserves the integrity of the rack system.
By adopting these simple maintenance practices, you will reduce the need for future repairs. Your KitchenAid dishwasher upper rack will last longer. Your dishes will get cleaner. This overall care keeps your home running efficiently.
FAQ Section
Q1: Why does my KitchenAid upper rack keep falling?
A: Your KitchenAid upper rack might keep falling due to broken wheels or a damaged height adjuster. Inspect all the wheels for cracks or flat spots. Check the adjuster mechanisms on both sides of the rack for any broken levers or disconnected parts. Replacing these specific components usually solves the problem.
Q2: Can I replace just the wheels on my KitchenAid upper rack?
A: Yes, you can replace just the wheels on your KitchenAid upper rack. This is a common and easy repair. Wheels are often sold as individual replacement parts or in small kits. You simply snap the old broken wheel off and snap the new one into place.
Q3: How do I adjust the height of my KitchenAid dishwasher upper rack?
A: KitchenAid dishwasher upper racks usually have adjusters on each side. These adjusters often involve a lever or button that you press to release the rack. Then you lift or lower it to the desired height. Ensure both sides are released and adjusted evenly for the rack to sit level.
Q4: What tools do I need to repair a KitchenAid dishwasher upper rack?
A: For most KitchenAid upper rack repairs, you will need basic tools. These include Phillips and flathead screwdrivers, possibly pliers for stubborn clips, and a small container for holding screws. Always remember to disconnect power to the dishwasher before starting any work.
Q5: How long does it take to fix a KitchenAid upper rack?
A: Most KitchenAid upper rack repairs, like replacing wheels or adjusters, take 15 to 30 minutes. This time includes preparing the dishwasher and installing the new parts. More complex issues or rail replacements might take slightly longer, but rarely more than an hour for a DIYer.
Q6: Is it worth repairing an old KitchenAid dishwasher rack?
A: Yes, repairing an old KitchenAid dishwasher rack is often worth it. Replacement parts like wheels, adjusters, and rails are usually inexpensive. The repair process is typically straightforward. This cost-effective solution extends the life of your dishwasher, saving you money compared to buying a new appliance.
Conclusion
Repairing your KitchenAid dishwasher upper rack is a task you can handle. We covered identifying common problems like broken wheels, faulty adjusters, and damaged rails. We walked through step-by-step repair guides. You learned to gather tools safely
- KitchenAid dishwasher repair
- upper rack repair
- DIY dishwasher fix
- appliance maintenance
- dishwasher parts

Elira Thomsen
Home Organization & DIY Living Expert
I'm Elira Thomsen, a lifelong enthusiast of clean, beautiful, and functional homes. With over a decade of hands-on experience in DIY home decor, smart cleaning solutions, and practical organization, I help everyday homeowners turn clutter into calm. Whether it's transforming a neglected nook into a cozy reading spot, mastering budget-friendly storage hacks, or refreshing a space with seasonal décor, I'm here to guide you every step of the way. My mission is simple — make home care easier, more inspiring, and truly rewarding.