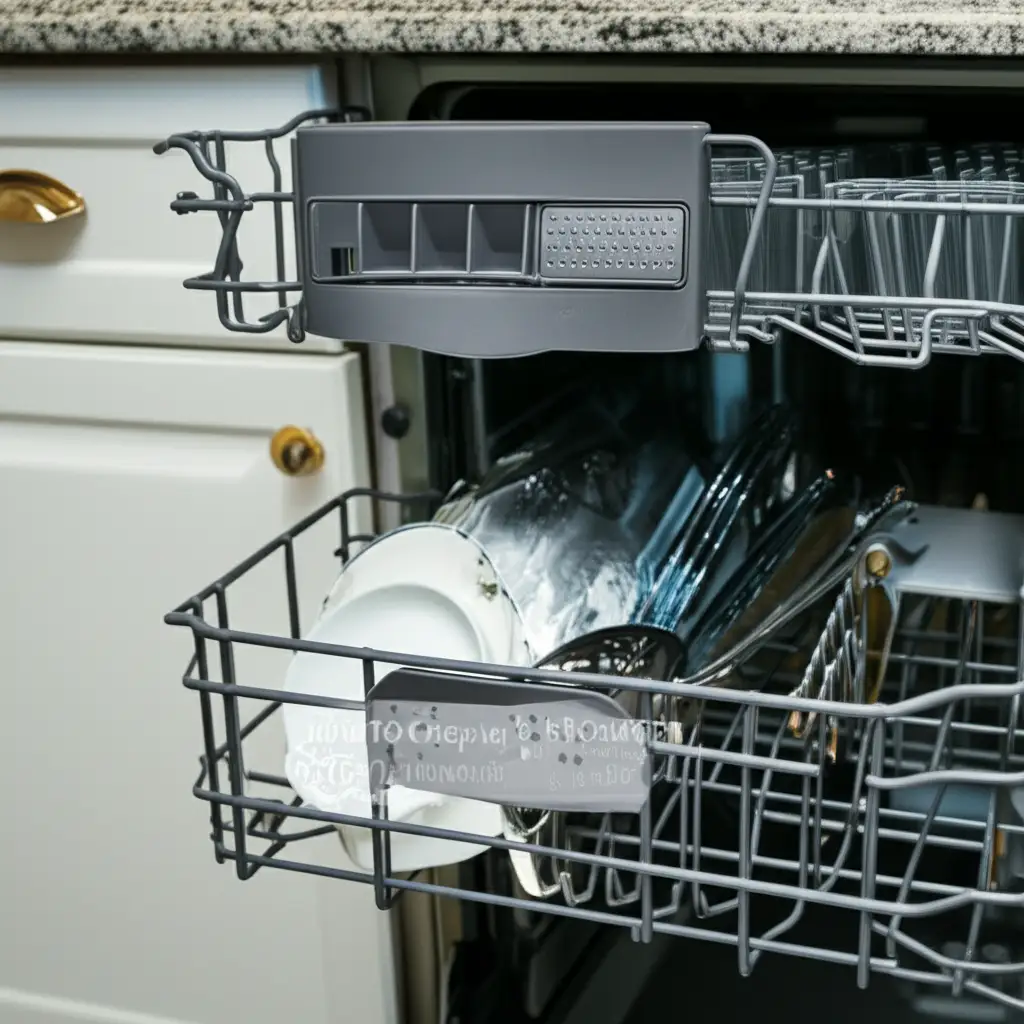
· Tessa Winslow · Appliance Repair · 24 min read
How To Remove Ge Dishwasher Flood Float
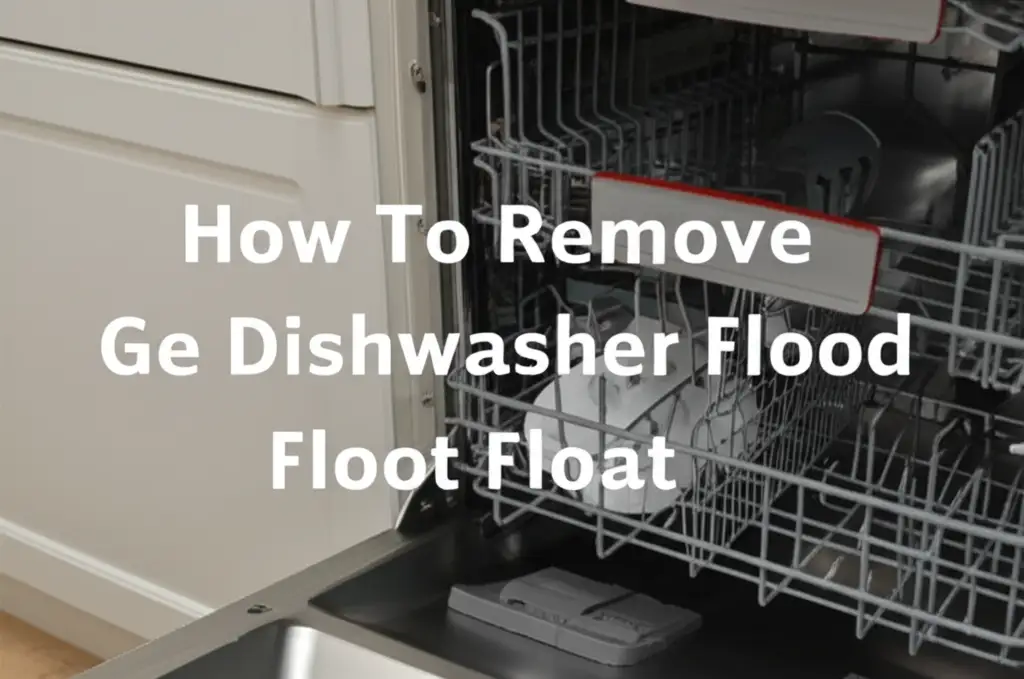
Troubleshoot Your GE Dishwasher: How to Remove the Flood Float
Have you ever walked into your kitchen and discovered a puddle of water around your GE dishwasher? It is a frustrating sight. Often, the cause of this mess relates to your GE dishwasher flood float. This small component prevents your appliance from overflowing. When it malfunctions, water spills onto your floor.
Understanding how your dishwasher works helps in fixing problems. The flood float acts as a safety sensor. It detects high water levels inside the tub. If water rises too much, the float triggers a switch, telling the dishwasher to stop filling. Sometimes, debris or wear makes this float stick. This article will guide you through the process. You will learn how to safely and effectively remove the GE dishwasher flood float. We cover essential tools, step-by-step instructions, and maintenance tips. Get ready to tackle this common dishwasher issue with confidence.
Takeaway
- Prioritize Safety: Always disconnect power and water before starting any repair.
- Locate the Float: Find the GE dishwasher flood float, usually at the bottom front of the tub.
- Clean and Inspect: Remove the float carefully. Clean it and its housing thoroughly.
- Test Functionality: After reassembly, run a test cycle to ensure proper operation.
- Prevent Future Issues: Regular cleaning prevents debris buildup around the float.
To remove a GE dishwasher flood float, first disconnect power and water. Open the dishwasher door and locate the float assembly, typically in the front-left corner of the tub bottom. Carefully twist or unclip the float and its housing. Clean any debris or buildup, then reassemble the parts, ensuring they move freely.
Understanding Your GE Dishwasher’s Flood Float System
Every GE dishwasher uses a flood float system. This system acts as a crucial safety device. It stops water from overfilling the dishwasher tub. The flood float itself is a lightweight plastic component. It sits in a small chamber at the bottom of your dishwasher. As water fills the tub, the float rises with the water level. When the water reaches a certain height, the float lifts an attached rod. This rod then activates a microswitch. The switch signals the control board. The control board then stops the water inlet valve. This action prevents an overflow.
The flood float works simply but plays a vital role. Without it, a malfunctioning water inlet valve could cause major flooding. If the float gets stuck in the “up” position, your dishwasher might not fill with enough water. This leads to poor cleaning performance. If it sticks in the “down” position when water levels are high, the dishwasher could overflow. Knowing where this part is and how it functions helps with troubleshooting. We can identify if a flood float is the actual source of your dishwasher’s problem. Regular checks on this system can save you from messy situations. You will often find the float near the front corners of the dishwasher tub. It is easily visible when you open the door and remove the lower rack.
How the Flood Float Prevents Overflows
The float works with the float switch. When water levels are normal, the float rests low. The float switch remains open. This allows water to enter. As water rises, the float lifts. It pushes up against a lever. This lever closes the float switch. Closing the switch sends a signal. The signal tells the water valve to shut off. This stops water flow. If the float cannot move freely, it might fail to activate the switch. Debris often causes this. Food particles or mineral deposits can bind the float. This prevents it from rising. This can also prevent it from falling back down. A stuck float causes many problems. It leads to too much water or not enough water.
Sometimes, the float switch itself fails. The float might move correctly, but the switch does not register the movement. This requires testing the switch. You can use a multimeter for this. Most times, cleaning the float and its housing solves the issue. This is why learning how to remove and clean your GE dishwasher flood float is a good first step. It addresses common problems. You avoid larger repairs by fixing small issues. Ensuring the float moves freely is key.
Signs Your GE Dishwasher Flood Float Needs Attention
Recognizing the signs of a faulty GE dishwasher flood float can save you time and money. Your dishwasher will often show clear symptoms when this part acts up. One of the most obvious signs is water leaking from the bottom of the dishwasher. If water overflows the tub and spills onto your kitchen floor, the float system may be at fault. This means the float did not rise to trigger the shut-off, or the switch failed. You might see puddles during the fill cycle. This indicates water entering the tub without proper control.
Another common symptom is your dishwasher not filling with enough water. Alternatively, it might not fill with any water at all. If the float is stuck in the “up” position, it tricks the dishwasher into thinking the tub is already full. The control board will then prevent the water inlet valve from opening fully or at all. This results in poor cleaning performance because dishes do not get the necessary water for washing. You might notice dishes are still dirty after a cycle. A partially filled tub cannot wash effectively. These signs point directly to a problem with your GE dishwasher flood float. Addressing these issues early prevents further complications or more costly repairs.
Common Symptoms of a Malfunctioning Flood Float
- Dishwasher Overflows: Water spills out onto the floor. This happens because the float does not rise to shut off the water. The float might be stuck down. Or, the switch it activates has failed. Check for puddles near the front.
- Dishwasher Not Filling: The tub remains dry or has very little water. This occurs if the float is stuck in the “up” position. The dishwasher believes it is already full. It will not allow more water in.
- Continuous Filling: The dishwasher keeps filling with water even after the cycle should have stopped. This is similar to an overflow. The float is not stopping the water flow.
- Dishwasher Stops Mid-Cycle: Sometimes, if the float moves erratically, it can interrupt the cycle. This might be due to the float intermittently activating the switch.
- Error Codes: Some modern GE dishwashers display specific error codes. These codes relate to water level issues or overflow. Consult your owner’s manual for specific code meanings. These codes often point to the flood float or related components. For general troubleshooting on water issues, you might find useful information on how to get the dishwasher to drain. This can help with initial overflow diagnosis before tackling the float.
If you observe any of these problems, inspect your GE dishwasher flood float. Cleaning or replacing this part often resolves these issues. Ignore these signs, and you risk water damage to your kitchen floor and cabinets. This simple check can prevent larger headaches.
Safety First: Preparing for GE Dishwasher Flood Float Removal
Before you begin any work on your GE dishwasher, safety must be your top priority. Working with electrical appliances and water carries inherent risks. Ignoring safety steps can lead to electric shock, injury, or further damage to your appliance. Always assume that power is present until you have positively disconnected it. This applies even if the dishwasher appears to be off. Water lines also carry pressure. They can spray water if not shut off correctly.
Taking proper precautions ensures a smooth and safe repair process. Do not rush through these initial steps. They are essential. Gather all your tools before you start. This prevents mid-task searching and allows you to focus on the repair. Having a clear workspace also reduces the chance of accidents. Remember, safety first saves lives and prevents costly mistakes.
Essential Safety Steps Before You Start
- Disconnect Power: This is the most critical step. Locate your home’s circuit breaker box. Find the breaker labeled for your kitchen or dishwasher. Flip the breaker to the “OFF” position. If labels are unclear, turn off the main breaker for the entire house. Confirm power is off by trying to turn on the dishwasher. You can also test an outlet nearby with a lamp or voltage tester.
- Turn Off Water Supply: Find the hot water supply valve to your dishwasher. It is usually under the kitchen sink, near the dishwasher. Turn the handle clockwise until it is completely off. If you cannot find a dedicated valve, you might need to turn off the main water supply to your house. This prevents water from entering the dishwasher during the repair.
- Clear the Area: Remove all dishes, racks, and any standing water from inside the dishwasher tub. Use towels to soak up excess water. Place old towels or newspapers on the floor around the dishwasher. This protects your flooring from any remaining drips.
- Wear Protective Gear: Consider wearing work gloves. They protect your hands from sharp edges inside the dishwasher. Eye protection is also wise, especially if you expect splashing or debris.
- Allow Cooling (if recently run): If your dishwasher just completed a hot cycle, let it cool down. Hot water and components can cause burns. Give it at least 30 minutes to cool.
Following these steps prepares you for a safe and effective repair. They minimize risks associated with appliance maintenance. Once these precautions are in place, you are ready to gather your tools and begin the removal process.
Tools You Will Need to Remove a GE Dishwasher Flood Float
Having the right tools makes any repair job easier and safer. When working on your GE dishwasher flood float, a few basic household tools will be necessary. You do not need highly specialized equipment for this task. Using the correct tools prevents damage to the dishwasher components. It also speeds up the process. Before you start, gather everything in one place. This saves time and frustration during the repair.
Most of these tools are common items found in a typical homeowner’s toolbox. If you do not have a specific tool, consider borrowing one or making a quick trip to a hardware store. Investing in basic hand tools is always a good idea for home maintenance. Remember, a well-prepared repair is a successful repair.
List of Required Tools
- Phillips Head Screwdriver: This is essential for removing screws. You might need it for inner panels or the float assembly itself. Many dishwasher components use Phillips head screws.
- Flathead Screwdriver: A flathead screwdriver can assist with prying. It helps lift tabs or gently separate plastic parts. Choose one with a medium-sized tip.
- Pliers (Needle-Nose or Slip-Joint): Pliers are useful for gripping small parts. They help to manipulate stubborn clips or wires. Needle-nose pliers are great for tight spaces. Slip-joint pliers offer more grip for larger components.
- Towels or Rags: Keep several clean towels or rags on hand. You will use them to absorb any remaining water inside the dishwasher. They also protect your floor.
- Bucket or Shallow Pan: A small bucket or pan is helpful. You can place it under the dishwasher if you expect residual water. This prevents water from spreading.
- Work Light or Headlamp (Optional but Recommended): Dishwashers are often located in dimly lit areas under counters. A work light improves visibility. It helps you see small components clearly.
- Multi-meter (Optional for Testing): If you suspect the flood float switch is faulty, a multi-meter allows you to test its continuity. This confirms if the switch sends an electrical signal when activated. This is not needed for simple removal and cleaning.
Having these tools ready ensures you can proceed efficiently. They help you complete the GE dishwasher flood float removal without interruptions.
Step-by-Step Guide: How to Remove Your GE Dishwasher Flood Float
Removing your GE dishwasher flood float is a straightforward process. However, it requires care and precision. Follow these steps carefully to avoid damaging your appliance. Remember, you have already completed the crucial safety steps. Power is off, and water is off. Your workspace is clear. Now, let us begin the actual removal. Take your time with each step. Refer to your GE dishwasher’s user manual if you need specific diagrams for your model. While we focus on removing the flood float, regular maintenance helps prevent such issues. Learning how often should you clean your dishwasher filter can improve overall dishwasher health and prevent many common problems. This general cleaning also reduces debris that might affect the flood float.
Detailed Removal Process
Open the Dishwasher Door and Remove Lower Rack:
- Fully open your GE dishwasher door.
- Pull out the lower dish rack completely.
- Set the rack aside on a clean, safe surface. This provides clear access to the bottom of the tub.
Locate the Flood Float Assembly:
- Look at the bottom of the dishwasher tub.
- The flood float is typically in one of the front corners, usually the front-left.
- It appears as a small, mushroom-shaped plastic component. It often has a circular base. It sits within a housing. You can usually see the float itself.
Access the Float Housing:
- The flood float assembly is often secured with clips or a twist mechanism.
- Some GE models may require you to gently pry up a plastic cover or unscrew a small panel. Use your flathead screwdriver for gentle prying if needed. Avoid excessive force to prevent breakage.
- You might need to reach underneath the float assembly to disconnect any electrical wires. These wires connect to the flood float switch.
Disconnect the Flood Float Switch Wires (If Applicable):
- Many flood floats have a small electrical switch attached underneath.
- Locate the wires connected to this switch.
- Gently pull the wire connectors off the terminals. They usually slide off. Make a note or take a picture of their connection for reassembly. This is crucial for proper reinstallation.
Remove the Flood Float and Housing:
- The flood float typically twists counter-clockwise to unlock from its base. It might also have small tabs you need to depress.
- Once unlocked, carefully lift the flood float and its housing out of the tub.
- Some models might require you to push the float down from the top to release it from the underside.
- Be gentle. Do not force anything. Plastic components can break easily.
Inspect and Clean the Components:
- Examine the removed flood float and its housing.
- Look for any trapped food particles, mineral deposits, or other debris. These often cause the float to stick.
- Clean all components thoroughly with warm, soapy water. Use a small brush, like an old toothbrush, to scrub away grime. Ensure the float moves freely within its housing.
- Inspect the float for cracks or damage. Check the float switch for visible damage. If any part is broken, it may need replacement.
Reassemble the Flood Float:
- Once clean and dry, reinsert the float into its housing.
- Align the housing with the opening in the dishwasher tub.
- Twist clockwise or push down until it locks securely into place. It should sit flush with the tub floor.
- Reconnect the electrical wires to the flood float switch terminals. Ensure they are secure. Pay attention to the correct wire placement if you took a picture earlier.
By following these steps, you will successfully remove, clean, and reassemble your GE dishwasher flood float. This often resolves overflow or water-filling issues.
Troubleshooting After Flood Float Removal and Replacement
After you have removed, cleaned, and reinstalled your GE dishwasher flood float, the work is not quite done. It is important to test the dishwasher to ensure the repair was successful. This troubleshooting step confirms that the float now functions correctly. It also helps identify any remaining issues. Sometimes, the problem was not just a stuck float. It could have been a faulty switch or another component. This final check helps you confirm the fix.
A successful repair means your dishwasher fills and drains properly. It should complete a wash cycle without any leaks or error codes. Be patient during this testing phase. Observe the dishwasher’s behavior closely. A clean and properly moving flood float is crucial for your GE dishwasher’s performance.
Steps for Testing and Further Troubleshooting
Restore Power and Water:
- Go back to your circuit breaker box.
- Flip the dishwasher’s breaker back to the “ON” position.
- Return to the water supply valve under the sink.
- Slowly turn the water supply valve clockwise until it is fully open. Check for any immediate leaks around the water inlet hose.
Run a Test Cycle:
- Close the dishwasher door.
- Select a short, simple wash cycle, like “Rinse Only” or “Light Wash.”
- Start the cycle.
- Do not add any dishes or detergent for this initial test. This makes it easier to observe water levels.
Observe Dishwasher Behavior:
- During Fill: Watch the dishwasher carefully as it fills. The water level should rise appropriately. The flood float should lift as the water rises. The water should stop filling once it reaches the correct level. If water overflows, immediately turn off the power and water. This indicates the float or switch is still not working. If it does not fill at all, the float might be stuck in the “up” position, or the switch is faulty.
- Throughout Cycle: Listen for unusual noises. Check for leaks around the door seal and underneath the appliance.
- At Cycle End: Ensure the dishwasher completes the cycle and drains properly. If your dishwasher has problems draining, you might need to investigate how to get the dishwasher to drain. This could be a separate issue or related to the flood float’s influence on water management.
If the Problem Persists:
- Re-check Connections: Turn off power and water again. Re-examine the flood float and switch connections. Ensure all wires are secure. Make sure the float is seated correctly and moves freely.
- Test the Flood Float Switch: If you have a multi-meter, test the continuity of the flood float switch. With the float in the “down” position, there should be no continuity (open circuit). When you manually push the float “up,” the switch should show continuity (closed circuit). If it does not, the switch is likely faulty and needs replacement.
- Inspect Water Inlet Valve: If the dishwasher continuously fills or overflows even after verifying the flood float and switch, the water inlet valve might be stuck open. This is a common part to fail after the float.
- Check for Clogs: A slow drain or overflow could also be due to a clogged filter or drain hose. Learning how to clean filter in old GE dishwasher can resolve drainage issues not directly related to the float.
- Consider Professional Help: If you have completed these steps and the issue remains, it may be time to call a qualified appliance technician. Some problems require specialized diagnostic tools or more complex repairs.
By systematically testing and troubleshooting, you can confirm your GE dishwasher flood float repair. This ensures your dishwasher operates safely and efficiently.
Preventative Maintenance for Your GE Dishwasher Flood Float System
Regular maintenance extends the life of your GE dishwasher. It also prevents common issues like a malfunctioning flood float. Proactive care saves you from unexpected leaks and expensive repairs. While removing and cleaning the flood float solves an immediate problem, preventing it from happening again is even better. Your dishwasher works hard. It processes food particles, grease, and minerals. These elements can build up over time. This buildup directly affects the flood float’s ability to move freely.
Simple routine habits make a big difference. They keep your dishwasher running smoothly. Think of it like taking care of your car. Regular oil changes prevent engine problems. Similarly, consistent cleaning prevents dishwasher issues. Incorporating these tips into your kitchen routine will keep your GE dishwasher’s flood float system in top condition. You will avoid the frustration of future leaks and poor wash performance.
Key Maintenance Tips
Regular Filter Cleaning:
- Your dishwasher has a filter system. This filter catches food debris.
- A dirty filter causes water to drain slowly. It can also cause food particles to recirculate. These particles settle at the bottom of the tub. They can accumulate around the flood float.
- Locate your GE dishwasher filter. Clean it regularly, at least once a month. Some dishwashers have a removable cylindrical filter. Other models have a flat filter screen. Refer to your manual for its exact location and cleaning instructions. Knowing where is the GE dishwasher filter located helps you start this task easily.
- Rinse the filter under running water. Use a brush to scrub away stubborn residue.
Scrape Dishes Before Loading:
- Remove large food scraps from plates before placing them in the dishwasher.
- You do not need to pre-rinse perfectly, but scraping off excess food prevents it from entering the drain system. This reduces the amount of debris that can reach and jam the flood float.
Run Hot Water Before Starting:
- Before starting a dishwasher cycle, run the hot water at your kitchen sink for a minute.
- This brings hot water to the dishwasher’s inlet. Hot water is more effective at dissolving grease and preventing mineral buildup. It also helps the detergent activate better.
Use a Dishwasher Cleaner Monthly:
- Purchase a specialized dishwasher cleaner. These products help break down grease, soap scum, and mineral deposits.
- Use them monthly or quarterly. Follow the product instructions.
- Many cleaners are run on an empty cycle. This helps clean the internal components, including the float and spray arms.
- Alternatively, you can use white vinegar. Place a cup of white vinegar in an open, top-rack safe bowl. Run an empty hot cycle. This helps remove mineral deposits and eliminates odors. If you are looking for tips on using vinegar, you can find more information on where to put vinegar in dishwasher to clean. This is a natural and effective cleaning solution.
Inspect the Flood Float Annually:
- Even if your dishwasher works well, perform an annual inspection of the flood float.
- Follow the removal steps outlined earlier. Clean the float and its housing thoroughly.
- Check for any signs of wear or damage. This proactive check can catch issues before they cause problems.
By following these preventative maintenance steps, you significantly reduce the likelihood of a GE dishwasher flood float malfunction. This ensures your appliance continues to operate efficiently and reliably, keeping your kitchen dry and your dishes clean.
Troubleshooting Common GE Dishwasher Issues Beyond the Flood Float
While a malfunctioning GE dishwasher flood float is a common problem, other issues can arise. Sometimes, a leak or poor wash performance stems from a different component. Understanding these other potential culprits helps you diagnose problems effectively. It ensures you address the root cause, not just a symptom. A holistic approach to troubleshooting saves you time and frustration. It prevents you from repeatedly fixing the wrong part.
Many dishwasher issues share similar symptoms. For example, a dishwasher not filling with water could relate to the flood float, but it could also involve the water inlet valve or even a clogged screen. Likewise, drainage issues might involve the drain pump or hose, not just the flood float’s indirect impact. Let us explore some other frequent GE dishwasher problems and their solutions.
Other GE Dishwasher Problems and Solutions
Dishwasher Not Draining:
- Cause: This is a common complaint. It can be due to a clogged drain hose, a malfunctioning drain pump, or a blocked air gap (if installed). Food debris often accumulates in these areas.
- Solution: First, check the filter for clogs, as mentioned earlier. Then, inspect the drain hose for kinks or blockages. You might need to disconnect and clear it. If the problem persists, the drain pump might need testing or replacement. Sometimes, food particles can accumulate in the drain hose. For detailed steps, refer to resources on how to get the dishwasher to drain.
Dishwasher Not Cleaning Dishes Properly:
- Cause: Several factors can lead to poor cleaning. These include clogged spray arms, using too little or too much detergent, hard water issues, or a malfunctioning wash pump. A stuck float causing low water levels also impacts cleaning.
- Solution: Check the spray arms for clogged holes. Clean them with a small pick or toothpick. Ensure you use the correct type and amount of detergent. Use a rinse aid if you have hard water. Regularly cleaning the filter also improves wash quality. If your dishwasher smells bad, it also means it is not cleaning well. For tips on odors, you might want to learn why does my GE dishwasher smell, as a bad smell often indicates cleaning issues.
Dishwasher Leaking from Door:
- Cause: If water leaks from the door, the door gasket (seal) is often the problem. It could be dirty, cracked, or worn out. Improper loading of dishes can also cause splashing that leads to leaks.
- Solution: Clean the door gasket thoroughly with a damp cloth. Remove any food debris or grime. Inspect the gasket for cracks or tears. If damaged, it needs replacement. Ensure dishes are loaded correctly and do not block the spray arms or detergent dispenser.
Dishwasher Not Starting:
- Cause: If your GE dishwasher does not start, check the power supply first. The door latch might be faulty. The control panel or fuse could also be at fault.
- Solution: Ensure the dishwasher is plugged in and the circuit breaker is on. Test the door latch by opening and closing it firmly. The latch needs to engage fully for the dishwasher to start. If these simple checks do not work, it might require a technician.
Dishwasher Making Loud Noises:
- Cause: Unusual noises often indicate a problem with the wash motor, drain pump, or circulation pump. Sometimes, foreign objects fall into the pump area.
- Solution: Inspect the bottom of the tub for any foreign objects like broken glass or small plastic items. If the noise persists, it usually points to a failing motor or pump bearing, requiring professional service.
Addressing these issues requires a systematic approach. Start with the simplest checks and move to more complex diagnostics. By understanding these common GE dishwasher problems, you equip yourself to handle more than just the flood float.
FAQ Section
What is the purpose of a GE dishwasher flood float?
The GE dishwasher flood float acts as a crucial safety sensor. It detects high water levels inside the dishwasher tub. When water reaches an excessive height, the float rises. This rising movement activates a switch, which signals the control board. The control board then stops the water inlet valve, preventing the dishwasher from overfilling and potentially leaking onto the floor.
How do I know if my GE dishwasher flood float is stuck?
You can identify a stuck GE dishwasher flood float through specific symptoms. If your dishwasher consistently overflows and leaks water, the float might be stuck in the “down” position. It is failing to activate the shut-off switch. Conversely, if your dishwasher does not fill with enough water or fills very slowly, the float might be stuck in the “up” position, falsely indicating the tub is full.
Can I clean the GE dishwasher flood float myself?
Yes, you can clean the GE dishwasher flood float yourself. It is a common DIY repair. First, disconnect power and water to the appliance for safety. Locate the float at the bottom of the tub. Carefully remove it by twisting or unclipping its housing. Clean off any food debris, grease, or mineral deposits using warm, soapy water and a small brush. Reassemble and test.
What tools are needed to remove a GE dishwasher flood float?
To remove a GE dishwasher flood float, you will primarily need basic hand tools. A Phillips head screwdriver helps with screws, while a flathead screwdriver can assist with gentle prying. Pliers, such as needle-nose or slip-joint, are useful for gripping small components or wires. You will also need towels or rags to manage any residual water in the tub.
What causes a dishwasher flood float to fail?
A dishwasher flood float typically fails due to debris buildup. Food particles, grease, and mineral deposits accumulate around the float and its housing. This prevents the float from moving freely up and down. Over time, the plastic float or its associated switch can also wear out or crack, leading to malfunction. Regular cleaning helps prevent these issues.
How often should I check my GE dishwasher flood float?
It is a good practice to inspect your GE dishwasher flood float annually as part of your general appliance maintenance. While you may not need to remove and clean it every time, check its movement. If you notice any of the aforementioned symptoms of a stuck float, then immediate inspection and cleaning are necessary. Regular cleaning of the dishwasher filter also indirectly helps the float.
Conclusion
Understanding how to remove your GE dishwasher flood float empowers you. It allows you to tackle common appliance issues with confidence. This small, yet critical, component plays a vital role in preventing kitchen floods. A stuck or malfunctioning GE dishwasher flood float causes frustrating leaks or poor
- GE Dishwasher
- Flood Float
- Dishwasher Repair
- Appliance Maintenance
- Troubleshooting

Tessa Winslow
Cleaning Expert
With years of hands-on experience in home care and a love for transforming everyday spaces, I specialize in making cleaning feel approachable and even enjoyable. I share smart, sustainable solutions that blend cleaning, organization, and decor—so your home not only looks good, but feels good too. Whether you're tackling weekend chores or taking on a full DIY refresh, I’m here to help you create a cleaner, cozier space you’ll love coming home to.