· Elira Thomsen · Appliance Repair · 17 min read
How To Remove Middle Part Of Washing Machine
Safely Remove Your Washing Machine’s Middle Part
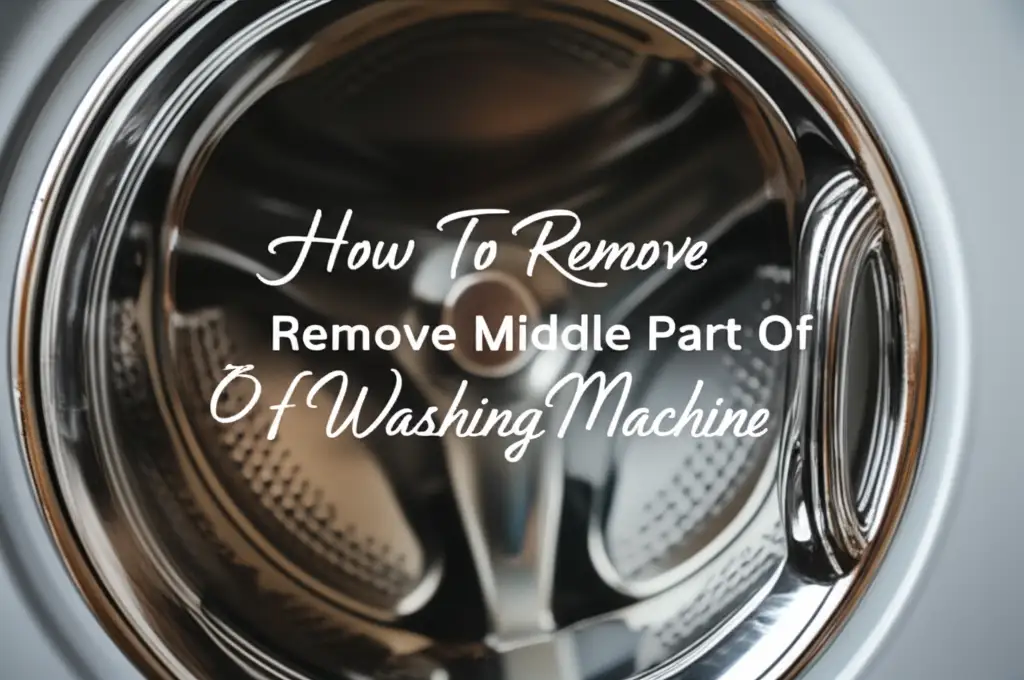
Have you ever wondered what mysteries hide beneath the central pillar of your washing machine? That “middle part” in your washing machine often collects lint, forgotten socks, or even acts as a silent witness to detergent build-up. Learning how to remove the middle part of a washing machine can feel like a big step. However, it is a simple process once you understand the steps.
This guide helps you access those hidden areas for a thorough cleaning or basic repairs. We will walk you through the necessary tools, safety steps, and specific instructions for both traditional agitators and modern impellers. Prepare to give your washing machine the deep clean it deserves. This helps it run better and last longer.
Takeaway
Removing the middle part of your washing machine requires careful attention to detail. Follow these key steps for a safe and effective job:
- Always disconnect power and water before starting any work.
- Gather all necessary tools beforehand, like wrenches and screwdrivers.
- Identify whether your washer has an agitator or an impeller.
- Follow the specific removal instructions for your washer type.
- Clean the parts thoroughly once removed.
- Reassemble everything correctly to ensure proper function.
Removing the middle part of a washing machine, usually the agitator or wash plate, involves disconnecting power and water first. You then access and unfasten the central bolt or locking mechanism holding it in place. Next, carefully lift the component straight out of the washer tub. This process helps you clean hidden areas or access parts for maintenance.
Understanding Your Washing Machine’s “Middle Part”
The “middle part” of a washing machine usually refers to the central component inside the tub. This part moves clothes around during a wash cycle. In most top-load washers, this component is either an agitator or an impeller. Both designs serve the same purpose: to create the necessary water action for cleaning clothes. However, their appearance and removal methods differ.
Knowing which type you have is the first step before you start any removal process. A traditional agitator is a tall, vertical post. It stands in the center of the wash tub. It twists back and forth to move clothes through the water. Impellers are different. They are low-profile cones or plates. They sit at the bottom of the wash tub. They create currents that rub clothes together for cleaning.
Agitators vs. Impellers: Know Your Washer Type
Distinguishing between an agitator and an impeller is simple. Look inside your top-load washing machine. If you see a large, tall column sticking up from the center, you have an agitator. Agitators are common in older or standard capacity top-load washing machines. They typically have fins or vanes around them.
If your washer has a flat, disc-like component at the bottom of the tub, you have an impeller. Impellers are found in high-efficiency (HE) top-load washers. These washers use less water and rely on the impeller’s rotation to clean clothes. They do not have a tall central post. This design allows for larger wash loads.
Why Removing the Middle Part Matters
You might wonder why you need to remove the middle part of your washing machine. There are several good reasons. Over time, lint, hair, and detergent residue can build up under the agitator or impeller. This build-up creates unpleasant odors. It also affects the machine’s cleaning performance. A thorough cleaning helps prevent these issues.
Sometimes, small items like socks, coins, or other debris can fall underneath this part. They can get stuck and cause noise or even damage. Removing the agitator or impeller lets you retrieve these items. It also provides access to other internal components. You might need this access for basic repairs or diagnostic checks. For example, you might need to check the drive block or transmission. Regular inspection and cleaning can extend the life of your appliance. It also helps maintain its efficiency.
Essential Tools and Safety Precautions Before You Start
Before you begin to remove the middle part of your washing machine, prepare yourself. Gathering the right tools is important. Taking necessary safety precautions is even more critical. Working with appliances that use electricity and water requires careful attention. Do not rush this preparation phase. It ensures your safety and the success of the task.
Start by clearing the area around your washing machine. You will need enough room to move and work comfortably. Make sure the lighting is good. This helps you see small parts and connections clearly. Having a clean, dry surface to place removed parts is also helpful. This prevents them from getting lost or damaged.
Gathering Your DIY Toolkit
You will need a few common household tools to remove the middle part of your washing machine. The exact tools depend on your specific washer model. However, a basic set covers most needs.
Here is a list of tools you will likely use:
- Flathead Screwdriver: Use this to pry open plastic caps or covers.
- Phillips Head Screwdriver: Needed for screws that might secure some parts.
- Socket Wrench Set: This is often the most important tool. You will use it to loosen the large bolt that holds the agitator or impeller. Make sure you have a set with various sizes. This ensures you find the correct size for your specific bolt.
- Pliers: These help with gripping small parts or stubborn nuts.
- Flashlight or Headlamp: This improves visibility inside the washer tub.
- Bucket and Towels: Keep these nearby to catch any residual water.
- Gloves: Protect your hands from grime and sharp edges.
Always ensure your tools are in good condition. Worn-out tools can slip and cause injury.
Prioritizing Your Safety: Electrical and Water Risks
Safety is the most important aspect of this job. Working with a washing machine involves both electrical and water risks. Ignoring these can lead to serious injury or damage to your home.
Follow these safety steps without fail:
- Disconnect Power: Unplug the washing machine from the electrical outlet. Do not just turn it off. Pull the plug completely. This prevents accidental startup. It removes any risk of electric shock.
- Turn Off Water Supply: Locate the hot and cold water supply valves behind the washing machine. Turn both valves off completely. This stops water from entering the machine during the process.
- Drain Remaining Water: If there is any water in the tub, try to drain it first. Run a short spin cycle if possible. Or, manually bail out the water with a cup and towel.
- Wear Protective Gear: Consider wearing work gloves to protect your hands from sharp edges or grime. Safety glasses are also a good idea to protect your eyes.
By following these safety guidelines, you create a safe working environment. This makes the entire removal process much smoother.
Step-by-Step Guide to Removing a Traditional Agitator
Removing a traditional agitator is a common task for top-load washing machine owners. This process allows for thorough cleaning of the tub and the agitator itself. It also lets you retrieve any items that have fallen underneath. Most agitators are held in place by a single central bolt. This section guides you through the process, step by step.
Remember, every washing machine model can be slightly different. Always refer to your appliance’s user manual if you encounter any difficulties or specific instructions not covered here. Following the correct procedure prevents damage to your machine.
Accessing the Agitator Cap
The first step is to gain access to the bolt that holds the agitator in place. This bolt is usually hidden under a plastic cap or fabric softener dispenser.
- Remove the Fabric Softener Dispenser: If your agitator has a fabric softener dispenser on top, remove it first. This dispenser often pulls straight up. Some models may require a slight twist. Empty any liquid inside before removal.
- Locate the Agitator Cap: Once the dispenser is off, you will see a plastic cap. This cap covers the central bolt. It might be flush with the agitator’s top or slightly raised.
- Pry Off the Cap: Use a flathead screwdriver or a putty knife to gently pry off this cap. Insert the tool into a seam or a small notch on the cap’s edge. Apply gentle, even pressure to lift it. Be careful not to scratch or break the plastic. The cap should pop off.
Once the cap is off, you will see the large central bolt. This bolt secures the agitator to the transmission shaft.
Loosening the Central Bolt
The central bolt is the main fastener holding the agitator. You need a socket wrench to loosen it. The size of the socket varies by washing machine brand and model. Common sizes range from 7/16 inch to 1/2 inch, or metric equivalents.
- Select the Right Socket Size: Test different socket sizes until you find one that fits snugly over the bolt head. A proper fit prevents stripping the bolt.
- Loosen the Bolt: Place the socket wrench onto the bolt. Turn the wrench counter-clockwise to loosen it. The bolt can be very tight, especially if it has been in place for a long time. You might need to apply significant force. A cheater bar or pipe over the wrench handle can provide extra leverage if needed.
- Remove the Bolt and Washer: Once loosened, continue turning the bolt until it comes free. There might be a washer underneath the bolt head. Remove this washer and keep it with the bolt. Place these small parts in a safe spot. This prevents them from getting lost.
With the bolt removed, the agitator is now free from its direct connection to the shaft.
Carefully Lifting the Agitator
Now that the bolt is out, you can remove the agitator from the tub. This step sometimes requires a bit of effort. The agitator might be stuck due to soap scum buildup or rust.
- Grasp the Agitator Firmly: Grip the agitator firmly with both hands. Place your hands on the base or the sturdy part of the agitator.
- Pull Upward with Wiggling Motion: Pull the agitator straight up. If it does not move, try a gentle wiggling or twisting motion while pulling upward. Do not use excessive force. Excessive force can damage the transmission shaft below.
- Use an Agitator Removal Tool (If Needed): For stubborn agitators, a specialized agitator removal tool might be helpful. This tool hooks under the agitator’s base and provides leverage for lifting. You can often rent or buy these tools from appliance parts stores.
- Remove and Inspect: Once the agitator is free, lift it out of the tub. Place it on a clean, flat surface. Inspect the bottom of the agitator and the washer tub for any trapped items or buildup. You will likely find a surprising amount of gunk. This is a good time to move on to cleaning. For detailed cleaning instructions, you can refer to our guide on how to clean washing machine agitator.
How to Remove an Impeller (Low-Profile Agitator Plate)
High-efficiency (HE) washing machines often use an impeller instead of a traditional agitator. An impeller is a low-profile wash plate. It sits at the bottom of the washer tub. These machines use less water and rely on the impeller’s movement to scrub clothes clean. Removing an impeller is different from removing an agitator. However, it is equally straightforward with the right approach.
Impellers can also accumulate grime and hidden items underneath. This makes their removal important for deep cleaning and maintenance. The design of an impeller means it has different securing mechanisms. This section explains how to remove this type of “middle part.”
Locating the Impeller Access Point
The impeller is typically a large, flat disc at the bottom of your washer tub. Its securing mechanism is usually in the very center of this disc.
- Identify the Center Cap or Cover: Look for a small plastic cap or a decorative cover in the center of the impeller. This cap often hides the bolt or screw that holds the impeller in place.
- Remove Any Softener Dispensers: Some impeller designs might have a small fabric softener dispenser integrated into this central cap. If so, remove it first. It typically lifts straight up.
- Gently Pry Up the Center Cap: Use a small flathead screwdriver or a putty knife. Insert it carefully into the seam around the cap. Apply gentle, even pressure to pry it up. Work slowly to avoid damaging the plastic. The cap should pop off revealing the securing hardware.
Underneath this cap, you will find either a central bolt or a series of clips. These hold the impeller to the wash tub’s drive shaft.
Detaching the Impeller Securing Mechanism
The method to detach the impeller depends on how it is secured. Most impellers use a central bolt, similar to agitators. Some newer models might use plastic clips or a twist-lock design.
Option A: Central Bolt:
- Select the Right Socket Wrench: If you see a bolt, choose the correct size socket from your wrench set. The bolt size might be different from an agitator bolt.
- Loosen and Remove the Bolt: Place the socket wrench on the bolt. Turn it counter-clockwise to loosen it. Continue turning until the bolt comes out completely. Keep the bolt and any washers safe.
Option B: Plastic Clips or Twist-Lock:
- Locate Release Tabs: Some impellers have several small plastic tabs around their perimeter or underside. These tabs act as clips. You might need to press them inward or outward to release the impeller.
- Twist-Lock Mechanism: Other impellers might simply twist to lock and unlock. Look for arrows or indicators showing the direction for unlocking. You might need to apply firm pressure while twisting.
- Use Pliers if Necessary: For stubborn clips, long-nose pliers can help. Use them to gently squeeze or spread the tabs as required. Be very careful not to break the plastic clips.
Once the securing mechanism is disengaged, the impeller is ready for removal.
Lifting the Impeller
With the bolt removed or clips released, you can now lift the impeller.
- Grasp the Impeller Firmly: Get a good grip on the edges of the impeller. If there are handholds, use them.
- Lift Straight Up: Pull the impeller straight up from the wash tub. It should come off relatively easily if the securing mechanism is fully disengaged.
- Wiggle if Stuck: If the impeller feels stuck, gently wiggle it back and forth while pulling upward. Buildup of detergent or minerals can sometimes make it stick. Avoid strong twisting motions that could damage the drive shaft.
- Inspect for Debris: After removing the impeller, inspect the area underneath. You will likely find lint, hair, and maybe small forgotten items. This is the perfect time to clean this often-neglected area.
Removing the impeller opens up the bottom of your washing machine tub for deep cleaning. This prevents odors and improves machine performance.
Troubleshooting Common Removal Challenges
Even with clear instructions, removing the middle part of a washing machine can sometimes present challenges. Parts can become stuck due to years of use, mineral buildup, or corrosion. Do not get discouraged if your agitator or impeller does not come out easily. There are common solutions for these issues. Patience and the right approach are key.
Always remember safety first. Recheck that the power is off and water supply is disconnected before attempting any of these troubleshooting tips. For detailed information on cleaning your agitator after removal, you can consult our guide on how to clean washing machine agitator.
Dealing with a Stubborn Agitator
A common problem is an agitator that refuses to budge. This usually happens because soap scum or hard water deposits have cemented it to the drive shaft.
- Apply Lubricant: Spray a penetrating lubricant (like WD-40 or similar product) around the base of the agitator where it meets the shaft. Let it sit for 15-30 minutes. This helps dissolve or loosen any buildup.
- Pour Hot Water: For soap scum, carefully pour a kettle of hot (but not boiling) water around the base of the agitator. Let it soak for a few minutes. The heat can help soften and loosen the crud. Use caution with hot water to avoid burns.
- Gentle Wiggling and Lifting: After applying lubricant or hot water, try pulling and wiggling the agitator again. Try rocking it gently from side to side while pulling upward. This can break the seal.
- Use an Agitator Puller Tool: If manual pulling fails, an agitator puller tool is your best friend. This specialized tool hooks under the agitator’s bottom lip. It provides powerful leverage to lift it straight up. You can often rent these from appliance repair shops or tool rental centers. This tool reduces the risk of damage.
Do not hit the agitator with a hammer. This can damage the agitator, the shaft, or the transmission. Avoid excessive force.
Rust and Corrosion Issues
Rust can bond the central bolt or the agitator itself to the shaft. This makes removal very difficult.
- Use Rust Penetrant: If the central bolt is rusted, apply a generous amount of rust-penetrating oil directly onto the bolt head and threads. Let it soak for several hours, or even overnight. This gives the oil time to break down the rust.
- Tap the Bolt: After soaking, gently tap the bolt head with a hammer a few times. This can help the penetrant work deeper and break any rust bonds. Then, try to loosen the bolt again with your socket wrench.
- Heat Application (Caution!): For very stubborn rust, a heat gun or small torch can be used carefully to heat the bolt. The heat causes the metal to expand. This can break the rust bond. Use extreme caution if applying heat. Keep a fire extinguisher nearby. Do not overheat plastic components. This method is usually a last resort for professionals.
If the bolt head strips, you might need a bolt extractor kit. These kits help remove stripped or broken bolts.
When to Call a Professional
Sometimes, despite your best efforts, the middle part will not come out. Or, you might encounter unexpected damage. Knowing when to stop and call for professional help is important.
- Stripped Bolt: If the central bolt’s head becomes stripped, your socket wrench will not grip it anymore. Removing a stripped bolt often requires special tools and expertise.
- Excessive Force Needed: If you are applying extreme force and the part still does not move, stop. Continuing to force it can damage the washer’s transmission or tub. Repairing these can be costly.
- Unusual Damage: If you notice cracks, bent shafts, or other damage during the process, it is best to consult a professional. They can assess the extent of the damage. They can also advise on the best course of action.
- Lack of Confidence: If you feel uncomfortable or unsure at any point, do not hesitate to call a certified appliance technician. Your safety and the machine’s integrity are paramount.
Calling a professional saves you frustration and potential repair costs in the long run.
Cleaning and Maintenance After Removal
Once you successfully remove the middle part of your washing machine, you will likely see why this step is so important. The areas hidden beneath the agitator or impeller often harbor a surprising amount of gunk. This includes lint, hair, soap scum, and mineral deposits. These buildups can cause odors and reduce your washer’s efficiency. This is your chance to give your washing machine a thorough cleaning.
This deep cleaning not only makes your washer smell fresh but also helps it perform better. It also helps prevent future issues. Take your time with this part of the process. A clean machine lasts longer and cleans clothes more effectively.
Deep Cleaning the Agitator/Impeller
The agitator or impeller itself needs a good cleaning. It accumulates a lot of the same grime as the tub.
- Rinse Off Loose Debris: Start by rinsing the agitator or impeller under a faucet. Use warm water to wash away loose lint and hair.
- Scrub with a Brush and Detergent: Prepare a solution of warm water and a mild detergent. You can also use white vinegar or baking soda for extra cleaning power. Use a stiff brush or an old toothbrush to scrub all surfaces. Pay special attention to the underside, fins, and any crevices. These areas trap the most dirt.
- Remove Stubborn Buildup: For tough soap scum or mineral deposits, make a paste of baking soda and a little water. Apply it to the stubborn spots. Let it sit for 15-20 minutes. Then, scrub vigorously. A non-abrasive scrubber can also help.
- Rinse Thoroughly: Rinse the agitator or impeller completely with clean water. Make sure no detergent residue remains.
- Dry Completely: Allow the part to air dry fully before reinstallation. This prevents mold and mildew growth. For more detailed tips on cleaning this specific part, explore our comprehensive guide on how to clean washing machine agitator.


