· Tessa Winslow · Home Improvement · 18 min read
How To Cover Range Hood Duct
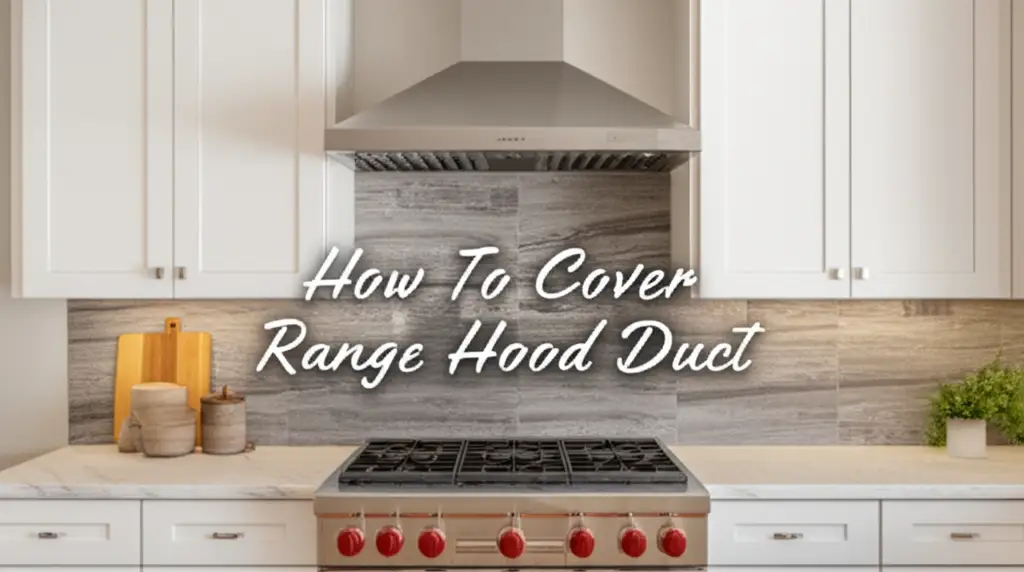
Concealing Your Range Hood Duct for a Stylish Kitchen
Have you ever looked at your kitchen and felt something was just…off? Often, the exposed range hood duct stands out like a sore thumb, disrupting your kitchen’s overall design. That ugly metal pipe, sometimes running across the wall or ceiling, breaks the smooth lines you want in a modern home. Many homeowners face this common challenge. We want our kitchens to be beautiful and functional. Hiding that ductwork can make a big difference in achieving a polished look.
This article will show you exactly how to cover range hood ducting, turning a functional necessity into a design asset. We will explore various options, from simple DIY solutions to more integrated professional approaches. You will learn about planning your project, choosing the right materials, and executing different covering methods. By the end, you will have the knowledge to transform your kitchen, making it both elegant and efficient.
Takeaway
- Plan Carefully: Measure your ductwork and surrounding space precisely before starting any project.
- Choose Wisely: Select a covering method that matches your kitchen’s style and your budget.
- Consider Accessibility: Ensure your chosen cover allows for future maintenance and cleaning.
- Safety First: Always follow proper safety procedures and building codes.
To cover a range hood duct, you can use several methods: build a custom wood enclosure, create a drywall box, install decorative metal sleeves, integrate it into new or existing cabinetry, or conceal it with faux beams. Each option aims to blend the ductwork seamlessly into your kitchen’s aesthetic.
Understanding Your Range Hood Duct and Why Cover It
Your range hood plays a vital role in keeping your kitchen air clean. It pulls smoke, steam, and cooking odors away from your living space. This exhausted air travels through a duct, usually a metal pipe, to the outside of your home. While essential for air quality, this exposed ductwork often creates an eyesore. It looks unfinished and industrial, clashing with the decor you have carefully chosen for your kitchen.
I have seen many kitchens where a well-designed space is marred by visible ducting. Covering this ductwork elevates your kitchen’s appearance, making it feel more intentional and complete. It also provides a cleaner surface, preventing dust and grease from accumulating directly on the duct. A hidden duct can even improve sound dampening, reducing noise from the ventilation system.
Types of Range Hood Ducts
Range hood ducts come in various shapes and sizes. Most are round or rectangular. Understanding your specific duct type helps you plan the best covering solution.
- Round Ducts: These are very common. They are flexible or rigid and typically made of aluminum. Covering a round duct often involves building a box or enclosure around it.
- Rectangular Ducts: Some range hoods use rectangular ductwork, especially those designed for a more flush installation. These can sometimes be easier to integrate into shallow enclosures.
- Ductless (Recirculating) Hoods: These hoods do not use external ducts. They filter air and recirculate it back into the kitchen. If you have a ductless hood, you do not need to worry about covering ductwork.
Benefits of Covering Ductwork
Covering your range hood duct offers several advantages beyond just aesthetics. It protects the duct, making it last longer. It also reduces noise and helps maintain cleanliness.
- Improved Aesthetics: This is the primary reason. A covered duct transforms an unsightly element into a seamless part of your kitchen’s design. It creates a polished and finished look.
- Easier Cleaning: Exposed ductwork can accumulate dust, grease, and grime, making it hard to clean. A smooth, enclosed surface is much simpler to wipe down. Before covering, consider giving the surrounding area a good clean. You might find our guide on how to clean a ceiling helpful for preparing your kitchen space.
- Protection for Ductwork: A cover protects the duct from accidental bumps and reduces wear and tear over time. This can extend the life of your ventilation system.
- Noise Reduction: An enclosure can help muffle the sound produced by the range hood fan, making your kitchen a quieter place.
- Potential for Added Features: A custom cover can sometimes incorporate shelves, lighting, or other decorative elements.
Pre-Planning Your Duct Cover Project
Before you grab any tools, careful planning is essential. A well-planned project saves time, money, and frustration. First, measure everything accurately. This includes the duct dimensions, the distance from the ceiling, and the wall space around the hood. Think about the style of your kitchen. Do you want the cover to blend in completely or become a decorative feature?
I always tell people to sketch out their ideas first. Visualizing the final product helps refine your plan. Consider any obstacles, like electrical wiring or plumbing lines. You might need professional help if your project involves moving these.
Assessing Your Space
Start with precise measurements. This step is critical for a successful outcome.
- Duct Dimensions: Measure the width, depth, and height of your exposed ductwork. Add at least 1-2 inches to each dimension to ensure sufficient clearance inside the cover.
- Wall and Ceiling Space: Measure the available wall space above and around your range hood. Note any uneven surfaces or existing fixtures.
- Obstructions: Check for electrical outlets, light fixtures, or other elements that might interfere with your cover design. You must ensure the cover does not block access to these.
- Kitchen Style: Look at your existing cabinetry, trim, and overall kitchen decor. Your duct cover should complement these elements.
Essential Tools and Materials
Having the right tools makes the job easier and safer. The materials you choose will depend on your desired aesthetic and budget.
- Measuring Tape: For accurate measurements.
- Level: To ensure your cover is straight and plumb.
- Stud Finder: To locate wall studs for secure mounting.
- Drill: For pre-drilling holes and driving screws.
- Saw: Depending on the material, you might need a miter saw, circular saw, or jigsaw.
- Screws and Anchors: To secure the cover to the wall and ceiling.
- Safety Gear: Gloves, safety glasses, and a dust mask are a must.
- Materials for the Cover:
- Wood: Plywood, MDF, or solid wood planks for custom enclosures.
- Drywall: For a seamless, painted finish.
- Sheet Metal: For custom fabrication or decorative sleeves.
- Cabinetry: Matching kitchen cabinets for an integrated look.
- Paint/Stain: To finish your chosen material.
Popular Methods to Cover Range Hood Ductwork
Many creative ways exist to hide that unsightly duct. The best method depends on your skill level, budget, and kitchen style. Some options offer a sleek, built-in appearance, while others provide a more rustic or industrial charm. I find that selecting a method that truly blends with your existing kitchen elements yields the most satisfying results. Each approach has its unique benefits and considerations.
Custom Wood Enclosures
Building a custom wood box around the duct is a popular choice. This method offers great flexibility in design and finish. You can paint it to match your walls or cabinets, or stain it for a natural wood look.
- Design Flexibility: You can create any shape or size to perfectly encase your duct. This allows for intricate designs or simple, clean lines.
- Material Choice: Use plywood, MDF, or solid wood. Plywood offers stability, while MDF is smooth for painting. Solid wood provides a premium feel.
- Finishing Options: Paint, stain, or veneer can match any kitchen decor. You can add decorative trim or molding to enhance the look.
- Construction: Build a sturdy frame first, then attach the panels. Ensure good ventilation within the enclosure if needed, though this is usually not an issue as the duct is sealed.
Drywall or Plaster Build-Outs
For a truly seamless look, a drywall or plaster build-out is an excellent option. This method integrates the duct cover directly into your wall or ceiling structure. It creates a smooth, continuous surface.
- Seamless Integration: The finished cover blends perfectly with the surrounding walls, often becoming invisible.
- Paintable Surface: Once taped and mudded, drywall can be painted to match any color in your kitchen.
- Professional Finish: This method often requires some drywall experience. Hiring a professional can ensure a flawless result.
- Limitations: This method is less flexible if you need to access the duct often. It makes future modifications more complex.
Decorative Metal Sleeves
If your kitchen has an industrial or modern aesthetic, a decorative metal sleeve might be perfect. These sleeves often come with the range hood or can be custom-fabricated.
- Modern Aesthetic: Metal sleeves, often stainless steel, copper, or powder-coated, provide a sleek, contemporary look.
- Pre-fabricated Options: Many range hood manufacturers offer matching duct covers that simply slide over the duct.
- Custom Fabrication: For unique designs or specific metals, a metal fabricator can create a custom sleeve. This offers a truly unique touch.
- Installation: Installation is often straightforward, involving mounting brackets that secure the sleeve to the wall or ceiling.
Cabinetry Integration
Integrating the ductwork into your existing or new kitchen cabinetry provides the most cohesive and built-in look. This method makes the duct virtually disappear.
- Unified Look: The duct cover becomes part of your kitchen’s cabinetry, creating a seamless and high-end appearance.
- Upper Cabinet Design: This often involves extending an upper cabinet box around the duct or building a custom cabinet specifically for the duct.
- Ventilation Access: Ensure that the cabinet design still allows for proper airflow and access to the hood filters.
- Professional Help: This method often requires precise carpentry skills to match existing cabinetry. It might be best handled by a cabinet maker or skilled contractor.
Faux Beams or Coffered Ceilings
For a more rustic, traditional, or even grand look, faux beams or a coffered ceiling can hide ductwork effectively. This is a creative way to turn a functional element into a decorative one.
- Architectural Interest: This method adds significant architectural character to your kitchen.
- Effective Concealment: Large beams or a patterned coffered ceiling can easily hide even bulky ductwork.
- Material Options: Use real wood for a rich look or lightweight, hollow faux beams for easier installation.
- Installation Complexity: This is a more involved project, often requiring careful measurement and planning to ensure the beams align correctly and provide proper support for the duct.
DIY Approaches for Covering Ducts
Tackling a DIY project to cover your range hood duct can be very rewarding. It saves money and gives you a sense of accomplishment. While some methods like custom cabinetry or drywall might be complex for beginners, building a simple wood enclosure is quite achievable. You just need basic woodworking skills and the right tools. I always recommend starting with a clear plan and gathering all materials before you begin. Remember to take your time and measure twice, cut once.
Building a Simple Plywood Box
A straightforward plywood box is a common and effective DIY solution. It provides a clean, modern look and is relatively easy to construct.
- Measure and Cut: First, measure the exact dimensions of your duct. You will need to create a box with enough clearance around the duct, usually an inch or two on all sides. Cut plywood sheets to form the top, bottom, and side panels of your box.
- Assemble the Frame: Create a simple internal frame using 2x2 lumber if needed, especially for longer runs. This frame will provide something to screw the plywood panels into and mount the box to the wall.
- Attach Panels: Use wood glue and screws to attach the plywood panels to the frame. Ensure all joints are tight and square. You can use clamps to hold pieces while the glue dries.
- Mount to Wall/Ceiling: Locate wall studs or use appropriate anchors to securely mount the box to the wall and ceiling. Pre-drill holes to prevent wood splitting. This box needs to be very stable.
Finishing Touches for Your DIY Cover
Once the structure is built, the finishing touches make all the difference. This is where your DIY cover transforms from a functional box into a seamless part of your kitchen.
- Sanding: Smooth out any rough edges or imperfections on the plywood. Start with a coarser grit sandpaper and gradually move to finer grits for a silky finish.
- Priming: Apply a good quality primer. This step ensures that your paint adheres well and provides a uniform finish. It also helps hide any wood grain or blemishes.
- Painting or Staining: Choose a paint color that matches your walls, ceiling, or cabinetry for a cohesive look. Apply multiple thin coats for a professional finish. If staining, ensure the wood is prepared correctly to accept the stain evenly.
- Caulking: Use paintable caulk to fill any small gaps or seams where the box meets the wall or ceiling. This creates a smooth, integrated appearance.
- Decorative Trim: Add crown molding, baseboards, or other decorative trim to further enhance the built-in look. This step can elevate a simple box into a sophisticated feature. When doing general home improvements or cleaning tasks like this, remembering to maintain other areas can be helpful. For instance, cleaning air vents regularly is important for air quality, similar to how your range hood functions. Learn more about how to clean air vents to keep your home’s air fresh.
Professional Solutions vs. DIY
Deciding whether to tackle a range hood duct cover as a DIY project or hire a professional depends on several factors. Your skill level, the complexity of the desired design, and your budget all play a role. A DIY approach can save money and offers a sense of pride. However, certain projects truly benefit from professional expertise, especially those requiring specific tools or advanced carpentry skills.
I have seen many DIY projects that look fantastic, but I have also seen some that fall short. It is important to be realistic about your abilities. Sometimes, investing in a professional ensures a flawless finish and long-term durability.
Advantages of Professional Installation
Hiring a professional brings expertise and efficiency to your project. They have the tools and experience to handle complex installations.
- Expertise and Experience: Professionals have experience with various duct cover designs and materials. They know the best practices for secure and aesthetically pleasing installations.
- Quality Finish: A professional can deliver a seamless, high-quality finish, especially with intricate designs like integrated cabinetry or complex drywall work.
- Time-Saving: Professionals work efficiently, completing the project much faster than a DIY approach might take.
- Code Compliance: They ensure the installation meets all local building codes and ventilation requirements.
- Problem Solving: Professionals can handle unexpected challenges that might arise during the project.
When DIY is Best
DIY is a great option for simpler projects or if you have existing skills. It offers personal satisfaction and cost savings.
- Simple Designs: Basic box enclosures made from wood or MDF are often suitable for DIYers.
- Budget Constraints: If you have a limited budget, doing the work yourself can significantly cut costs.
- Existing Skills: If you are comfortable with basic carpentry, measuring, cutting, and finishing, a DIY project is within reach.
- Personal Satisfaction: There is a unique pride in completing a home improvement project yourself.
- Learning Opportunity: It is a chance to learn new skills and expand your home improvement repertoire.
Design Considerations and Aesthetic Integration
Covering your range hood duct is not just about hiding a pipe; it is about enhancing your kitchen’s overall design. The goal is to make the cover look like an intentional part of the room, not an afterthought. Consider how the new element will interact with existing cabinetry, countertops, and appliances. The right design can elevate your entire kitchen. Think about colors, textures, and even subtle details.
I encourage clients to consider the cover as a design opportunity. It is a chance to add architectural interest or a unique focal point. A well-designed duct cover can become a beautiful feature.
Matching Kitchen Style
The most important design consideration is ensuring the duct cover complements your kitchen’s existing style.
- Modern Kitchens: Opt for sleek, minimalist designs. Smooth drywall enclosures, stainless steel sleeves, or simple, unadorned wood boxes painted to match walls work well. Clean lines are key.
- Traditional Kitchens: Consider custom wood enclosures with decorative trim or molding. Matching the wood type and stain to existing cabinetry creates a cohesive look. Raised panel designs can also fit.
- Farmhouse/Rustic Kitchens: Faux wood beams, shiplap cladding, or reclaimed wood for a custom enclosure can enhance this style. Embrace natural textures.
- Industrial Kitchens: Exposed metal sleeves or raw wood finishes can fit right in. Think about matte black or brushed stainless steel.
- Transitional Kitchens: These blend modern and traditional elements. A simple, painted wood box with minimal trim can bridge the two styles.
Adding Functionality
A duct cover does not have to be just a box. With clever design, it can add useful features to your kitchen.
- Integrated Lighting: Install LED strip lights or puck lights within the bottom of the enclosure to provide task lighting over your cooktop. This is very practical.
- Small Shelves: If space allows, incorporate small, shallow shelves on the sides of the enclosure. These are perfect for displaying decorative items, small plants, or spices.
- Hidden Storage: For wider enclosures, consider adding a small, shallow cabinet door or pull-down panel. This creates a discreet spot for storing rarely used items or cleaning supplies.
- Display Niche: Create an open niche within a wider enclosure to showcase artwork or a collection. This turns a functional element into a decorative one.
- Chalkboard Surface: If you paint the cover with chalkboard paint, it becomes a fun, interactive surface for notes or grocery lists.
Maintenance and Accessibility for Covered Ducts
While covering your range hood duct makes your kitchen look great, it is crucial to think about future maintenance. Range hoods need periodic cleaning, including filters and sometimes the duct itself. You also need to consider potential repairs to the hood or ductwork. A well-designed cover should allow for easy access when needed. Ignoring this step can lead to significant problems down the line. I always advise people to plan for future maintenance during the design phase.
Ensuring Easy Access
Designing for accessibility prevents headaches later. You do not want to tear down your beautiful cover just to clean a filter.
- Removable Panels: Design your cover with sections that can be easily removed. Use screws, magnetic catches, or strong clips instead of permanent fasteners. This allows access to the duct for cleaning or repair without damage.
- Hinged Sections: For a more integrated look, consider a hinged door or panel at the bottom or front of the cover. This can provide quick access to the range hood motor or filter area.
- Access Points: Plan the location of access points carefully. They should be discreet but easy to reach. Consider using matching hardware or camouflaged seams.
- Filter Access: Ensure you can easily remove and clean your range hood filters. Most hoods require filter cleaning every few months. Your cover should not impede this routine task.
Long-Term Care of Your Covered Duct
Once your duct is covered, maintaining the cover itself becomes part of your routine kitchen cleaning. This keeps it looking good for years.
- Regular Cleaning: Wipe down the exterior of your duct cover regularly with a damp cloth and mild cleaner. This prevents grease and dust buildup, just as you would clean the refrigerator or other kitchen surfaces.
- Inspect for Damage: Periodically check the cover for any signs of wear, cracks, or loose fasteners. Address small issues before they become larger problems.
- Paint/Finish Touch-Ups: Over time, paint or stain may chip or fade. Keep a small amount of your chosen finish for easy touch-ups. This maintains the fresh look.
- Duct Cleaning (Internal): While the cover protects the exterior, the internal duct still needs cleaning. Consider professional duct cleaning every few years, especially if you cook frequently. This helps maintain air quality and hood efficiency. Your removable panels will be crucial for this access.
FAQ Section
How much does it cost to cover a range hood duct?
The cost to cover a range hood duct varies widely. DIY options using plywood can cost $50-$200 for materials. Custom wood enclosures or drywall build-outs, especially with professional help, can range from $300-$1,500+. Integrated cabinetry might be even higher, depending on cabinet costs.
Can I cover a range hood duct myself?
Yes, you can cover a range hood duct yourself, especially using simpler methods like building a plywood box. Basic carpentry skills, accurate measurements, and patience are key. More complex solutions, such as drywall integration or custom cabinetry, may require professional expertise.
Do range hood ducts need to be insulated?
Range hood ducts generally do not require insulation in most residential settings, especially if running through conditioned space. However, if the duct runs through an unconditioned attic or cold exterior wall, insulating it can prevent condensation issues and improve energy efficiency. Check local building codes for specific requirements.
How do I access the duct for maintenance after covering it?
To ensure access for maintenance, design your duct cover with removable panels or hinged sections. Use screws, magnets, or clips for attachment instead of permanent fasteners. This allows you to easily open the cover when you need to clean the duct or service the range hood.
What materials are best for covering a range hood duct?
Popular materials for covering range hood ducts include plywood or MDF for custom enclosures, drywall for a seamless painted finish, and stainless steel or other metals for decorative sleeves. The best material depends on your desired aesthetic, budget, and skill level.
Can covering the duct affect ventilation performance?
No, properly covering the duct will not affect ventilation performance. The cover simply encloses the existing ductwork. Ensure the cover does not restrict the hood’s intake or exhaust points. Maintain proper airflow around the duct itself within the enclosure for ideal performance.
Conclusion
Transforming your kitchen by learning how to cover range hood ductwork is a fantastic way to elevate its aesthetic appeal and functionality. No more unsightly pipes detracting from your beautiful space. We have explored various methods, from simple DIY wooden boxes to seamless drywall build-outs and integrated cabinetry. Each option provides a unique solution, catering to different styles and budgets. Remember, careful planning, precise measurements, and choosing the right materials are crucial for a successful project.
Whether you opt for a weekend DIY project or decide to bring in a professional, concealing your range hood duct makes a significant impact. It creates a more polished, cohesive, and enjoyable kitchen environment. Take action today. Start by measuring your space and envisioning the possibilities. Your dream kitchen, free from exposed ductwork, is within reach. Elevate your home; you deserve a kitchen that looks as good as it feels.


