· Elira Thomsen · Home Improvement · 14 min read
How To Make Glass Cabinet Doors
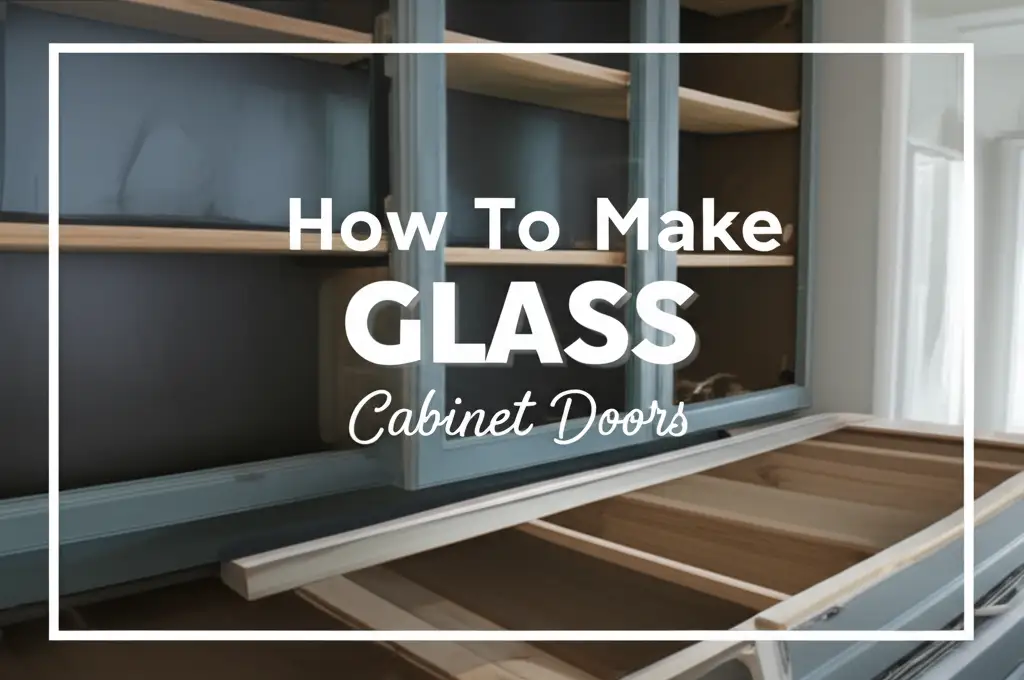
Upgrade Your Home: Make Your Own Glass Cabinet Doors
Have you ever looked at your kitchen cabinets and wished they had a fresh, open look? Adding glass cabinet doors is a simple way to transform your home. This DIY project can bring light and style to any room. It allows you to display cherished items while keeping them free from dust. Making glass cabinet doors yourself provides a custom fit and saves money. It gives you full control over the design.
In this guide, I will share the steps needed to make glass cabinet doors. We will cover planning, gathering materials, building the frames, installing the glass, and adding hardware. You will learn about precise measurements, choosing glass, and safe handling practices. Get ready to give your cabinets a beautiful new appearance. This project is a rewarding experience for any homeowner.
Takeaway:
- Plan carefully: Measure openings and select glass types before starting.
- Use proper tools: Gather necessary woodworking tools for precise cuts and assembly.
- Build strong frames: Ensure door frames are square and sturdy for glass installation.
- Handle glass safely: Always use gloves and eye protection when working with glass.
- Finish well: Apply a good finish to the wood and clean the glass for a perfect result.
To make glass cabinet doors, you build sturdy wooden frames with a routed recess. This recess holds the glass panel. You then secure the glass with retainers and add hinges. This process allows light to enter the cabinet and display contents. It also gives a stylish, open feel to your room.
Planning Your Glass Cabinet Door Project
Starting any home project requires good planning. When you want to make glass cabinet doors, proper planning ensures a smooth process. You need to consider the size, style, and type of glass. This step helps avoid mistakes later on. It sets a strong foundation for a successful outcome. I always spend extra time planning to save time during the actual build.
Measuring Existing Cabinet Openings
Accurate measurements are very important. You need to measure the width and height of each cabinet opening. Use a tape measure and check in multiple places. For instance, measure the width at the top, middle, and bottom. Do the same for the height on both sides and in the middle. Record the smallest measurements. This ensures your new doors will fit without rubbing. Remember to account for door overlays and hinge types. These factors affect the final door size.
When you measure, think about the hinges. Face frame cabinets need overlay hinges. Frameless cabinets use full overlay or inset hinges. Each hinge type requires specific door dimensions. Always double-check your measurements before cutting any wood. A small error here can waste materials. Write down your numbers clearly.
Choosing the Right Glass Type
The type of glass you choose impacts both look and safety. Standard clear glass is a popular choice for display cabinets. Frosted glass offers privacy while still letting light through. Seeded glass has small bubbles for an antique look. You can also pick tempered glass for extra safety. Tempered glass breaks into small, dull pieces if it shatters. This makes it a safer option for homes with children or pets.
Think about how you use the cabinet. For everyday items, strong tempered glass is best. For decorative displays, thinner clear glass works well. Consider the style of your home too. A modern home might use frosted glass. A traditional home might prefer clear or seeded glass. Your choice affects the final look and feel of your cabinets.
Gathering Tools and Materials for Glass Doors
Once you have a clear plan, gather all your tools and materials. Having everything ready before you start saves time. It prevents interruptions during the building process. A well-stocked workspace makes the project more enjoyable. I always organize my tools first. This helps me work efficiently.
Essential Woodworking Tools
You will need specific tools to make cabinet doors. A miter saw or table saw is vital for precise wood cuts. A router with a rabbeting bit helps create the groove for the glass. You will also need clamps to hold pieces while glue dries. A drill is necessary for pilot holes and hardware installation. Safety gear, like eye protection and work gloves, is a must. These tools help you work accurately and safely.
Other helpful tools include a measuring tape, pencil, and a square. A block plane or sandpaper helps refine edges. Good quality tools make the job easier and improve the final result. If you do not own a router, you might rent one or ask a local lumberyard to cut the rabbets. Proper tools ensure your door frames are strong and well-made.
Selecting Wood and Glass
Choosing the right wood is important. Hardwoods like oak, maple, or cherry are durable and look great. Softwoods like pine are easier to work with but may dent more easily. Match the wood type to your existing cabinets if you are integrating new doors. For the glass, you can buy pre-cut panels or have them cut to size. Measure your routed frames before ordering the glass. This ensures a perfect fit.
When ordering glass, specify the type and thickness. A common thickness is 1/8 inch or 3/16 inch. Thicker glass is more robust. Tell the supplier if you want tempered glass. Always order glass after your frames are built. This way, your glass size will be exact. You will also need small rubber or plastic spacers to keep the glass from rattling.
Building the Cabinet Door Frames
Now we begin the actual construction. Building strong, square frames is the most important step. The frames hold the glass and support the door. Take your time with this part. Precision here prevents problems later. I find that patience makes a big difference in woodworking.
Cutting Wood Pieces Precisely
Start by cutting the vertical stiles and horizontal rails. The stiles are the long side pieces. The rails are the top and bottom pieces. Use your miter saw or table saw for accurate cuts. Ensure all cuts are square (90 degrees). Use a stop block on your saw to make multiple pieces the exact same length. This is crucial for door symmetry.
For a typical glass cabinet door, the rails fit between the stiles. This means the stiles will be the full height of the door. The rails will be shorter than the full width. Account for the width of the stiles when you cut the rails. Check your dimensions against your plan. Cut all pieces carefully before assembly.
Assembling the Frame
You have several options for joining the frame pieces. Dowel joints, mortise and tenon joints, or pocket screws are common choices. Pocket screws are simpler for beginners. They create strong joints. Apply wood glue to all joint surfaces. Then, use clamps to hold the frame together tightly. Ensure the frame is perfectly square before the glue dries. Use a large framing square to check all corners.
Let the glue dry completely. This might take several hours or overnight. Drying time depends on the glue type and humidity. Do not rush this step. Strong joints are vital for a lasting door. After drying, remove the clamps. You now have a solid door frame ready for the next steps.
Preparing for Glass Installation
With the frames built, the next step is to prepare them for the glass. This involves creating a rabbet (a groove) where the glass will sit. It also includes finishing the wood frame. Proper preparation ensures the glass fits snugly and looks great. I always enjoy seeing the frame come together at this stage.
Creating the Glass Rabbet
A rabbet is a recess cut along the inside edge of the frame. This provides a ledge for the glass panel to rest on. You use a router with a rabbeting bit for this task. The bit’s bearing guides it along the frame’s edge. Set the cutting depth to half the thickness of your wood. This leaves enough wood for strength.
Rout along the inside back edge of all four frame pieces. Go slowly and maintain an even pressure. The rabbet should be uniform around the entire opening. This ensures the glass sits flat and securely. After routing, clean any sawdust from the rabbet. This creates a clear space for the glass.
Finishing the Wood Frame
Before installing glass, finish the wood frame. This is easier to do now than after the glass is in place. You can stain, paint, or clear coat the wood. Choose a finish that matches your existing cabinets or desired look. Apply the finish according to product directions. Use thin, even coats.
Sanding is important before finishing. Start with medium-grit sandpaper (120-grit) and move to finer grits (180 or 220-grit). This smooths the wood surface. Wipe away all dust before applying any finish. A good finish protects the wood. It also enhances the natural beauty of the grain. Let the finish dry completely before touching it or moving to the next step.
Installing the Glass Panels
Installing the glass is a delicate but rewarding part of the project. Safety is paramount here. Handle glass with care to prevent injury. A properly installed glass panel will be secure and rattle-free. I always wear protective gear during this step.
Safe Glass Handling
Glass can be sharp and fragile. Always wear thick work gloves and eye protection. Clear your workspace of any debris. Lay the finished wooden door frame on a clean, soft surface. This protects both the frame and the glass. Have a clear path from where you store the glass to your work area.
Pick up the glass carefully. Hold it by its edges. Avoid putting pressure on the center of the panel. Lower the glass slowly into the routed rabbet of the door frame. Ensure it sits evenly and completely within the groove. Do not force it into place. If it does not fit, recheck your measurements or the rabbet cut. A clean glass piece makes a big difference in the final look. For tips on keeping glass spotless, you might find information on how to clean glass stove top electric helpful for general glass care. how to clean glass stove top electric
Securing Glass in the Frame
Once the glass sits in the rabbet, you need to secure it. Glazing points or small glass retainer clips work best. These tiny metal or plastic pieces push into the wood. They hold the glass firmly against the rabbet. Place them every few inches around the perimeter of the glass. Use a putty knife or specialized tool to insert them. Do not push too hard. You do not want to crack the glass.
For an extra secure fit, you can also use clear silicone caulk. Apply a thin bead of silicone along the edge where the glass meets the rabbet. This helps prevent rattling. It also creates a seal. Wipe away any excess silicone immediately. Allow the silicone to dry completely before moving the door. This ensures the glass stays firmly in place for years to come.
Attaching Hardware and Final Touches
The project is almost done! Adding hinges and pulls brings your glass cabinet doors to life. These final steps make the doors functional and beautiful. It is exciting to see your hard work come to fruition. I always take pride in the last details.
Installing Hinges and Pulls
Choose hinges that match your cabinet style and function. Decide between overlay or inset hinges. Mark the hinge locations carefully on the door and the cabinet frame. Use a drill to create pilot holes. This prevents wood splitting. Screw the hinges onto the door first. Then, attach the door to the cabinet. Ensure the door opens and closes smoothly. Adjust the hinges as needed for proper alignment.
Select cabinet pulls or knobs that complement your design. Mark the drill points for the pulls. Drill holes through the door at these marks. Attach the pulls securely. Make sure they are level. The right hardware adds a polished look to your new glass doors. It also makes them easy to use every day.
Cleaning Your New Glass Doors
After installation, the glass will likely have smudges or dust. Clean the glass thoroughly to reveal its shine. Use a glass cleaner and a microfiber cloth. Spray the cleaner directly onto the cloth, not the glass. This prevents excess cleaner from getting into the frame. Wipe the glass until it is streak-free. You can also use a mixture of vinegar and water for a natural clean.
A clean finish highlights your craftsmanship. Dust the wood frame as well. This final cleaning step prepares your cabinets for use. Your new glass cabinet doors are now ready to display your items. This completes a truly rewarding DIY project.
Tips for Success and Troubleshooting
Making glass cabinet doors can be a smooth process with the right approach. Knowing a few extra tips and how to handle common issues helps. These insights make your project more enjoyable and successful. I have learned many things from my own DIY experiences.
Common Issues and Solutions
One common issue is the door not hanging straight. This usually means the hinges need adjustment. Most modern hinges allow for small adjustments in multiple directions. Read your hinge instructions. If the glass rattles, it might not be fully secured. Add more glazing points or a bead of silicone around the edge. If the wood does not fit snugly, check your measurements and cuts. You might need to recut a piece if it is too short.
Sometimes, wood can warp slightly. Store wood flat to prevent this. If a piece warps, you might need to use extra clamps during assembly. If your finish looks uneven, apply more thin coats. Sand lightly between coats for a smoother result. Addressing issues promptly saves frustration.
Long-Term Care for Glass Doors
Once installed, glass cabinet doors need minimal care. Dust them regularly with a soft cloth. Clean the glass as needed to keep it clear. Avoid harsh chemical cleaners on the wood finish. Use wood-specific cleaners if necessary. Check hinges periodically for tightness. Loose hinges can cause doors to sag.
If a glass panel gets scratched, you might need to replace it. Small chips can sometimes be repaired by a glass professional. Handle items inside the cabinet carefully. This prevents accidental impact on the glass. With proper care, your new glass cabinet doors will look beautiful for many years. They add lasting value and style to your home.
FAQ Section
Q1: Can I use regular window glass for cabinet doors?
A1: You can use regular window glass, but tempered glass is safer. Tempered glass breaks into small, dull pieces. Regular glass shatters into sharp shards. For cabinet doors, especially in busy areas, tempered glass provides more safety. It is a worthwhile upgrade for peace of mind.
Q2: What is the best way to cut the wood frames precisely?
A2: A miter saw or table saw gives the best precision for wood cuts. Use a sharp blade for clean edges. Always use a stop block when cutting multiple pieces of the same length. This ensures all your rails and stiles are uniform in size. Accuracy is key for strong, square frames.
Q3: How do I measure for the glass panel itself?
A3: Measure the inside dimensions of your finished door frame. Subtract about 1/16 inch from both the width and height. This small gap allows for easy installation and accounts for wood expansion. This ensures the glass fits well without being too tight. Provide these exact measurements to your glass supplier.
Q4: Can I replace existing solid cabinet door panels with glass?
A4: Yes, you can often convert solid doors. You need to remove the solid panel from the door frame. Then, rout a rabbet on the inside edge of the frame. This creates the groove for the glass. The process is similar to building new frames, but you adapt existing doors.
Q5: What kind of hinges should I use for glass cabinet doors?
A5: The hinge type depends on your cabinet structure. Overlay hinges work for face frame cabinets. Full overlay hinges or inset hinges fit frameless cabinets. Choose hinges designed for cabinet doors, often with soft-close features. Ensure the hinges can support the weight of your new glass doors.
Q6: How do I prevent the glass from rattling in the frame?
A6: Use glazing points or small plastic retainer clips to hold the glass firmly. Insert them every few inches around the glass perimeter. For extra security, apply a thin bead of clear silicone caulk where the glass meets the wood rabbet. This creates a cushion and seal.
Conclusion
Making your own glass cabinet doors is a satisfying home improvement project. It transforms the look of your space with light and display possibilities. We covered planning, precise measuring, and choosing the right materials. You learned about building strong frames and safely installing glass. We also discussed essential tools and helpful finishing touches.
This DIY effort adds personal style and value to your home. You gain the satisfaction of building something beautiful with your own hands. Remember to take your time, prioritize safety, and enjoy the process. Ready to start your transformation? Grab your tools and begin making glass cabinet doors today. Your home will thank you.
- glass cabinet doors
- DIY woodworking
- cabinet upgrades
- home improvement projects

Elira Thomsen
Home Organization & DIY Living Expert
I'm Elira Thomsen, a lifelong enthusiast of clean, beautiful, and functional homes. With over a decade of hands-on experience in DIY home decor, smart cleaning solutions, and practical organization, I help everyday homeowners turn clutter into calm. Whether it's transforming a neglected nook into a cozy reading spot, mastering budget-friendly storage hacks, or refreshing a space with seasonal décor, I'm here to guide you every step of the way. My mission is simple — make home care easier, more inspiring, and truly rewarding.