· Liora Benning · Home Improvement · 13 min read
Can I Paint My Dishwasher
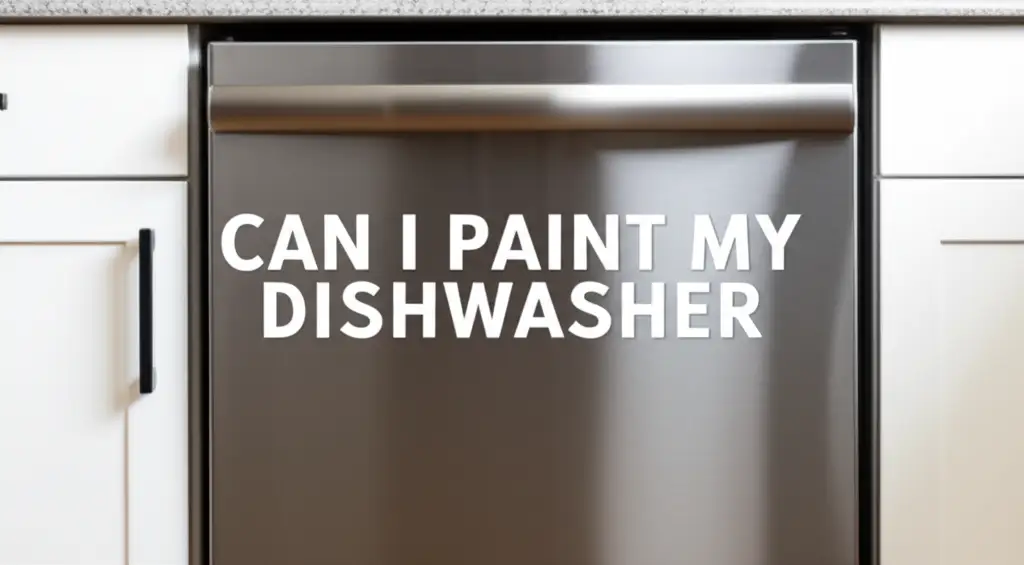
Can I Paint My Dishwasher? A DIY Guide to Appliance Refresh
Is your kitchen dishwasher looking tired? Perhaps its color clashes with your new cabinets. Many homeowners wonder about giving their appliances a fresh look without buying new ones. The idea of painting a dishwasher often comes up. This simple update can truly change your kitchen’s feel.
Painting an old dishwasher is a great way to save money. It lets you match your appliance to your home decor. This article will show you how to paint your dishwasher. We cover choosing the right paint and careful preparation. We also include the steps for a long-lasting finish. By following these steps, you can refresh your kitchen. You will also feel proud of your DIY work.
Takeaway
- Yes, You Can Paint: It is possible to paint a dishwasher’s exterior.
- Choose the Right Paint: Use appliance epoxy paint or durable enamel.
- Preparation is Key: Thorough cleaning and sanding ensure paint sticks well.
- Apply Thin Coats: Multiple thin coats prevent drips and provide a smooth finish.
- Allow Full Cure: Let the paint dry and cure completely for durability.
Can I paint my dishwasher?
Yes, you can paint your dishwasher. It is a cost-effective way to update its look. You need specific types of paint for appliances. Proper surface preparation is also very important. This DIY project can give your kitchen a fresh, new appearance.
Why Consider Painting Your Dishwasher?
Your dishwasher is a central part of your kitchen. Over time, its finish can show wear. Dents, scratches, or faded colors are common issues. Replacing a dishwasher can be expensive. A new unit often costs hundreds or thousands of dollars. Painting provides a much cheaper option.
You might want to change your kitchen’s style. Maybe you are going for a modern look. Your old white dishwasher might not fit. Painting it a new color helps it blend in or stand out. This gives you design freedom. You can pick a color that truly matches your vision.
Painting extends the life of your appliance too. A fresh coat of paint protects the metal. It can cover minor rust spots. This prevents them from getting worse. This small investment in paint adds years to your dishwasher’s useful life. It keeps your kitchen looking good without a large expense.
Many people enjoy DIY projects. Painting your dishwasher can be a satisfying task. It gives you a sense of accomplishment. You transform an old item into something new. This personal touch makes your home feel more unique. It is a practical skill to learn and use.
Choosing the Right Paint for Dishwashers
Picking the correct paint is critical when you paint your dishwasher. Not all paints work on metal appliances. You need specific types designed for high-wear surfaces. These paints offer durability and adhesion. They stand up to heat and moisture.
Appliance epoxy paint is a top choice. This paint comes in spray cans or brush-on forms. It creates a hard, enamel-like finish. This finish resists chipping and scratching. It is made to bond with metal surfaces. It handles the daily use of kitchen appliances.
Another good option is durable oil-based enamel paint. These paints also offer a tough finish. They are known for their lasting power. You can apply them with a brush or roller. Ensure the label states it is suitable for metal and appliances. Avoid standard wall paints. They will not stick well or last long on a dishwasher.
Consider the application method. Spray paint offers a smooth, factory-like finish. It requires careful masking and good ventilation. Brush-on paint gives you more control. It might show slight brush strokes. Both methods can give great results if done right. Choose based on your skill level and preference.
Color choice is also important. Appliance paints come in common shades like white, black, and stainless steel. Some brands offer custom colors. Think about your kitchen’s overall design. A neutral color often blends well. A bold color can make a statement. I find that a satin or semi-gloss finish is usually best. It offers good durability and is easy to clean.
Essential Preparation Before You Paint
Proper preparation is the most important step to paint your dishwasher successfully. Skipping steps here leads to a poor finish. It can cause peeling or bubbling paint. A clean, smooth surface helps the paint stick well. This ensures a long-lasting result.
First, unplug your dishwasher from the power source. This is a crucial safety step. Pull the dishwasher away from the wall slightly. This gives you room to work. If you need to move your appliance completely, learn how to move a dishwasher without scratching the floor. This prevents damage to your flooring during the project.
Clean the dishwasher’s exterior thoroughly. Use a strong degreaser to remove grease, grime, and food residue. Dishwasher surfaces often have baked-on grease. Simple soap and water might not be enough. You can also use a mixture of vinegar and water. For cleaning the interior or tough spots, refer to guides like where to put vinegar in dishwasher to clean or how to clean mold off dishwasher. Rinse the surface well with clean water. Let it dry completely. Any moisture trapped under the paint will cause problems.
Lightly sand the surface. Use fine-grit sandpaper, around 220-grit. This creates a slightly rough texture. Paint adheres better to a dull, scuffed surface than a slick one. Sanding also smooths out minor imperfections. After sanding, wipe away all dust with a tack cloth or damp rag. Ensure no dust remains.
Mask off all areas you do not want painted. Use painter’s tape and plastic sheeting. Cover the control panel, handle, edges, and floor. Protect surrounding cabinets and countertops too. Make sure the tape creates sharp, clean lines. Press it down firmly to prevent paint bleeding. This meticulous masking saves a lot of cleanup later.
Step-by-Step Guide to Painting Your Dishwasher
Now that your dishwasher is ready, it is time to paint. Take your time with each step. Rushing can lead to drips or an uneven finish. Good ventilation is vital. Open windows or use fans. This helps clear paint fumes. Wear protective gear like gloves and a mask.
Start with a primer layer. Appliance paint often works as a self-priming product. However, for maximum adhesion and durability, a separate metal primer is wise. Apply a thin, even coat of primer. Allow it to dry fully according to product instructions. This usually takes a few hours. Primer helps the topcoat stick better and look more uniform.
Apply your first coat of appliance paint. If using spray paint, hold the can 8-12 inches away from the surface. Use steady, even passes. Overlap each pass slightly. For brush-on paint, use a quality brush or roller. Apply paint in one direction. Avoid applying a thick coat. Thin coats dry better and prevent drips. A thin coat also adheres more effectively.
Allow each coat to dry to the touch before applying the next. This typically takes 30 minutes to an hour. Consult your paint can for exact drying times. Most dishwashers need two to three thin coats for full coverage. You will achieve a durable and professional-looking finish this way. Do not rush this drying process. If you apply a new coat too soon, it can create a soft finish. It can also cause bubbling.
After your final coat, let the paint dry completely. This “dry to touch” time is just for handling. The paint needs to “cure” fully. Curing means the paint hardens and reaches its maximum durability. This process can take several days to a week. Avoid using or touching the dishwasher during this curing period. The paint will be soft until cured. It could easily scratch or dent. Once fully cured, carefully remove all painter’s tape. Admire your new-looking appliance.
Maintaining Your Painted Dishwasher’s Finish
After you paint your dishwasher, proper care ensures its finish lasts. A painted surface requires gentle cleaning. Harsh chemicals can damage the paint. Regular cleaning keeps it looking new. It prevents grime buildup.
For daily cleaning, use a soft cloth with mild soap and water. Dish soap is generally safe. Wipe down the painted exterior gently. Avoid abrasive scrubbers or strong cleaning solutions. These can scratch or dull the paint. Rinse the cloth often to remove dirt. Dry the surface with a clean, soft towel. This prevents water spots.
Be mindful of what touches the painted surface. Magnets, sticky notes, or heavy kitchen items can scratch the paint. If you have children, remind them to be gentle. Avoid leaning against the dishwasher too much. Small dings are easy to prevent with care.
Over time, small chips or scratches might occur. This is normal with any painted surface. You can easily touch up these areas. Keep a small amount of your leftover appliance paint. Clean the chipped spot. Apply a small amount of paint with a fine brush. Let it dry and cure. This keeps your dishwasher looking neat.
Regular maintenance for your appliance itself is also good. For example, knowing how often should you clean your dishwasher filter keeps the machine working well. A clean, well-maintained machine is less likely to develop issues that might affect its exterior. A healthy dishwasher performs better. It also maintains its updated look longer.
Potential Challenges and Troubleshooting
Even with careful planning, sometimes issues arise when you paint your dishwasher. Knowing how to fix common problems helps. Do not get discouraged if things do not go perfectly. Most mistakes are fixable.
One common issue is paint drips or runs. This happens when you apply paint too thickly. If the paint is still wet, you can often smooth it out. Use a brush or roller to redistribute the excess paint. If the paint has dried, you need to lightly sand the drip. Use fine-grit sandpaper. Then, reapply a very thin coat of paint. Remember, thin coats are best.
Bubbling or peeling paint is another problem. This often means the surface was not clean enough. Or, there was moisture present. It could also mean the paint did not adhere well. For this, you might need to sand down the affected area. You might even remove all paint from that spot. Then, clean and prime the area again. Repaint using thin layers. If you get spray paint off mirror, you use solvents. For dishwasher paint, sanding is usually safer.
Uneven coverage occurs if you apply paint inconsistently. Some spots might look thin. Others might be too thick. This problem is solved by applying additional thin coats. Make sure each new coat covers the entire surface evenly. Always work in consistent strokes. Overlapping slightly helps ensure full coverage.
Poor adhesion can happen if you do not sand the surface. Or, if you use the wrong type of paint. If the paint scratches off easily, it is not adhering properly. In this case, you might need to strip all the paint. Start the preparation process over. Ensure thorough cleaning and sanding. Then apply a high-quality appliance primer. Finish with the correct appliance paint. This takes more effort but results in a durable finish.
Always follow the paint manufacturer’s instructions. These guidelines are there for a reason. They help prevent common errors. If you face a unique challenge, check the paint company’s website or contact their support. They can offer specific advice for their product.
Beyond the Standard: Creative Dishwasher Makeovers
Painting your dishwasher does not have to stop at a single, solid color. You can use this project as a chance to get truly creative. Explore different designs. Turn your appliance into a unique piece of kitchen art. This adds personality to your home.
Consider a two-tone design. You could paint the top half one color and the bottom half another. Use painter’s tape to create a crisp line. A popular choice is black on the bottom and white on top. Or, use a bold accent color on one section. This modern look can truly transform the space. It adds visual interest to a basic appliance.
Stenciling is another fun option. Find a stencil pattern that matches your kitchen theme. Floral designs, geometric shapes, or even a simple border can work. Apply the stencil after your base coat has fully dried. Use a contrasting color for the stencil. Apply the paint lightly with a stencil brush or foam roller. Remove the stencil carefully before the paint dries completely. This technique adds intricate details.
You can also use magnetic covers. These are not paint, but they pair well with a painted dishwasher. You paint the main body. Then, add a magnetic cover for the door. These covers come in many designs, including faux wood or stainless steel. This gives you flexibility. You can change the look of your dishwasher door easily.
Some people paint murals or freehand designs. This takes artistic skill. If you are good with a brush, try a simple landscape or abstract pattern. Use paint pens for fine details. Clear coat over the finished design for protection. This creates a truly custom appliance. Your dishwasher becomes a focal point.
Remember to protect your artwork. A clear, protective topcoat is important. Use a clear appliance-grade enamel or epoxy. This shields your design from wear and tear. It ensures your creative efforts last for years. Your dishwasher can be more than just an appliance. It can be a canvas for your home style.
FAQ Section
How long does painted dishwasher last?
A properly painted dishwasher can last for several years. The lifespan depends on the paint quality and surface preparation. Appliance epoxy paint offers excellent durability. Regular, gentle cleaning also extends the finish. Avoid abrasive cleaners and harsh scrubbing for best results.
Can I paint the inside of my dishwasher?
No, you should not paint the inside of your dishwasher. The interior is constantly exposed to high heat, water, and harsh detergents. Standard paints cannot withstand these conditions. They would quickly peel, flake, or leach chemicals into your dishes. The interior liner is made of specific materials for a reason.
What type of paint is best for dishwashers?
Appliance epoxy paint is the best choice for painting a dishwasher. It is designed to adhere well to metal and withstand kitchen conditions. Durable oil-based enamel paints are also suitable. Always choose paints labeled for appliances or metal surfaces. They offer a hard, chip-resistant finish.
How long does dishwasher paint take to cure?
Dishwasher paint usually takes 3 to 7 days to fully cure. While it might be dry to the touch in a few hours, the paint needs more time to harden completely. Avoid using or handling the dishwasher during this curing period. This ensures maximum durability and prevents damage to the fresh paint.
Can I paint a stainless steel dishwasher?
Yes, you can paint a stainless steel dishwasher. Stainless steel surfaces are smooth. They require proper preparation for paint adhesion. Lightly scuff the surface with fine-grit sandpaper. Then, clean and prime it thoroughly. Appliance epoxy paint works well on stainless steel, just like other metal surfaces.
Does painting a dishwasher void its warranty?
Painting your dishwasher may void its warranty. Most appliance manufacturers do not cover external cosmetic alterations. If you have an active warranty, check its terms before painting. Consider the age of your dishwasher. If it is old, the warranty likely expired anyway.
Conclusion
Painting your dishwasher is a fantastic DIY project. It offers a fresh look for your kitchen. You can avoid the cost of a new appliance. We have shown that you can paint your dishwasher. We covered the right materials and important steps. From choosing tough appliance paint to careful preparation, each step matters.
Remember to clean and sand your dishwasher thoroughly. Apply thin, even coats of paint. Allow ample drying and curing time. Your effort will result in a durable, attractive finish. This project lets you personalize your kitchen. It gives you a great sense of accomplishment. Give your kitchen a budget-friendly upgrade today. Your refreshed dishwasher will be a point of pride.
- dishwasher paint
- appliance painting
- kitchen DIY
- refresh dishwasher
- painting metal appliances

Liora Benning
Cleaning Specialist
With a passion for tidy spaces and years of hands-on experience, I specialize in blending deep-cleaning strategies with practical organization and cozy design. I believe every home—no matter the size—can feel both functional and beautiful. At Cosy Home Creation, I share realistic routines, creative DIY projects, and decor tips that make home care feel less like a chore and more like a lifestyle. From sparkling countertops to serene workspaces, I help you build a home that truly works for you.