· Tessa Winslow · Home Improvement · 20 min read
How To Bond Gripper Metal Carpet Trim On Concrete Linoleum
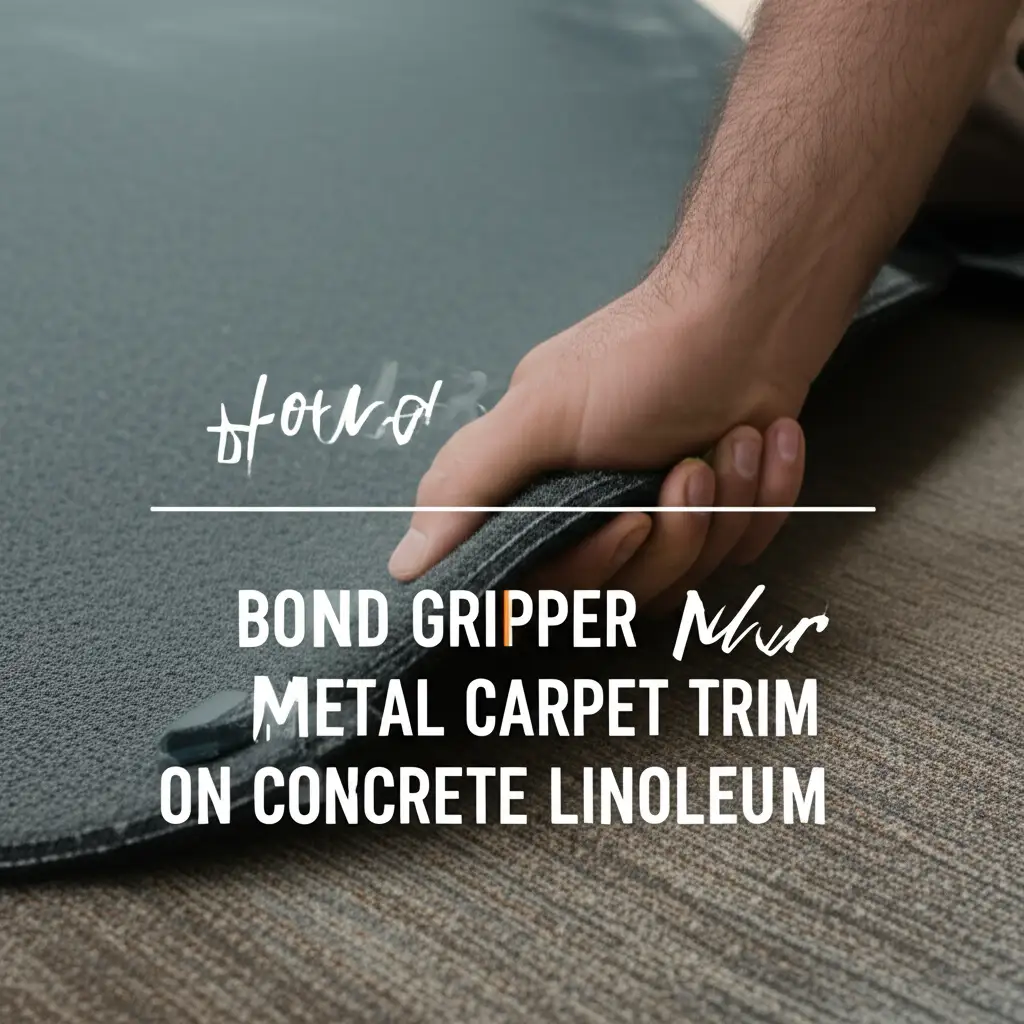
Bonding Gripper Metal Carpet Trim on Concrete & Linoleum
Have you ever looked at a doorway or a room transition and wished it looked cleaner? A well-installed carpet trim makes all the difference. It provides a neat edge for your carpet, protecting it from fraying. Today, we focus on how to bond gripper metal carpet trim on concrete linoleum surfaces, two common yet challenging subfloors.
I understand the desire for a professional finish in your home. This guide helps you achieve just that. We will discuss essential tools, prepare your surfaces, and detail the bonding steps for both concrete and linoleum. You will learn the best adhesives to use and how to ensure your trim stays firmly in place. Get ready to transform your floor transitions with confidence.
Takeaway
- Gather the right tools and select appropriate adhesives for concrete or linoleum.
- Thoroughly clean and prepare both concrete and linoleum surfaces for strong adhesion.
- Apply adhesive evenly and press the gripper metal trim firmly into place.
- Allow sufficient curing time for the adhesive before putting weight on the trim.
Answer to the main query: To bond gripper metal carpet trim on concrete or linoleum, first clean and dry the subfloor. Apply a strong construction adhesive or specialized floor adhesive evenly to the trim’s underside. Press the trim firmly onto the prepared surface, ensuring full contact, and allow adequate curing time for a durable bond.
Understanding Gripper Metal Carpet Trim
Gripper metal carpet trim, also known as transition strips or Z-bar, helps finish carpet edges. It provides a clean line where carpet meets other flooring types. This trim protects carpet edges from wear and tear. It also prevents tripping hazards. The trim typically has small teeth or “grippers” that hold the carpet securely.
When you install carpet, you often need a durable edge. Metal trim offers this durability, especially in high-traffic areas. It is strong and resists bending or breaking. This makes it a popular choice for connecting carpet to harder surfaces. Think about where your carpet ends and a hard floor begins. That is where gripper metal trim comes in handy.
Why Choose Metal Trim?
Metal trim offers several benefits over other types. It lasts a long time. It can handle heavy foot traffic without deforming. Metal trim also creates a very neat and professional appearance. It comes in various finishes, like aluminum or brass. This allows you to match it with your home’s decor.
Plastic trims might be cheaper, but they do not offer the same strength. They can crack or break over time, especially in busy areas. Wood trims are another option, but they can warp or scratch. Metal stands up to daily use much better. This makes it a smart long-term investment for your floors.
How Gripper Trims Work
The “gripper” part of the trim is important. It is a row of small, angled pins on one side. These pins face towards the carpet. When you lay the carpet over the trim and stretch it, the carpet backing catches on these pins. This holds the carpet edge tight. It prevents the carpet from pulling away or fraying.
The other side of the trim, the part that bonds to the subfloor, is flat. This flat surface is where your adhesive will go. You need to ensure this surface is clean and ready for bonding. A good bond here is crucial for the trim to stay put. Without it, the entire transition could become loose.
Essential Tools and Materials for Bonding Trim
Before you start bonding gripper metal carpet trim, gather all your supplies. Having everything ready saves time and frustration. The right tools ensure a smooth and effective installation. This section details what you will need.
Adhesives: The Core of Your Bond
Choosing the correct adhesive is vital. Not all adhesives work well on concrete and linoleum. You need a strong, permanent bond. Look for construction adhesive or specialized flooring adhesive.
- Construction Adhesive: This is a strong, heavy-duty adhesive. It comes in tubes for a caulk gun. Brands like Loctite PL Premium or Liquid Nails are good options. They offer strong bonds to concrete and many other materials. Ensure the product states it works for both concrete and linoleum.
- Polyurethane-Based Adhesives: These adhesives offer flexibility and powerful adhesion. They can handle temperature changes and slight movements in the floor. They are often water-resistant, which is good for subfloors like concrete.
- Epoxy Adhesives: For an extremely strong bond, a two-part epoxy adhesive can be used. These require mixing before application. They offer excellent durability but dry quickly. Work fast if you choose this option.
Avoid regular wood glue or general-purpose craft glues. These are not strong enough for metal trim on concrete or linoleum. They will not hold up to foot traffic.
Measuring and Cutting Tools
Accurate measurements and clean cuts are important for a professional look.
- Tape Measure: Use a sturdy tape measure to get precise lengths.
- Utility Knife: A sharp utility knife helps cut linoleum if you need to adjust it.
- Metal Snips or Hacksaw: Metal snips are great for cutting thin metal trim. For thicker trim or more precise cuts, a hacksaw with a fine-tooth blade works well. Always wear protective gloves when handling cut metal.
- Miter Box (Optional): A miter box helps you make accurate angled cuts if your trim meets at a corner.
Cleaning and Preparation Supplies
Surface preparation is critical for a strong bond.
- Broom and Vacuum Cleaner: Remove all loose debris.
- Stiff Brush: Scrub away stuck-on dirt.
- Degreaser or Floor Cleaner: Clean any grease, oil, or old adhesive residues. Make sure it is safe for your subfloor. For concrete, you might need a stronger cleaner. You may find helpful information on how to remove carpet adhesive from concrete.
- Rags or Mop: Wipe surfaces clean after scrubbing.
- Fan or Dehumidifier: Speed up drying time.
- Concrete Sealer/Primer (for concrete only): If your concrete is dusty or very porous, a sealer or primer will create a better bonding surface. Learn more about how to sealing basement concrete floor before carpet.
Safety Gear
Your safety matters most.
- Work Gloves: Protect your hands from sharp metal edges and adhesives.
- Safety Glasses: Protect your eyes from debris and adhesive splashes.
- Knee Pads: If you will be kneeling a lot, knee pads make the job more comfortable.
Having these tools and materials ready will make your bonding project much easier. It also increases the chances of a successful, long-lasting installation.
Preparing Concrete and Linoleum Subfloors
Proper subfloor preparation is the most important step. A clean, smooth, and dry surface ensures your adhesive creates a strong, lasting bond. Skipping this step often leads to bonding failures. Take your time here.
Concrete Subfloor Preparation
Concrete floors are durable, but they can be dusty, uneven, or absorb moisture. Each of these can affect your bond.
- Clean Thoroughly: Start by sweeping and vacuuming the area. Remove all loose dirt, dust, and debris. Use a stiff brush to scrub any stubborn spots. If there is old adhesive or paint, scrape it off. You can use a floor scraper for this.
- Degrease and Dry: Clean the concrete with a degreaser or a strong floor cleaner. This removes any oil, grease, or grime. Rinse the area completely with clean water. Allow the concrete to dry fully. This can take several hours, or even a day, depending on humidity. Use a fan to speed up drying. A damp surface will prevent proper adhesion.
- Check for Moisture: Concrete can hold moisture. You can do a simple test. Tape a 2x2 foot piece of plastic sheeting tightly to the concrete. Check it after 24 hours. If you see condensation under the plastic, the concrete is still too damp. Wait for it to dry more, or consider a moisture barrier primer.
- Level and Repair: Look for cracks, holes, or uneven spots. Fill these with a concrete patching compound or self-leveling underlayment. A smooth surface helps the trim lie flat and bond evenly.
- Prime (Optional but Recommended): For very dusty or porous concrete, apply a concrete primer. This creates a stable surface for the adhesive. It reduces dust and helps the adhesive grip better. Follow the primer manufacturer’s drying instructions.
Linoleum Subfloor Preparation
Linoleum is generally smoother than concrete, but it requires different cleaning and careful handling.
- Clean Thoroughly: Sweep and vacuum the linoleum surface. Remove all dirt and dust. Use a mild floor cleaner to wipe down the area. Avoid harsh chemicals that could damage the linoleum.
- Remove Old Wax/Finish: Linoleum often has wax or a floor finish. This can prevent adhesive from sticking. Use a linoleum-safe wax stripper or a mild abrasive cleaner to remove any old wax or finish. Rinse thoroughly with clean water.
- Dry Completely: Allow the linoleum to dry completely. Linoleum is less porous than concrete. Water can sit on the surface longer. Ensure there is no moisture before applying adhesive.
- Check for Loose Spots: Inspect the linoleum for any loose edges or bubbles. If the linoleum itself is not securely bonded to the subfloor, your trim will not bond well either. If you find loose areas, re-secure them with appropriate linoleum adhesive.
- Rough Up (Slightly): For some adhesives, a slightly roughened surface helps improve grip. You can lightly scuff the area where the trim will go with fine-grit sandpaper (e.g., 180-220 grit). Do this gently, just enough to dull the shine, not to damage the linoleum. Wipe away all dust after sanding.
Proper preparation ensures a strong, long-lasting bond for your gripper metal carpet trim on either concrete or linoleum. It is a step you should not rush.
Step-by-Step Bonding Process for Concrete
Once your concrete subfloor is clean, dry, and level, you are ready to bond the gripper metal carpet trim. This process involves careful measurement, adhesive application, and proper placement. Follow these steps for a secure installation.
- Measure and Cut the Trim: Measure the exact length of the area where the trim will go. Mark this measurement on your metal trim. Use metal snips or a hacksaw to cut the trim to size. Always cut slightly longer and trim again if needed for a perfect fit. Wear gloves to protect your hands from sharp edges.
- Dry Fit the Trim: Place the cut trim in its final position without adhesive. Check if it fits snugly. Ensure there are no gaps or overlaps. Make any necessary adjustments to the length now. This dry fit helps you visualize the placement. It also confirms your measurements are accurate.
- Prepare the Adhesive: If using a cartridge adhesive, load it into your caulk gun. Cut the nozzle at a 45-degree angle. Make the opening small enough for a controlled bead of adhesive. For two-part epoxy, mix it according to the manufacturer’s instructions. Work quickly, as epoxy sets fast.
- Apply Adhesive to the Trim: Turn the metal trim upside down. Apply a continuous, even bead of adhesive along the underside of the trim. Focus on the flat section that will contact the concrete. You can also apply a zig-zag pattern along the length. Ensure good coverage, especially near the edges. Do not apply too much, as it will squeeze out.
- Position and Press the Trim: Carefully place the adhesive-coated trim onto the prepared concrete subfloor. Align it precisely with your carpet edge or transition line. Once positioned, press down firmly along the entire length of the trim. Use your body weight or a rubber mallet to ensure good contact.
- Secure and Clean Excess Adhesive: If possible, place heavy objects on top of the trim. This helps maintain pressure while the adhesive cures. Wipe away any excess adhesive that squeezes out immediately. Use a damp cloth for water-based adhesives or mineral spirits for solvent-based ones. Clean-up is easier before the adhesive dries.
- Allow for Curing: Adhesives need time to cure fully. This can range from several hours to a full day or more. Check the adhesive manufacturer’s instructions for exact curing times. Do not disturb the trim or put weight on it during this period. A full cure ensures maximum bond strength.
- Install the Carpet (Optional): Once the trim is fully bonded and the adhesive is cured, you can stretch your carpet onto the gripper pins. Use a carpet kicker or power stretcher to achieve a tight fit. The carpet will then lock onto the trim’s teeth.
By following these steps, you will achieve a strong and lasting bond for your gripper metal carpet trim on concrete.
Step-by-Step Bonding Process for Linoleum
Bonding gripper metal carpet trim to linoleum requires a slightly different approach. Linoleum is a softer surface than concrete and can react differently to adhesives. Care is needed to avoid damaging the linoleum while ensuring a strong bond.
- Measure and Cut the Trim: Just like with concrete, accurately measure the length needed. Mark your measurement on the metal trim. Use metal snips or a hacksaw to cut the trim. Always wear protective gloves when handling cut metal edges. A precise cut ensures a clean finish.
- Dry Fit the Trim: Place the cut trim on the linoleum where it will be installed. Check for a perfect fit. Ensure the trim lies flat against the linoleum. Make any necessary length adjustments now. This step confirms your measurements and placement before adhesive application.
- Prepare the Adhesive: Load your chosen adhesive into a caulk gun. Cut the nozzle to create a controlled bead. For linoleum, choose an adhesive specifically rated for vinyl or linoleum flooring, as well as metal. This ensures compatibility and strong adhesion without damaging the linoleum.
- Apply Adhesive to the Trim: Turn the metal trim upside down. Apply a consistent, even bead of adhesive along the flat underside of the trim. Focus on the area that will contact the linoleum. Avoid over-applying adhesive. Too much can squeeze out and be difficult to clean from linoleum.
- Position and Press the Trim: Carefully place the adhesive-coated trim onto the prepared linoleum surface. Align it perfectly with your carpet edge or the transition line. Press down firmly along the entire length of the trim. Apply even pressure to ensure full contact between the trim and the linoleum.
- Secure and Clean Excess Adhesive: Place weights along the trim. Books or sandbags work well. This pressure helps the trim adhere properly while the adhesive cures. Immediately wipe away any excess adhesive that escapes from under the trim. Use a cleaner recommended for the adhesive type and safe for linoleum.
- Allow for Curing: Adhesives need time to set and cure. Check the adhesive manufacturer’s instructions for the specific curing time. This can range from a few hours to 24 hours or more. Do not walk on the trim or place undue stress on it during this period. Proper curing ensures a durable bond.
- Install the Carpet (Optional): After the trim’s adhesive has fully cured, you can complete your carpet installation. Stretch the carpet firmly over the gripper pins on the trim. Use appropriate carpet tools, such as a knee kicker or power stretcher, to achieve a tight, secure fit against the trim’s teeth. This creates a neat and finished edge.
Following these specific steps helps you achieve a secure and professional bond for your gripper metal carpet trim on linoleum, ensuring a lasting and attractive transition.
Ensuring a Secure and Lasting Bond
Bonding gripper metal carpet trim is more than just applying adhesive. It involves careful preparation, correct application, and patience during curing. Following these tips helps ensure your bond is strong and lasts for years.
Key Factors for a Strong Bond
- Surface Cleanliness: This cannot be stressed enough. Any dust, dirt, grease, or old adhesive residue will weaken the bond. The adhesive needs direct contact with a clean surface. Think of it like trying to stick tape to a dusty wall – it just won’t hold.
- Dryness: Both concrete and linoleum must be completely dry. Moisture prevents adhesives from curing properly. It also creates a barrier between the adhesive and the subfloor. Always test concrete for moisture before application.
- Proper Adhesive Choice: Use an adhesive specifically formulated for bonding metal to concrete and linoleum. Not all glues are created equal. Construction adhesives, polyurethane-based, or specialized flooring adhesives are usually best. Read the product label carefully.
- Sufficient Pressure: Applying firm, even pressure when you lay the trim is crucial. This helps the adhesive spread and creates maximum contact. Weights can help maintain this pressure during curing.
- Adequate Curing Time: Resist the urge to walk on or disturb the trim too soon. Adhesives need their full specified curing time to reach maximum strength. Rushing this step can lead to a weak bond that fails later.
Troubleshooting Common Issues
- Trim Not Sticking:
- Issue: Adhesive not holding.
- Solution: Recheck subfloor cleanliness and dryness. The adhesive might be old or unsuitable. Consider using a primer on porous concrete. Re-clean the area and apply fresh, appropriate adhesive.
- Excess Adhesive Squeezing Out:
- Issue: Too much adhesive used or not cleaned fast enough.
- Solution: Always wipe away immediately with a suitable solvent or damp cloth. Prevention is best; apply a moderate, consistent bead.
- Trim Lifting at Edges:
- Issue: Uneven pressure, insufficient adhesive at edges, or uneven subfloor.
- Solution: Ensure subfloor is level before bonding. Apply extra pressure to edges during initial setting. You might need to re-bond the section.
- Adhesive Drying Too Fast/Slow:
- Issue: Environmental factors or product age.
- Solution: Work in moderate temperatures. Follow product instructions. Ensure adhesive is fresh.
Long-Term Maintenance
Once bonded, gripper metal carpet trim requires little maintenance.
- Regular Cleaning: Keep the area around the trim clean. This prevents dirt from building up under the edges. Use a vacuum cleaner to remove debris.
- Check for Loosening: Periodically check the trim for any signs of loosening. Press down on it to see if it moves. If you notice any movement, address it quickly before it becomes a bigger problem.
- Protect from Heavy Impacts: While metal trim is durable, heavy impacts can damage it. Avoid dropping heavy objects directly on the trim.
By paying attention to these details, you ensure your gripper metal carpet trim bond remains secure and provides a clean, lasting finish for your floors.
Common Mistakes to Avoid When Bonding Trim
Even simple projects can go wrong if you are not careful. When bonding gripper metal carpet trim, certain mistakes can compromise the bond. Avoiding these issues helps ensure a strong, long-lasting installation. I have seen these problems firsthand, and they are easy to prevent.
Not Preparing the Subfloor Properly
This is perhaps the biggest mistake. A dirty, dusty, or damp surface will prevent any adhesive from working its best.
- Dust and Debris: Leaving even a small amount of dust acts as a barrier. The adhesive sticks to the dust, not the floor. Always sweep and vacuum thoroughly.
- Moisture: Adhesives do not bond well to wet surfaces. Concrete often holds moisture. Linoleum surfaces might seem dry but can have condensation. Ensure the subfloor is bone dry.
- Old Residues: Old glue, paint, or wax layers also stop the new adhesive from bonding directly to the subfloor. You must scrape or clean these off completely.
Using the Wrong Adhesive
All glues are not created equal. Using the wrong adhesive will lead to bond failure.
- Incorrect Material Compatibility: Some adhesives work great on wood but fail on metal or concrete. Always read the adhesive label. Ensure it specifically states compatibility with metal, concrete, and linoleum.
- Insufficient Strength: Everyday craft glues or light-duty adhesives are not strong enough. You need construction-grade or specialized flooring adhesives designed for heavy traffic areas. These provide a much stronger, more durable bond.
Applying Too Little or Too Much Adhesive
Finding the right amount of adhesive is important.
- Too Little Adhesive: If you do not apply enough, there will not be enough contact points for a strong bond. The trim might lift or detach easily.
- Too Much Adhesive: Over-applying adhesive causes it to squeeze out from under the trim. This creates a mess. It is hard to clean, especially from textured linoleum or porous concrete. Excess adhesive can also make the trim slide around before it sets.
Not Applying Enough Pressure
The adhesive needs firm contact to bond correctly.
- Lack of Pressure: Simply laying the trim down is not enough. You must press down firmly along the entire length. This ensures the adhesive spreads evenly and fills any tiny gaps.
- Insufficient Weight During Curing: For some adhesives, especially those with longer curing times, placing weights on the trim is beneficial. This maintains continuous pressure, creating a stronger bond as the adhesive sets.
Not Allowing for Full Curing Time
Patience is a virtue, especially with adhesives.
- Disturbing Too Soon: If you walk on the trim, stretch carpet onto it, or disturb it before the adhesive fully cures, you weaken the bond. This can cause the trim to loosen or detach over time.
- Ignoring Instructions: Every adhesive has specific curing times. These vary based on temperature and humidity. Always follow the manufacturer’s instructions. Do not rush the process.
By being aware of these common mistakes, you can avoid them. This helps ensure your gripper metal carpet trim is bonded securely and lasts a long time.
FAQ Section
How long does gripper trim adhesive take to dry?
The drying time for gripper trim adhesive varies. It depends on the specific adhesive type, temperature, and humidity. Most construction adhesives offer initial tack in a few hours. They need 24-72 hours for a full cure. Always check the manufacturer’s instructions on the adhesive tube for exact drying and curing times.
Can I use nails instead of adhesive for metal trim on concrete?
Yes, you can use specialized concrete nails or screws for metal trim on concrete. However, this requires a hammer drill and masonry bits. Adhesive offers a cleaner look with no visible fasteners. It also distributes stress more evenly. For linoleum, nails are generally not recommended as they can damage the subfloor and may not hold well.
What kind of adhesive is best for outdoor use with metal trim?
For outdoor use, choose a heavy-duty construction adhesive. It must be rated for exterior applications and exposure to moisture and temperature changes. Polyurethane-based adhesives are often a good choice. They offer excellent flexibility and water resistance. Ensure the product states it is suitable for outdoor concrete or appropriate outdoor surfaces.
How do I remove old adhesive from concrete before bonding new trim?
To remove old adhesive from concrete, start by scraping away loose material with a floor scraper. For stubborn adhesive, use a chemical adhesive remover designed for concrete. Always follow product safety instructions and ensure good ventilation. After removal, clean the concrete thoroughly and allow it to dry completely. For more detailed instructions, you can check out how do you remove carpet adhesive from concrete.
Can I bond metal trim to painted concrete?
It is best to remove any paint from the concrete where the trim will bond. Paint can prevent the adhesive from forming a strong bond directly with the concrete. Scrape off loose paint and rough up the remaining paint for better adhesion. Priming the area after paint removal also helps create an ideal bonding surface.
Conclusion
Bonding gripper metal carpet trim to concrete and linoleum transforms your floor transitions. It creates a neat, professional edge. You have learned the importance of proper preparation. This includes thoroughly cleaning and drying your subfloor. We covered how to select the right adhesive. You also gained step-by-step guidance for both concrete and linoleum applications. Remember that choosing the right tools, applying adhesive correctly, and allowing ample curing time are key to a successful project.
A secure bond ensures your carpet trim lasts for years. It protects your carpet edges from wear. It also enhances the overall look of your rooms. Now you have the knowledge to confidently tackle this home improvement task. Go ahead, make your floors look finished. Your home will thank you.
- carpet trim installation
- metal trim adhesive
- concrete flooring
- linoleum flooring
- DIY home projects
- floor transition

Tessa Winslow
Cleaning Expert
With years of hands-on experience in home care and a love for transforming everyday spaces, I specialize in making cleaning feel approachable and even enjoyable. I share smart, sustainable solutions that blend cleaning, organization, and decor—so your home not only looks good, but feels good too. Whether you're tackling weekend chores or taking on a full DIY refresh, I’m here to help you create a cleaner, cozier space you’ll love coming home to.