· Tessa Winslow · Home Improvement · 15 min read
How To Create Stairs After Carpet
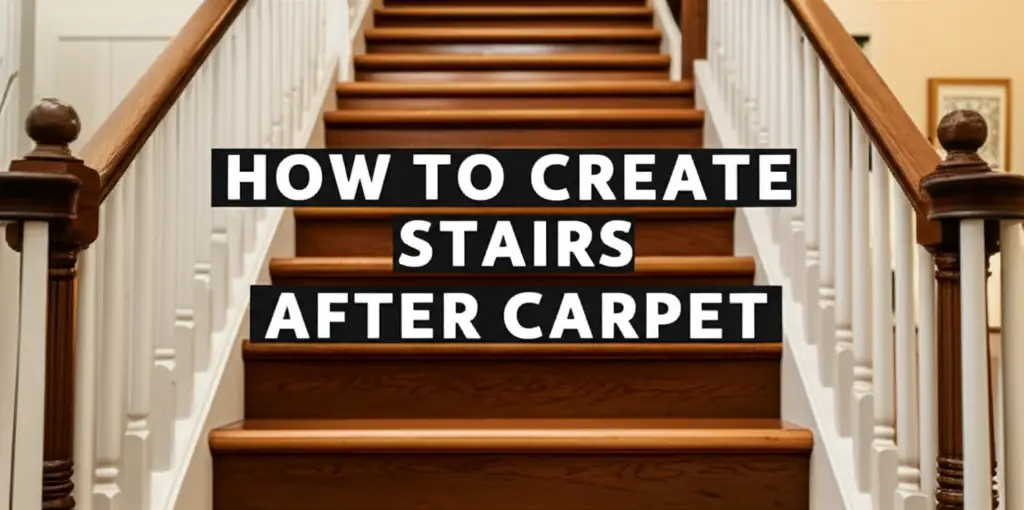
How To Create Stunning Stairs After Removing Carpet
Imagine stepping onto smooth, solid stairs instead of soft, worn carpet. Many homeowners dream of transforming their carpeted staircases. Learning how to create stairs after carpet can significantly upgrade your home’s look and feel. It also adds lasting value.
This guide walks you through each step of the renovation process. We begin with removing the old carpet. Then, we discuss preparing the sub-structure, selecting new materials, and installing each piece. Finally, we cover finishing touches for a beautiful, durable staircase. Get ready to give your home a fresh, new focal point.
Takeaway
- Assess the existing stair structure for stability.
- Carefully remove all old carpet and padding.
- Repair and prepare the underlying sub-stairs.
- Choose suitable materials like wood or laminate.
- Measure and cut new treads and risers with precision.
- Install stair components securely.
- Finish the new stairs by sanding, staining, or painting.
Clear Answer to the Main Query
To create stairs after carpet, you must first remove all existing carpet and padding. Next, prepare the underlying stair structure by making any necessary repairs. Then, install new treads and risers made from chosen materials like wood or laminate. Finally, apply a protective and decorative finish. This process transforms your staircase.
Preparing Your Stairs: The Crucial First Steps
Beginning any home renovation project requires careful preparation. Transforming your carpeted stairs is no different. The foundation of a beautiful new staircase lies in how well you prepare the existing structure. This preparation ensures stability and a smooth surface for your new materials.
I always start with a clear plan. This plan involves gathering the right tools and understanding the current state of the stairs. Skipping this stage can lead to many problems later on. A solid start makes the entire project easier.
Removing Old Carpet and Padding
First, remove all existing carpet and padding from your stairs. Use a utility knife to cut the carpet into manageable strips. This makes it easier to pull off. Start at the top stair and work your way down.
You will need a pry bar and pliers to remove carpet staples and tack strips. Be careful when working with tack strips; they have sharp points. Collect all removed materials for disposal. This step reveals the underlying stair structure. For more detailed instructions on this initial phase, you can refer to our guide on how to rip up carpet and paint stairs. This article offers helpful tips for taking up the old flooring.
Inspecting and Repairing the Sub-Stairs
Once the carpet is gone, inspect the bare wooden stairs. Look for any loose boards, squeaks, or damage. Wobbly stairs need immediate attention. Tighten any loose screws or nails. Use wood shims if there are gaps between risers and treads.
Replace any severely damaged wood. This part ensures your new stairs have a solid, stable base. I often find small issues at this stage that are easy to fix. Addressing them now prevents future problems.
Cleaning and Initial Preparation
After repairs, clean the entire staircase thoroughly. Vacuum up all dust and debris. Use a scraper to remove any remaining adhesive or carpet fibers. The surface must be clean and smooth for the new materials to adhere well.
Any bumps or rough spots will show through your new treads. Take your time with this cleaning step. It sets the stage for a professional-looking finish. A well-prepared surface is key to a successful renovation.
Choosing Materials for Your New Stairs
Once your stairs are ready, you need to select the materials for your new treads and risers. This choice impacts the look, durability, and cost of your project. There are several popular options available. Each material offers different benefits.
Think about your home’s style and your budget. Consider how much traffic your stairs will receive. My own preference often leans towards natural wood for its classic appeal.
Wood Treads and Risers
Solid wood treads are a popular choice. Hardwoods like oak, maple, or hickory offer great durability. They provide a timeless, elegant look. Pine is a more budget-friendly option, but it is softer and may show wear faster. Wood veneers also exist. These are thin layers of real wood over a core material.
Veneer options can lower costs. Solid wood stairs can last for many decades. They also add significant value to your home. Consider the wood grain and color before making a decision.
Laminate and Vinyl Options
Laminate and vinyl are cost-effective alternatives to solid wood. Laminate treads and risers offer a wide range of styles. They often mimic the look of natural wood or stone. Vinyl is durable and water-resistant. Both materials are relatively easy to clean and maintain.
Installation of laminate or vinyl can be simpler for a DIY enthusiast. However, they may not offer the same longevity or feel as solid wood. They are a good choice for those on a tighter budget. They still provide a beautiful transformation.
Stair Overlays
Stair overlays provide a quicker solution for existing stair structures. These are pre-fabricated caps that fit over your old treads and risers. They come in various materials, including wood and laminate. Overlays can save time and effort compared to full replacement.
They work best when the existing stairs are in good condition. You simply clean and level the old surface, then adhere the overlays. This method can give an updated look without major reconstruction. While this is different from covering ugly carpet permanently, it’s a way to transform the look efficiently once the carpet is gone.
Accurate Measuring and Cutting for Perfect Fits
Precision is very important when installing new stair components. Every tread and riser must fit perfectly. Errors in measurement or cutting can lead to gaps or uneven surfaces. This affects both the look and safety of your stairs.
I always double-check my measurements. It saves time and material in the long run. Proper planning at this stage makes installation much smoother.
Measuring Treads and Risers
Each stair step may have slight variations in size. Do not assume all steps are identical. Measure each tread and riser individually. Use a stair gauge or a sliding T-bevel for accurate angles. Record all measurements carefully.
Measure the depth and width of each tread. Also, measure the height of each riser. Remember to account for the nosing. Nosing is the front edge of the tread that extends over the riser below it. Consistent measurements ensure a professional finish.
Cutting Materials Safely and Precisely
Use a miter saw or a circular saw for cutting your materials. Always wear safety glasses and hearing protection. Cut each piece slightly larger than your measurement. Then, trim it down for a perfect fit. This method allows for fine adjustments.
Test fit each piece before applying adhesive or fasteners. A dry fit ensures everything aligns correctly. Mark the top and bottom of each piece. This prevents confusion during installation.
Planning the Installation Sequence
Planning the installation sequence is important. Most people start installing new stairs from the bottom up. This allows you to work your way up the staircase. It also makes it easier to walk on the newly installed treads.
You can also start from the top. This method avoids walking on wet adhesive or fresh finishes. No matter your choice, ensure you have enough materials and time to complete a section. Decide if you will install risers or treads first. I usually do risers, then treads.
Installing New Treads and Risers with Confidence
With your materials cut and ready, it is time for installation. This step brings your new staircase to life. Proper installation ensures durability and a clean, professional appearance. Taking care at each stage helps prevent common mistakes.
Remember, a secure fit is crucial for stair safety. I focus on making each connection strong. This gives me peace of mind about the finished product.
Securing Risers First
Begin by installing the risers. These are the vertical pieces between each step. Apply construction adhesive to the back of the riser and the stair frame. Place the riser firmly against the existing structure. Use a level to ensure it is plumb.
Secure the riser with finish nails or screws. Drive fasteners into the top, bottom, and sides. Countersink the nail heads for a smooth finish later. Make sure the riser is stable before moving on. This provides a solid base for the tread.
Installing Treads and Nosing
Next, install the treads. Apply construction adhesive to the top of the existing stair structure and the top edge of the riser below. Place the new tread on top, pushing it firmly into place. Ensure the nosing overhangs consistently. Nosing usually extends about 1 inch over the riser.
Secure the tread with finish nails or screws. Drive fasteners through the top of the tread into the riser and the stringers. Again, countersink all fastener heads. A tight fit prevents squeaks and movement. Make sure each tread is level before moving to the next.
Addressing Gaps and Imperfections
Even with careful measuring, small gaps may appear. Use wood filler to fill any small gaps or nail holes. Apply it smoothly with a putty knife. Let it dry completely.
For larger gaps, you might use caulk that matches your wood or paint color. Sand any excess filler once dry. This step creates a seamless look. It prepares the surface for finishing. A smooth surface is important for a good final appearance.
Finishing Touches: Sanding, Staining, and Sealing
The finishing process brings out the true beauty of your new stairs. This stage involves preparing the wood, applying color, and protecting the surface. A well-executed finish enhances the grain of the wood. It also protects against daily wear and tear.
I find this part very rewarding. It is where all your hard work truly shows. Take your time to achieve a lasting and beautiful result.
Preparing for Finish: Sanding
Sanding is a critical step for a smooth finish. Start with a coarse-grit sandpaper (around 80-grit) to remove any imperfections. Gradually move to finer grits (120-grit, then 220-grit). This progression removes scratches and smooths the wood.
Use a hand sander for treads and a sanding block for edges and corners. After each sanding stage, vacuum thoroughly to remove all dust. Dust can affect how stain or paint adheres. A clean, smooth surface is essential for a beautiful finish. If you plan to paint, proper sanding is still key, as outlined in our guide on how to rip up carpet and paint stairs.
Staining or Painting Your New Stairs
Decide if you want to stain or paint your stairs. Staining highlights the natural wood grain. Apply stain evenly with a brush or cloth. Wipe off any excess after a few minutes. Allow each coat to dry completely before applying another. Follow the product instructions for drying times.
Painting offers a uniform, solid color. Use a primer first, especially on new wood. Then apply two or more coats of durable floor or porch paint. Use a good quality brush for smooth application. Paint provides a protective layer.
Applying Protective Topcoats
After staining or painting, apply a protective topcoat. Polyurethane is a common choice. It creates a durable, clear layer that resists scratches and wear. Apply multiple thin coats.
Lightly sand between coats with a very fine-grit sandpaper (e.g., 220 or 320-grit). This creates better adhesion for subsequent coats. Remove all dust before applying the next layer. Three or more coats usually provide good protection. Allow the final coat to cure fully before heavy use.
Adding Safety and Style: Railings and Balusters
A staircase is more than just steps; it includes safety features like railings and balusters. These elements provide support and prevent falls. They also contribute significantly to the overall aesthetic of your staircase. It is important to meet local building codes.
Installing these components properly is essential for both function and beauty. I always prioritize safety in my designs. A sturdy railing system makes a big difference.
Understanding Stair Codes and Safety
Before installing railings, understand local building codes. Codes specify handrail height and baluster spacing. Most codes require handrails to be between 34 and 38 inches high. Balusters typically must be spaced so a 4-inch sphere cannot pass through.
These rules ensure safety, especially for children. Check with your local building department if you are unsure. Compliance with codes is not just for inspections; it is for the safety of everyone using your stairs.
Installing New Handrails
Install handrails firmly to wall studs or newel posts. Use strong brackets and screws. Ensure the handrail is comfortable to grip. It should offer continuous support from top to bottom.
Handrails prevent slips and falls. They are a necessary safety feature. Align them properly for a clean look. A well-secured handrail feels solid and dependable.
Adding Balusters for Support and Style
Balusters are vertical supports that fill the space between the handrail and the treads. They come in various materials and designs, including wood, iron, or a mix. Space them evenly according to code. Attach them securely to the treads and the handrail.
You might use pins, screws, or specialized connectors. Balusters add an important safety barrier. They also provide a significant decorative element. Choose a style that complements your new stairs and home decor.
Maintenance and Longevity of Your Transformed Stairs
Your newly created stairs are a significant investment. Proper maintenance ensures they remain beautiful and functional for many years. Regular care protects the wood and its finish from wear and tear. This helps maintain the home’s value.
I believe that good maintenance habits save money and effort in the long run. A little care goes a long way. Let us discuss how to keep your stairs looking new.
Regular Cleaning Practices
Keep your new stairs clean by sweeping or vacuuming regularly. Dust and grit can act like sandpaper, scratching the finish. Use a soft, damp cloth for spills. Avoid harsh chemical cleaners. These can damage the wood or the protective topcoat.
For wood stairs, use a wood-specific cleaner if needed. Clean spills quickly to prevent staining or water damage. Regular, gentle cleaning preserves the finish. It keeps your stairs looking fresh.
Protecting Against Wear and Tear
Consider adding runners or area rugs at the top and bottom of your stairs. These can protect high-traffic areas from excessive wear. Avoid dragging heavy furniture or sharp objects up or down the stairs. This can cause deep scratches or dents.
Use furniture pads on any items you move. Small protective measures prevent big problems. They extend the life of your stair finish. Good habits protect your investment.
Addressing Minor Damage
Even with care, minor damage can occur. Keep a small amount of your stain or paint for touch-ups. For small scratches, you might use a wood repair marker or wax stick. Deeper scratches may require light sanding and refinishing of the affected area.
If the protective topcoat wears thin in spots, apply a fresh coat. Addressing minor damage quickly prevents it from worsening. This proactive approach keeps your stairs looking their best. It avoids the need for major repairs later.
FAQ Section
How long does it take to convert carpeted stairs to wood stairs?
The time it takes depends on your skill level and the complexity of your stairs. It can take anywhere from a few days to a few weeks. Removing carpet and preparing the surface is the first step. Installation and finishing steps follow. Repairs to the underlying structure can add time.
Can I paint my existing stair treads instead of replacing them?
Yes, you can often paint your existing stair treads. First, remove the carpet and thoroughly clean and sand the treads. Apply a good primer, then multiple coats of durable floor paint. This option works best if your existing treads are structurally sound. For more details on this specific option, see our guide on how to rip up carpet and paint stairs.
What are the best wood types for stairs?
Hardwoods like oak, maple, and hickory are excellent choices for stair treads. They offer superior durability and resistance to wear. Pine is a more affordable option, but it is softer and can dent more easily. The best choice depends on your budget and desired level of durability.
Do I need professional help to create stairs after carpet?
You can do this project yourself if you have basic carpentry skills and tools. Many homeowners successfully tackle this DIY renovation. However, for complex stair structures or if you lack confidence, hiring a professional carpenter or stair installer is a good idea. Professionals ensure safety and a high-quality finish.
What tools are essential for this project?
Essential tools include a utility knife, pry bar, pliers, measuring tape, and a level. You will also need a miter saw or circular saw for cutting wood. A power sander is important for finishing. A drill, hammer, and various adhesives and fasteners are also necessary.
How can I make my new stairs less slippery?
To make new stairs less slippery, consider adding a stair runner. You can also apply anti-slip strips or coatings directly to the treads. Some paints and sealants offer textured finishes for added grip. These measures increase safety, especially in homes with children or elderly residents.
Conclusion
Transforming your carpeted stairs into beautiful, durable stairs is a rewarding home improvement project. You have learned how to create stairs after carpet. This journey takes you from stripping away old floor coverings to installing new treads and applying perfect finishes. We covered preparing the sub-structure, choosing materials, and ensuring precise installation.
Remember, patience and careful work lead to the best results. Your new stairs will not only enhance your home’s


