· Tessa Winslow · Home Improvement · 18 min read
How To Combine Carpet Runners On Stairs
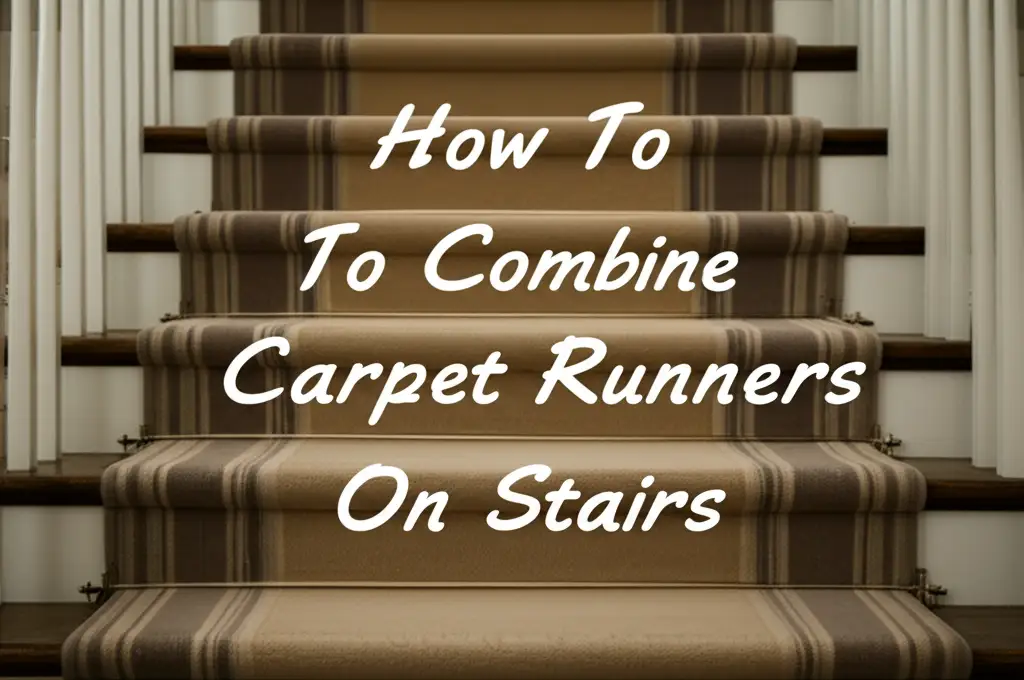
Seamless Style: How to Combine Carpet Runners on Stairs
Stairs are often a central feature in many homes. They offer a great chance to add personal style. Carpet runners bring warmth, reduce noise, and add safety to these high-traffic areas. You might wonder if you can combine carpet runners on stairs to cover longer staircases or create a specific design.
Yes, you can certainly combine multiple carpet runners to achieve a continuous or unique look. This approach allows for more design flexibility, especially on long or winding staircases. It means you are not limited by standard runner lengths. This guide helps you understand the process. We will cover everything from planning your project to making sure the seams look invisible. You will learn about choosing the right materials and the best installation methods. Get ready to transform your staircase into a true statement piece.
Takeaway:
- Careful planning and precise measurements are essential for success.
- Choose the right carpet type and joining method for durability and appearance.
- Proper tools and techniques ensure seamless integration of multiple runners.
- Prioritize safety by securing runners firmly to prevent slips.
- Regular maintenance extends the life and beauty of your stair runners.
How to Combine Carpet Runners on Stairs: A Quick Answer
To combine carpet runners on stairs, you must carefully measure and select runners with matching patterns or textures. Use specialized seaming tape, adhesive, or professional carpet seaming tools to join the runner ends on a flat surface or a stair tread. Ensure the connection is strong and virtually invisible for a smooth, unified appearance and lasting durability.
Understanding Your Staircase and Runner Needs
Before you start, get to know your stairs. Every staircase has unique features. Knowing these features helps you plan correctly for combining carpet runners. This step makes sure you get the right materials and tools.
Consider the length and width of your staircase. Measure each step, including the tread (where you step) and the riser (the vertical part). Pay attention to any turns or landings. Straight stairs are simpler, but turns need extra thought. A long staircase will definitely need more than one runner. Knowing the exact dimensions helps you determine how many runners you need and how long is a carpet runner.
Think about your lifestyle too. Do you have pets or small children? If so, durability is important. A high-traffic area requires a more robust carpet material. Consider the existing floor underneath. Is it wood, tile, or something else? This affects how you attach the runners. Sometimes, you might need to prepare the stairs first, especially if you plan to rip up carpet and paint stairs. This preparation ensures a clean and strong base for your new runners.
Types of Staircases and Their Impact
Different stair types present different challenges for combining runners.
- Straight Stairs: These are the easiest. You can simply run multiple pieces down in a straight line. Seams will appear at the end of a tread or riser.
- Winding or Curved Stairs: These are more complex. Runners need careful cutting and shaping. You might use smaller pieces around curves.
- Stairs with Landings: Landings break up the staircase. You can treat the landing as a separate carpeted area. Then you combine runners on the steps leading to and from it. This offers a natural break point for your seams.
Understanding your staircase layout helps you visualize where seams will fall. This knowledge also helps you decide on the best joining method.
Choosing the Right Runners and Materials
Selecting the correct carpet runners and joining materials is crucial for a successful project. Your choices directly affect how good the finished stairs look and how long they last. Do not rush this step.
First, think about the carpet material itself. Natural fibers like wool offer a luxurious feel and good durability. Synthetic fibers, such as nylon or polyester, often resist stains better and are more affordable. Consider the pile height. A lower pile height usually holds up better on stairs. It also makes seams less noticeable. High pile can look cozy but might show seams more and compress faster with foot traffic. The pattern also matters. A busy pattern can hide seams well, while a plain or striped runner requires more precise matching.
Next, choose your joining method. For DIY, carpet seaming tape is common. This tape is heat-activated or pressure-sensitive. It creates a strong bond between two carpet pieces. For a more professional look, you might use carpet adhesive and a specific seaming iron. Ensure the adhesive is suitable for the carpet material and stair type. You will also need padding. A good quality underlayment adds comfort and extends the life of the runner. It also helps dampen sound.
Essential Tools for Seamless Joining
Having the right tools makes the job much easier and yields better results.
- Measuring Tape: For accurate measurements of steps and runner lengths.
- Utility Knife or Carpet Cutter: A sharp blade is vital for clean, straight cuts. Change blades often.
- Straight Edge or T-Square: Ensures cuts are perfectly straight, which is critical for invisible seams.
- Carpet Seaming Iron (for heat-activated tape): Heats the seaming tape to create a strong bond.
- Seam Roller: Presses the seam firmly after heating or applying adhesive. This ensures good adhesion and flattens the pile.
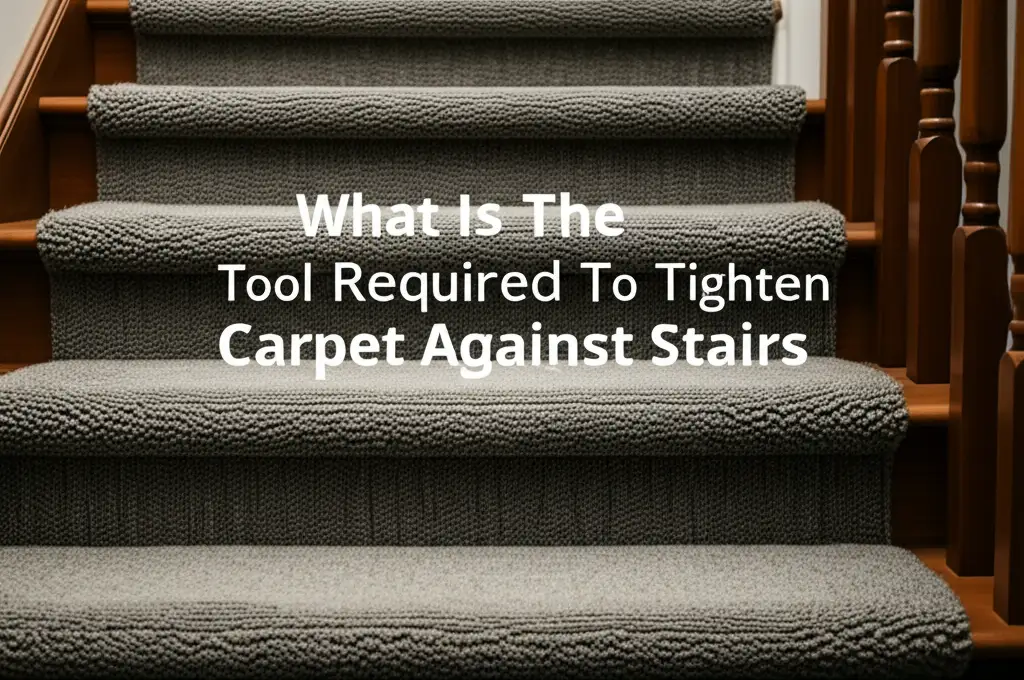
- Staple Gun or Tack Strips: To secure the runners to the stairs. A tool required to tighten carpet against stairs can be very helpful here.
- Knee Kicker (optional but recommended): Helps stretch the carpet to remove wrinkles and ensure a tight fit.
- Carpet Adhesive (if not using seaming tape): For a permanent bond, especially on treads.
- Gloves and Safety Glasses: Always protect yourself.
Gathering these tools before you start saves time and frustration. It also helps you achieve a professional-looking finish when you combine carpet runners.
Preparing Your Stairs for Installation
Proper preparation of your staircase is a vital step before you start installing carpet runners. This ensures a smooth installation process and a lasting finish. Skipping this part can lead to bumps, unevenness, or runners that do not stay in place.
First, thoroughly clean the stairs. Vacuum away any dust, dirt, or debris. If your stairs were previously carpeted, remove any old staples, tack strips, or adhesive residue. You want a completely clean and flat surface. If the stairs are bare wood, check for loose boards or squeaks. Fix these issues now. Sand down any rough spots or splinters. This not only creates a smoother base for your runner but also prevents damage to the new carpet or your hands during installation. If you are starting with ugly carpet on stairs, you might want to remove it completely before preparing the wood underneath.
Next, consider applying a coat of paint or stain to the parts of the stairs that will remain exposed. This is often the edges of the treads and risers. Doing this before installation saves you from tedious touch-ups later. It also creates a polished look around your new runners. Ensure the paint or stain is completely dry before proceeding. Finally, decide on your padding. Cut padding to fit each tread or tread and riser. This underlayment adds comfort, reduces noise, and protects the runner from wear. Secure the padding with staples. This creates a soft, consistent base for your runners.
Measuring and Cutting Your Runners
Accurate measurements are key to a successful installation when you combine carpet runners. Take your time with this step.
- Measure Each Tread and Riser: Use your tape measure to find the exact width of each tread and the height of each riser. Also, measure the depth of the tread. If you plan a waterfall style (where the runner drapes over the nose of the tread), add a few inches for this.
- Determine Runner Lengths: Decide where your seams will fall. For the most invisible look, try to place seams at the back of a tread, against the riser. Measure from the base of the bottom riser up to the desired seam point. If you have a very long runner, you might cut it into sections to make handling easier.
- Account for Overlap: When cutting sections that will be joined, add an extra 2-3 inches to each end that will be seamed. This extra material allows for trimming and ensures a perfect match.
- Cut with Precision: Lay the runner face down on a clean, flat surface. Use a straight edge and a sharp utility knife to make your cuts. Always cut from the back of the carpet. This helps keep the pile intact on the face. Make sure your cuts are perfectly straight. Any angle will make the seam visible. Remember, measure twice, cut once!
Joining Carpet Runners for a Seamless Look
This is the core of the project: creating invisible seams between your carpet runners. This step requires precision and patience. The goal is to make the joint look like a single piece of carpet.
Start by laying out the two runner pieces you plan to join. Position them face down on a clean, flat surface. You want the ends to butt up against each other perfectly. Ensure any patterns align, or if it is a solid color, check that the pile direction is consistent. The factory edges are often the best for joining. If you cut the ends yourself, make sure your cuts are perfectly straight and clean. Any frays or unevenness will show in the final seam.
Next, apply your chosen seaming method. For heat-activated seaming tape, lay the tape sticky-side up directly under the seam line. Make sure it runs the full width of the joint. Carefully align the carpet edges over the tape. Then, use a seaming iron to slowly move along the seam line, heating the tape. The adhesive will melt and bond the carpet fibers. As you iron, press the carpet edges firmly together. For adhesive-based joining, apply the adhesive evenly along one edge, then press the other edge onto it. Use a seam roller to press down firmly over the entire seam once the adhesive has set or the tape has cooled. This ensures maximum adhesion and flattens the pile for an almost invisible seam.
Step-by-Step Seaming Process
Let’s break down the seaming process for clarity.
- Prepare the Seam Edges:
- Lay both runner pieces face down.
- Overlap the two ends slightly, about 1-2 inches.
- Using a straight edge and a sharp utility knife, make a single, clean cut through both layers of carpet. This creates two perfectly matching edges. This is called a “double-cut” seam.
- Remove the excess trimmed carpet.
- Position Seaming Tape:
- Place a strip of heat-activated seaming tape, adhesive side up, directly under the joint line on your prepared stairs or floor. Ensure the tape extends a few inches beyond each end of the seam.
- Align Carpet Edges:
- Carefully bring the two cut edges of the carpet together. Butt them firmly against each other over the center of the seaming tape. Make sure there are no gaps or overlaps. The pile should look continuous.
- Apply Heat and Pressure:
- Plug in your carpet seaming iron and let it heat up.
- Place the hot iron directly onto the seam, moving it slowly along the length. As the iron moves, the adhesive on the tape melts.
- Immediately behind the iron, use a seam roller to press down firmly on the newly joined carpet. This forces the carpet backing into the melted adhesive. It also helps flatten the pile.
- Work in sections, moving the iron and roller smoothly.
- Allow to Cure:
- Once the entire seam is complete, do not disturb it for several hours. This allows the adhesive to cool and fully cure. This creates a strong, lasting bond.
This detailed process helps you achieve a truly professional-looking seam when you combine carpet runners on stairs.
Installing Your Combined Runners on Stairs
Once your carpet runners are seamlessly joined, the next step is to install them firmly on your stairs. Proper installation ensures safety, durability, and a polished appearance. A poorly installed runner can shift, creating trip hazards.
Begin at the top of the staircase. This makes it easier to work your way down. Position the start of your runner on the top riser, or at the very top edge of the first tread, depending on your desired look. Use a staple gun to secure the top edge of the runner. Place staples every 2-3 inches across the width of the runner, close to the edge. Pull the runner taut as you go. This prevents wrinkles and buckling. You want the runner to hug the stair contours tightly.
Next, work your way down each step. Decide if you prefer a “waterfall” or “Hollywood” installation style. Waterfall involves letting the runner drape over the nose of the tread naturally. Hollywood involves wrapping the carpet tightly around the nose and stapling underneath. The Hollywood style typically requires a tool required to tighten carpet against stairs to achieve that crisp, tailored look. Secure the runner at the back of each tread, where it meets the riser, and then at the bottom of each riser, where it meets the next tread. Ensure staples are hidden along the edges or under the tread nose. Make sure to keep the runner centered on the stairs as you descend.
Securing the Runner for Safety and Longevity
Securing the runner well is not just about looks; it is about safety. A loose runner is a serious fall risk.
- Staple Placement: Use enough staples. For each tread and riser, staple at the back crease (where the tread meets the riser) and along the underside of the nose of the tread. Space staples every 2-3 inches. This keeps the runner from shifting.
- Stretching the Carpet: As you move down, use a knee kicker or similar tool to push the carpet firmly into the crease of each step. This stretches the carpet slightly, removing slack and preventing future wrinkles. This also helps the runner conform tightly to the stair shape.
- Edge Finishing: Once the runner is fully installed, trim any excess carpet at the bottom of the last riser. Neatly fold the edge under and secure it with staples. For visible side edges, ensure they are consistently spaced from the stair edge. This creates a clean border.
- Adhesive Reinforcement (Optional): For extra security, especially on very high-traffic stairs, you can apply a thin bead of carpet adhesive along the very back edge of each tread before stapling. This provides a double layer of security to keep a carpet down.
By following these securing tips, your combined carpet runners will remain firmly in place. They will provide a safe and beautiful pathway for years to come.
Maintenance and Care for Combined Runners
Maintaining your combined carpet runners properly ensures they stay beautiful and last for many years. Regular care also helps keep your staircase safe and clean. Since your runners are a prominent feature, they will see a lot of foot traffic.
Start with routine vacuuming. Use a vacuum cleaner with strong suction to remove dirt and dust. Pay extra attention to the seams and the edges of the runners, as dirt can accumulate there. For deeper cleaning, consider professional carpet cleaning every 12-18 months. This helps remove embedded dirt and revitalize the carpet fibers. Address spills immediately. Blot liquid spills with a clean cloth. Never rub, as this can spread the stain. For solid messes, gently scrape them off before cleaning. Use a mild carpet cleaner suitable for your runner’s material. Always test the cleaner on an inconspicuous spot first to ensure it does not damage the color or fabric.
Regularly inspect your runners for any signs of wear, especially at the seams and on the nosing of the treads. If you notice any loose staples, re-secure them promptly with your staple gun. If a seam starts to separate, reapply heat with your seaming iron or use a strong carpet adhesive to re-bond the edges. Addressing small issues quickly prevents them from becoming bigger, more expensive problems. By committing to these simple maintenance steps, your combined carpet runners will continue to enhance your home’s appearance and provide a soft, safe surface for your stairs.
Addressing Common Issues with Seams
Even with careful installation, issues can sometimes arise with combined carpet runner seams. Knowing how to fix them helps maintain the look of your stairs.
- Visible Seams: If a seam becomes too visible, it might be due to improper alignment or insufficient bonding. Try re-heating the seam with a seaming iron, ensuring the carpet edges are tightly butted together. Then, press firmly with a seam roller. If the pile is crushed, gently brush it with a stiff brush to help it stand up.
- Fraying Edges: If the carpet edges at the seam start to fray, this usually means the cut was not clean enough, or the bond is weakening. You can apply a very thin line of carpet seam sealer (a liquid adhesive) along the underside of the seam. This helps to lock the fibers in place.
- Bubbling or Wrinkling Near Seams: This can happen if the carpet was not stretched tight enough during installation. Use a knee kicker to stretch the carpet and push it towards the seam. Then, re-staple the carpet firmly to remove the bubble. You may need to lift nearby sections to achieve proper tension.
Quick action on these issues keeps your stair runners looking their best. It prevents minor flaws from degrading the overall appearance and function of your combined runners.
Creative Ideas for Combining Runners
Combining carpet runners does not just have to be about creating a continuous line. It opens up a world of creative design possibilities for your stairs. Think beyond simple straight lines. This approach allows you to inject unique style and personality into your home.
One idea is to use different patterns or colors for alternating treads or sections. For example, you could have a solid color runner on one set of stairs and a striped runner on the next flight, joining them at a landing. Or, use a bold, patterned runner for the main staircase and a simpler, complementary color for a smaller, less visible set of steps. This creates visual interest and defines different zones in your home. You can also experiment with the runner’s width. While most runners are a standard width, you could combine custom-cut pieces to make a wider runner for a grand staircase or a narrower one for a tight space. This personalized approach truly tailors the carpet to your home’s unique dimensions.
Consider adding decorative elements at the seams or ends. Carpet binding tape can finish the raw edges of your runner, but it can also be used in a contrasting color to highlight the transition between two different runners. For a rustic or antique feel, you might even consider adding decorative stair rods over the seams. These rods not only add a touch of elegance but also provide an extra layer of security, holding the carpet more firmly in place. Remember, your staircase is a canvas. Combining runners offers an excellent chance to showcase your creativity and make a truly memorable statement in your home.
Frequently Asked Questions
Can I combine carpet runners with different patterns?
Yes, you can combine runners with different patterns. This creates a bold, custom look. However, ensure the colors or textures are complementary. You might want to use a solid color to separate two different patterns. Careful planning is essential to make sure the combined patterns look intentional and not mismatched.
Is combining carpet runners a DIY-friendly project?
Yes, combining carpet runners is a DIY-friendly project for someone with basic home improvement skills. The key steps involve accurate measuring, clean cutting, and careful seaming. While it requires patience and precision, most homeowners can achieve good results with the right tools and guidance.
Where is the best place to hide the seam when combining runners?
The best place to hide a seam is at the back of a tread, right where it meets the riser. This natural crease helps to conceal the joint from direct view. On straight stairs, aim to place seams consistently at this point. On landings, you can place a seam where the runner meets the landing’s edge.
How long does it take for the carpet seam to cure?
The curing time for a carpet seam depends on the type of adhesive or seaming tape used. For heat-activated seaming tape, the bond forms as it cools, usually within 30-60 minutes. However, it is best to avoid heavy foot traffic for at least 24 hours to allow the adhesive to fully set and create a strong, lasting bond.
What if my stairs are not perfectly straight?
If your stairs are not perfectly straight, combining runners becomes more complex. For winding stairs, you will need to cut the runner in smaller pieces and shape each piece to fit the curve of the tread. This might involve more cuts and seams. It is often best to consult a professional for curved stairs.
Can I use super glue to combine carpet runners?
No, you should not use super glue to combine carpet runners. Super glue provides a brittle, inflexible bond that will not hold up to foot traffic. It can also damage the carpet fibers. Always use specialized carpet seaming tape or professional carpet adhesive designed for this purpose.
Conclusion
Combining carpet runners on stairs is a powerful way to enhance your home’s aesthetics and functionality. It allows you to create a truly unique look that fits your style. You have learned that careful planning and precise execution are key to success. This includes understanding your staircase, selecting the right materials, and mastering the art of the invisible seam.
From preparing the stairs to securing the runners, each step plays a vital role. Remember the importance of choosing quality carpet, precise measurements, and using the correct tools. These elements ensure your combined runners are not only beautiful but also durable and safe. Regular maintenance will keep your new stair runners looking fresh and extending their lifespan. Do not be afraid to add your creative touch. Your staircase can become a stunning focal point. We encourage you to start your own stair transformation project. Your home will thank you for it!
- Stair Runners
- Carpet Installation
- DIY Home Decor
- Stair Renovation
- Home Improvement Project

Tessa Winslow
Cleaning Expert
With years of hands-on experience in home care and a love for transforming everyday spaces, I specialize in making cleaning feel approachable and even enjoyable. I share smart, sustainable solutions that blend cleaning, organization, and decor—so your home not only looks good, but feels good too. Whether you're tackling weekend chores or taking on a full DIY refresh, I’m here to help you create a cleaner, cozier space you’ll love coming home to.