· Tessa Winslow · Home Improvement · 17 min read
Bathtub To Shower Drain Conversion
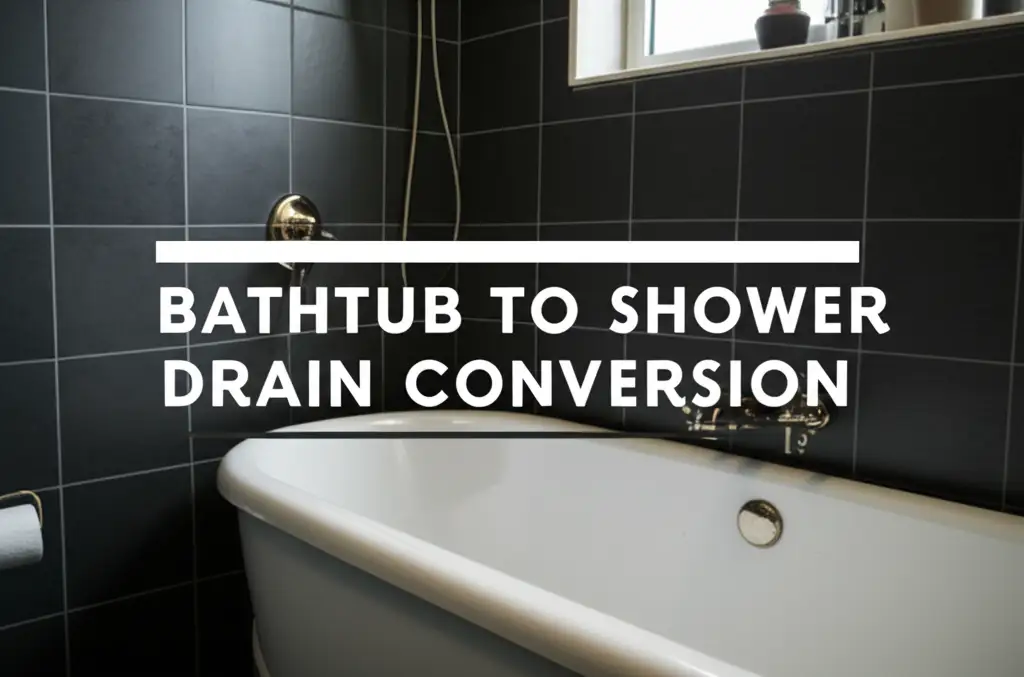
Bathtub To Shower Drain Conversion: Your Expert Guide
Have you ever considered upgrading your bathroom? Many homeowners dream of transforming their old bathtub into a modern, spacious shower. A bathtub to shower drain conversion is a popular home improvement project. It offers many benefits, from improving accessibility to giving your bathroom a fresh, updated look. This process involves more than just removing a tub. It requires careful planning and understanding of your plumbing.
Converting a bathtub to a shower means changing the drain setup, installing a new shower pan, and re-tiling the area. This guide will walk you through the entire process. We will cover everything from initial planning to connecting the new drain. You will learn about necessary tools, materials, and common challenges. My goal is to help you understand each step. This way, you can decide if a DIY project is right for you, or when to call a professional.
Takeaway
- Assess Existing Plumbing: Understand your current drain size and venting. This is key for a successful conversion.
- Plan Your Layout: Choose a shower pan or base that fits the space. Consider accessibility and design.
- Prioritize Waterproofing: Proper waterproofing prevents leaks and protects your subfloor. This step is critical.
- Match Drain Connections: Ensure the new shower drain connects correctly to existing pipes. Different shower types may need different drain setups.
- Consider Professional Help: For complex plumbing or structural changes, hire a licensed plumber or contractor. This ensures safety and compliance.
What is the primary process for a bathtub to shower drain conversion?
Converting a bathtub to a shower drain primarily involves removing the old tub, adjusting the drain pipe’s height and position to accommodate a new shower pan or base, ensuring proper P-trap and venting, and then installing the new shower drain system. This often includes reconfiguring the supply lines and waterproofing the new shower area.
Why Convert Your Bathtub to a Shower? Modernizing Your Bathroom
Many people are considering a bathtub to shower drain conversion today. There are several good reasons for this growing trend. Converting your bathroom can greatly improve its function and look. It often creates a more open and usable space.
One main benefit is increased accessibility. Walk-in showers are much easier to enter and exit than traditional bathtubs. This is especially helpful for older adults or people with mobility challenges. You eliminate the high wall of a tub, making the bathroom safer for everyone. This change supports independent living.
A shower conversion also updates your bathroom’s style. Bathtubs can look dated over time. A sleek, modern shower can give your entire bathroom a fresh, contemporary feel. You can choose from various tile patterns, fixtures, and glass enclosures. This allows for a personalized design that truly reflects your taste. It can make your bathroom feel like a spa.
Showers can also be more water-efficient than bathtubs. Taking a short shower generally uses less water than filling a bathtub. This can save you money on your water bill over time. It also helps conserve a valuable resource. Modern shower heads often have low-flow options that maintain good water pressure.
Lastly, converting to a shower can add value to your home. Many prospective buyers prefer a walk-in shower, especially in a primary bathroom. It can make your home more appealing on the market. This type of renovation shows potential buyers that the home is well-maintained and updated. It is a smart investment for your future.
Planning Your Bathtub to Shower Conversion Project
Careful planning makes any home renovation project smoother. A bathtub to shower drain conversion is no exception. Before you pick up any tools, think about your goals and resources. This includes your budget, the design you want, and any necessary permits.
First, consider your budget. Conversion costs vary widely. They depend on factors like materials, whether you hire professionals, and the complexity of your existing plumbing. Set a realistic budget from the start. This will help you make choices about materials and labor. Don’t forget to include a contingency fund for unexpected issues.
Next, think about the design of your new shower. Do you want a simple shower pan or a custom tiled base? What kind of tiles will you use for the walls? Will you install a single shower head or add features like body jets? These choices impact both cost and labor. Sketching out your ideas helps visualize the final look.
You must also check local building codes and permit requirements. Many plumbing and structural changes require a permit from your local authority. Skipping this step can lead to fines or problems when selling your home. A permit ensures your project meets safety and quality standards. It is always better to be safe and compliant.
Finally, assess your existing bathroom space. Measure carefully to ensure your chosen shower pan or base will fit. Consider the condition of your subfloor and walls. You might need to make repairs or reinforcements before starting the conversion. Understanding your current setup helps avoid surprises later.
Understanding Your Drain System: Bathtub vs. Shower
The drain system is a critical part of any bathtub to shower drain conversion. Bathtub drains and shower drains are different. Understanding these differences is key to a successful project. You must make sure the new shower drain connects correctly to your existing plumbing.
Bathtub drains typically sit lower to the floor compared to shower drains. A bathtub often has its drain opening about 2 inches above the subfloor. A shower pan, on the other hand, usually requires the drain to be nearly flush with the subfloor. This difference in height means you will likely need to adjust your drain pipe. You might need to cut the vertical drain pipe lower.
The size of the drain opening can also differ. Most bathtubs use a 1.5-inch drain pipe. Many modern showers use a 2-inch drain pipe for better flow. This is important for handling the higher volume of water from a shower head. If your existing drain pipe is 1.5 inches, you may need to upgrade it to 2 inches. This ensures proper drainage and meets current plumbing codes. For more information on drain pipe materials, you might want to read about ABS vs PVC shower drain. Choosing the correct material is important for longevity and code compliance.
Every drain system needs a P-trap. The P-trap is a U-shaped bend in the pipe that holds water. This water seal prevents sewer gases from entering your home. When converting, you must ensure the new shower drain has a properly installed P-trap. It needs to be accessible for future cleaning or repairs. A properly sized and vented P-trap is essential for healthy plumbing.
Venting is another crucial part of your drain system. Vent pipes allow air into the drain system. This prevents a vacuum from forming, which could suck water out of the P-trap. Your new shower drain needs proper venting to function correctly. If your existing vent is not adequate for the new shower setup, you might need to add or extend one. Proper venting prevents gurgling noises and ensures smooth drainage.
Essential Tools and Materials for Your Conversion
A successful bathtub to shower drain conversion requires the right tools and materials. Having everything ready before you start saves time and frustration. Let’s break down what you will need.
For demolition, you will need basic hand tools. A pry bar is essential for removing the bathtub and surrounding tiles. A hammer and chisel help with stubborn grout or old mortar. A utility knife is useful for cutting caulk and various materials. Safety gear like gloves, eye protection, and a dust mask are non-negotiable. Protecting yourself from dust and debris is important.
For plumbing work, you will need pipe cutters suitable for your drain material, like PVC or ABS. A tape measure helps with precise cuts. A level ensures your new shower pan sits perfectly flat. Plumber’s putty, pipe glue (for PVC/ABS), and thread sealant are necessary for leak-free connections. A wrench set will help tighten drain fittings. Remember, proper plumbing connections prevent future problems.
When it comes to new materials, the shower pan or base is central. You can choose a pre-fabricated pan or build a custom tiled base. You will also need waterproofing materials. This includes a waterproof membrane like a liquid-applied sealant or shower pan liner. Cement board is commonly used for shower walls. It resists moisture better than drywall.
Other key materials include new drain assembly parts specific to a shower. You will also need mortar or thin-set for setting tiles and the shower pan. Grout and caulk will finish the tile work and seal seams. Don’t forget new shower fixtures, such as the shower head, mixing valve, and trim kit. Your choice of valves is important for water control and comfort. You might wonder, for instance, Are all shower valves universal? Knowing this helps in selecting the right product.
Finally, think about wall coverings. Tiles are a popular choice for showers. You will need enough tiles to cover the shower walls and any areas where the old tub connected. Consider tile spacers for uniform grout lines. Having all these items ready before demolition day simplifies the entire project.
Step-by-Step Bathtub to Shower Drain Conversion Process
Performing a bathtub to shower drain conversion involves several key stages. Each step builds upon the last. Following them in order ensures a smooth and effective renovation. I will walk you through the core process.
1. Demolition and Preparation: First, you need to remove the old bathtub. Shut off the water supply to the bathroom before starting. Disconnect the drain and overflow pipes from the tub. Then, carefully remove any surrounding wall tiles or materials. Use a pry bar to lift and remove the tub. Be careful not to damage the subfloor. Once the tub is out, clean the area thoroughly. You may need to repair or reinforce the subfloor if it shows any water damage. This forms the foundation for your new shower.
2. Adjusting the Drain and Plumbing Rough-in: This is the most critical plumbing step. The old bathtub drain is usually higher than a shower drain. You will need to cut down the vertical drain pipe (the standpipe) so the new shower drain flange sits flush with the subfloor. Ensure the P-trap is correctly positioned and secured. If you are upgrading from a 1.5-inch to a 2-inch drain, you will need to adapt the pipes. Connect the new shower drain assembly to the main drain line. Check for any leaks. For your new shower, you will also need to install the shower valve. This controls water temperature and flow. Many people ask, for example, Are all Delta shower valves the same? Understanding valve compatibility is important for installation. Run new water supply lines for your shower valve if needed.
3. Installing the Shower Pan or Base: Once the drain is set, install your shower pan or build your custom base. If using a pre-fabricated pan, apply a thin bed of mortar to the subfloor. This helps the pan sit level and provides full support. Carefully place the pan onto the mortar bed and connect it to the drain. Ensure it is perfectly level. If building a custom tiled base, you will create a sloped mortar bed first. This directs water to the drain.
4. Waterproofing the Shower Area: Waterproofing is essential to prevent future leaks and mold growth. Cover the shower walls and curb with a waterproof membrane. This can be a liquid-applied product or a sheet membrane. Overlap seams and use proper sealant. Extend the waterproofing at least 6-8 inches above the highest point where water will splash. This step protects your home from water damage.
5. Wall Preparation and Tiling: Install cement board on the shower walls over the waterproofing membrane. Screw it securely into the wall studs. Then, you can begin tiling. Apply thin-set mortar to the back of each tile and press it firmly onto the cement board. Use tile spacers to maintain consistent grout lines. Start from the bottom and work your way up. After the thin-set cures, apply grout to fill the spaces between tiles. Wipe off excess grout with a damp sponge.
6. Installing Fixtures and Finishing Touches: Once the grout dries, install your new shower head, mixing valve trim, and shower door or curtain rod. Connect the shower head to the rough-in plumbing. For instance, if you want to add a second shower head, this is the time to plan its placement. Apply silicone caulk to all corners and seams where water might penetrate. This includes the seam between the shower pan and the wall tiles. Caulk provides a final seal against moisture. Turn the water supply back on and test your new shower for leaks. Enjoy your newly converted shower space!
Common Challenges and Troubleshooting During Conversion
A bathtub to shower drain conversion can present some challenges. Knowing what to look for helps you troubleshoot problems effectively. Even with careful planning, unexpected issues can arise.
One common challenge is dealing with existing plumbing. Old houses might have cast iron pipes, which are harder to cut and modify than PVC or ABS. You may need specialized tools or a plumber’s help. The existing drain location might also not align perfectly with your new shower pan. This requires careful pipe adjustment. Sometimes, the main drain line might be too high or too low, demanding more significant rework.
Another frequent issue is ensuring a level and properly sloped shower pan. If the pan isn’t perfectly level, water can pool in certain areas instead of draining. If you’re building a custom tiled shower base, getting the correct slope (typically 1/4 inch per foot) towards the drain can be tricky. Use a level and a long straightedge often during this step. Uneven floors below the pan can complicate matters further, requiring shimming or floor leveling.
Waterproofing failures are serious problems. If the waterproofing membrane is compromised, water can seep into your walls or subfloor. This leads to mold, rot, and structural damage. Make sure all seams are properly sealed and overlaps are correct. Test your waterproofing before installing tiles, if possible. Look for any gaps or tears. Remember that even small leaks can cause big issues later. If you are going to be cleaning your new shower regularly, knowing how to clean tile shower floor properly will help maintain its integrity.
Dealing with unforeseen structural issues can also be a challenge. Once you remove the bathtub, you might discover rotten subfloor or damaged wall studs. These problems need immediate attention before you proceed. Replacing damaged wood ensures a solid and safe base for your new shower. It is better to fix these issues now than to face bigger problems later.
Finally, unexpected costs can arise. These might include needing a different pipe fitting, finding hidden water damage, or needing to rent a specific tool. Always have a contingency fund in your budget for these surprises. Staying flexible and ready to adapt helps overcome these common hurdles.
DIY vs. Professional Bathtub to Shower Drain Conversion
Deciding between a DIY project and hiring a professional for your bathtub to shower drain conversion depends on several factors. Your skill level, time commitment, and budget all play a role in this decision. Both options have their pros and cons.
A DIY conversion can save you a significant amount of money on labor costs. If you have experience with plumbing, carpentry, and tiling, you might feel comfortable tackling this project yourself. You have full control over material choices and the project timeline. Doing it yourself can also be a rewarding experience. You gain new skills and a sense of accomplishment. This option works best for those with a solid understanding of home renovations and access to the necessary tools.
However, a DIY approach demands a lot of your time and effort. This is not a weekend project. It often takes several days or even weeks, especially if you have a full-time job. You must be prepared for unexpected problems, like discovering rotten wood or complex plumbing configurations. If you make mistakes with plumbing or waterproofing, the consequences can be costly. Leaks can cause significant damage to your home. Incorrect installations might not pass inspection, leading to rework.
Hiring a professional, such as a licensed plumber and a general contractor, offers peace of mind. Professionals have the experience, tools, and expertise to complete the job efficiently and correctly. They understand building codes and permit requirements, ensuring your conversion meets all standards. They can handle complex plumbing adjustments, waterproofing, and tile installation with precision. A professional can often finish the job faster than a DIYer.
The main drawback of hiring a professional is the cost. Labor fees can add a substantial amount to your overall budget. However, this cost often covers insurance, warranties, and expertise that can prevent expensive mistakes. If your existing plumbing is old or unusual, or if you lack confidence in your skills, a professional is likely the safer and more effective choice. They can navigate challenges like uneven floors or tricky pipe connections with ease. Ultimately, choose the option that best fits your comfort level, budget, and time availability.
FAQ Section
1. Can I use the existing drain hole for a new shower? You can often use the existing drain hole for a new shower, but adjustments are usually needed. Bathtub drains sit higher than shower drains. You will likely need to cut the drain pipe lower to accommodate the shallower shower pan. The drain pipe size might also need upgrading from 1.5 inches to 2 inches for better shower drainage.
2. How much does a bathtub to shower conversion cost? Costs vary greatly. A DIY conversion with basic materials might cost $1,000-$3,000. Hiring professionals for a mid-range conversion typically costs $5,000-$15,000. High-end conversions with custom features can exceed $20,000. Factors include materials, labor, and plumbing modifications.
3. How long does a bathtub to shower conversion take? A DIY conversion can take one to two weeks, depending on your experience and free time. Professional installations typically take 3-7 days of active work. This timeline does not include planning, material ordering, or permit approval time. Unexpected issues can extend the project duration.
4. Do I need a permit for a bathtub to shower drain conversion? Yes, most bathtub to shower drain conversions require a permit. This is because the project often involves significant plumbing changes and structural modifications. Always check with your local building department before starting any major renovation. Permits ensure the work meets safety and code standards.
5. What size drain pipe do I need for a shower? Most modern showers require a 2-inch diameter drain pipe. While bathtubs often use 1.5-inch drains, a 2-inch pipe allows for faster water flow, which is necessary for the higher volume of water from shower heads. Upgrading to a 2-inch drain ensures proper drainage and helps prevent clogs.
6. Can I convert a small bathtub to a shower? Yes, you can convert a small bathtub to a shower. The footprint of your existing tub will determine the size of your new shower base. Even small spaces can benefit from a walk-in shower, which can make the bathroom feel larger and more open than a tub. Careful measurement is key.
Conclusion
Transforming your bathroom with a bathtub to shower drain conversion is a significant home improvement. It offers many benefits, from enhancing accessibility to updating your bathroom’s look. We covered the entire journey, from initial planning to the final touches. Understanding your existing plumbing, carefully choosing materials, and following a step-by-step process are all vital for success.
Remember, proper waterproofing and drain adjustments are the core of this project. These steps prevent costly issues down the road. Whether you decide to tackle this project yourself or hire a professional, careful preparation is your best friend. A well-planned conversion adds value and comfort to your home for years to come.
Are you ready to create the shower space of your dreams? Take the first step by assessing your current bathroom and envisioning its new potential. Start planning your bathtub to shower drain conversion today, and enjoy a more functional and beautiful bathroom.
- bathtub conversion
- shower installation
- bathroom remodel
- drain plumbing
- DIY shower
- bathroom renovation

Tessa Winslow
Cleaning Expert
With years of hands-on experience in home care and a love for transforming everyday spaces, I specialize in making cleaning feel approachable and even enjoyable. I share smart, sustainable solutions that blend cleaning, organization, and decor—so your home not only looks good, but feels good too. Whether you're tackling weekend chores or taking on a full DIY refresh, I’m here to help you create a cleaner, cozier space you’ll love coming home to.