· Elira Thomsen · Home Improvement · 17 min read
How To Loose Reattach Carpet Around Border Of Room
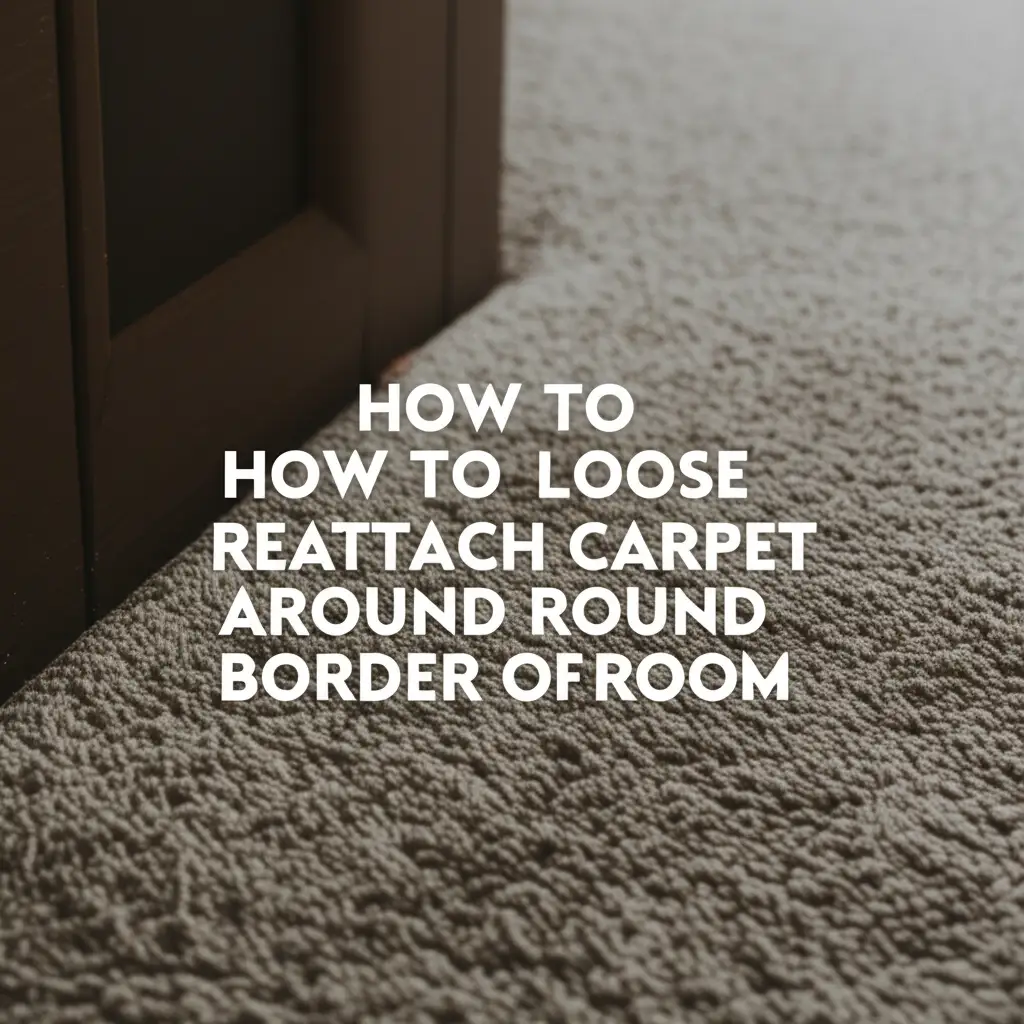
Reattach Loose Carpet Around Your Room’s Border
Is your carpet looking tired around the edges? A loose carpet border can be a real tripping hazard. This issue makes your room look unkempt. Reattaching loose carpet yourself is a practical solution.
This comprehensive guide will show you exactly how to reattach carpet around the border of a room. We cover everything from understanding why carpet loosens to choosing the right tools. You will find step-by-step instructions. You will also learn maintenance tips. This article helps you restore your carpet’s neat appearance.
Takeaway
- Assess the Problem: Identify why your carpet became loose. This helps prevent future issues.
- Gather Essential Tools: Proper tools like a knee kicker and power stretcher are key for effective reattachment.
- Prepare the Area: Clear the room and ensure a clean, safe workspace.
- Stretch and Secure: Use specific techniques to stretch the carpet onto tack strips.
- Trim and Tuck: Finish the edges for a professional look.
- Maintain Your Carpet: Follow care tips to extend the life of your reattached carpet.
How do you fix a loose carpet border?
You fix a loose carpet border by stretching the carpet back onto the existing or new tack strips. Use a knee kicker or power stretcher to pull the carpet taut. Then, secure the stretched carpet edge into the tack strips. Finally, trim any excess material and tuck the edge neatly against the wall or baseboard for a smooth finish.
Understanding Why Carpet Loosens Around Room Borders
Carpet loosening around the border of a room is a common issue. Several factors contribute to this problem. Knowing these causes helps you fix the issue effectively. It also helps prevent it from happening again.
One main reason is normal wear and tear. Over time, foot traffic causes carpet fibers to stretch and relax. This stretching makes the carpet lose its original tension. Areas near doorways or frequently walked paths show this first.
Poor installation is another significant factor. If the carpet was not stretched enough during its initial installation, it will loosen faster. Insufficient use of tack strips or improper placement can also lead to early loosening. The carpet needs strong anchors to stay in place. If these anchors are weak, the carpet will shift.
Environmental conditions also play a role. Humidity and temperature changes make materials expand and contract. This constant movement can weaken the carpet’s grip on the tack strips. High humidity makes carpets absorb moisture and expand. When the air dries out, the carpet contracts, but it might not return to its original tension. This can contribute to the carpet not staying down properly. To learn more about keeping your carpet secure, you can read our guide on how to keep a carpet down.
Subfloor issues can also cause problems. An uneven subfloor creates stress points on the carpet. These points can stretch the carpet unevenly. This leads to specific areas becoming loose. Water damage, spills, or moisture beneath the carpet can also affect its backing and lead to detachment. Addressing these underlying issues is important for a lasting repair.
Essential Tools for Reattaching Loose Carpet
Reattaching loose carpet requires specific tools. Using the correct tools makes the job easier and ensures a professional result. Gather these items before you start the project. Having everything ready saves time and frustration.
First, you need a knee kicker. This tool helps stretch the carpet over the tack strips. You place the padded end against your knee. Then you kick the tool forward. This action pushes the carpet slightly. It is essential for small stretching jobs and starting points. The knee kicker provides a good balance of force and control.
For larger areas or stubborn carpet, a power stretcher is better. This tool provides more stretching force than a knee kicker. It uses a long handle and a head that grips the carpet. You push the handle to stretch the carpet over a longer distance. A power stretcher gives a professional-level stretch. This helps achieve a very tight, wrinkle-free finish.
A utility knife is crucial for trimming excess carpet. Make sure you have a sharp blade. A dull blade can fray the carpet edges. You will use this knife to cut the carpet neatly along the wall or baseboard. Have spare blades ready, as they dull quickly.
A carpet tucking tool, also called a carpet seaming roller or stair tool, is needed. This tool helps tuck the carpet neatly into the gully between the tack strip and the wall. It ensures a clean, tight edge. The tucking tool also helps set the carpet onto the tack strips securely. It makes the final edge look tidy.
You might need new tack strips. These wooden strips have sharp pins that grip the carpet backing. They are nailed to the subfloor around the room’s perimeter. If your old tack strips are damaged or missing, replace them. Damaged strips cannot hold the carpet properly.
Finally, have a hammer for securing tack strips if needed. You may also need safety gloves and knee pads. Safety is important when working with tools and sharp objects. These tools together ensure you can successfully reattach your carpet.
Preparing Your Space for Carpet Reattachment
Proper preparation is crucial for a successful carpet reattachment project. This step ensures safety and makes the repair process smoother. Do not rush this part. A well-prepared area allows for efficient work.
Start by clearing the room. Move all furniture away from the walls. You need clear access to the entire border of the carpet. Large items may need to be moved out of the room entirely. Smaller items can be pushed to the center of the room. This gives you ample space to work with tools and the carpet.
Next, vacuum the carpet thoroughly. Remove any dust, dirt, or debris from the area you plan to work on. This cleaning prevents dirt from getting trapped under the carpet. It also makes it easier to see the tack strips and the carpet’s condition. A clean surface helps the tools grip better.
Inspect the loose area of the carpet. Determine the extent of the damage. Check the condition of the existing tack strips. Are they still firmly attached to the subfloor? Are the pins on the tack strips sharp and unbroken? If the tack strips are old, broken, or not gripping well, you will need to replace them. Replacing damaged tack strips provides a solid foundation for the reattached carpet.
Pay attention to safety. Wear work gloves to protect your hands from the sharp pins on the tack strips. Consider wearing knee pads, especially if you will be on your knees for extended periods. This protects your joints from hard floors. Ensure the area is well-lit so you can see clearly. If you are replacing old tack strips, you may need to remove debris. Sometimes, removing old carpet can be a big job itself. If you’re wondering about that process, you can find helpful information on how to get old carpet out of a room.
Finally, check for any moisture or subfloor issues. If you find any, address them before reattaching the carpet. Reattaching carpet over a damp subfloor can lead to mold or mildew growth. It can also damage the carpet backing over time. A dry, clean, and stable subfloor is essential for a lasting repair.
Step-by-Step Guide to Reattach Carpet
Reattaching carpet around the border of a room involves a series of precise steps. Follow these instructions carefully for the best results. This process makes your loose carpet tight and neat again. I will guide you through each part of the repair.
Assessing the Loose Area
First, pull back the loose carpet from the wall. This exposes the tack strips underneath. Examine the tack strips closely. Are they securely nailed down? Are the pins sharp and intact? If the tack strips are damaged, brittle, or missing, replace them now. New tack strips ensure a strong hold. Position new strips about half an inch from the wall. Ensure the pins point towards the wall.
Engaging the Tack Strip
Carefully hook the carpet onto the tack strips. Start at one corner or edge of the loose section. Press the carpet onto the pins of the tack strip. Work your way along the perimeter. Do not press the entire carpet down yet. You only need to secure it enough to hold it in place for stretching. This initial hook helps with tension.
Stretching the Carpet
This is the most crucial part. Use a knee kicker or a power stretcher. For a knee kicker, place the padded end against your knee. Position the head of the kicker on the carpet about 1 to 2 inches from the wall. Push forward with your knee. This action stretches the carpet. As you stretch, push the carpet down onto the tack strips with your hands. Work in small sections, moving around the perimeter. Overlap your stretches slightly. For larger areas or if the carpet is very loose, use a power stretcher. Anchor one end of the stretcher against the opposite wall. Engage the carpet with the gripping head. Push the lever to stretch the carpet. While stretched, press the carpet onto the tack strips. A proper stretch removes all wrinkles. It creates a tight, smooth surface. This step is key to making your carpet stay down for a long time. For more tips on keeping carpet secure, refer to our article on how to keep a carpet down.
Trimming and Tucking
Once the carpet is stretched and secured on the tack strips, you will have excess carpet extending up the wall. Use a sharp utility knife to trim this excess. Hold the knife at a slight angle, cutting along the line where the carpet meets the wall or baseboard. Be precise with your cuts. A dull blade can fray the edges.
After trimming, use a carpet tucking tool. This tool helps push the cut edge of the carpet neatly into the gully between the tack strip and the wall. Run the tucking tool along the entire trimmed edge. This action secures the carpet further and gives it a clean, finished appearance. This final tuck ensures the carpet edge is invisible and secure.
Dealing with Common Challenges in Carpet Repair
Reattaching carpet can present a few challenges. Knowing how to address these makes your DIY repair smoother. I have faced these issues myself, and I can share what works. This section covers common problems you might encounter.
One common issue is wrinkles or bubbles in the middle of the room. This happens if the carpet was not stretched evenly. If you see a bubble after reattaching the edges, you will need to re-stretch the entire room. You can carefully unhook the carpet from the tack strips on one side. Then, use your knee kicker or power stretcher to pull the carpet taut across the room. Re-secure it to the tack strips. This process may need repeating until the carpet is flat.
Small tears or frays near the edge are another challenge. If you find a small tear, you can try to mend it. Use a strong carpet adhesive. Apply a small amount under the torn section. Press it down firmly. For frays, a sharp utility knife can trim away the loose fibers. You might consider using a seam sealer on the cut edge to prevent further fraying. This sealer dries clear and holds the fibers together.
Corners and doorways require extra attention. Corners need precise cuts and careful stretching. Ensure the carpet is tight into the corner, then trim and tuck. For doorways, the carpet often meets a different flooring type. You might need a transition strip or door bar. These bars hold the carpet edge down firmly and bridge the gap to the other floor. Ensure the carpet is stretched well into the doorway before securing it under the transition strip. Use a hammer to secure the strip.
Sometimes, the tack strips are old and brittle. They might break when you try to reattach the carpet. If this happens, remove the damaged section of the tack strip. Install a new piece in its place. Use a hammer and small nails to secure the new strip to the subfloor. Ensure the pins point towards the wall. A solid tack strip foundation is essential for a lasting repair.
Finally, you might find that the carpet seems too short to reach the tack strips after stretching. This indicates the carpet might have shrunk significantly. In some rare cases, you might need to add a small strip of matching carpet to bridge the gap. This is a more advanced repair. If the gap is very small, a wider transition strip at a doorway might cover it.
Maintaining Your Carpet After Reattachment
Once you reattach your carpet, proper maintenance is essential. This helps prevent future loosening and extends the life of your flooring. I always tell people that good care saves money in the long run. Follow these simple steps to keep your carpet looking its best.
Regular vacuuming is very important. Vacuum your carpet at least once a week. This removes dirt and debris that can grind into the fibers. Dirt acts like sandpaper, causing wear. Pay extra attention to the reattached borders. Regular vacuuming helps the carpet fibers stay upright and reduces matting. This simple act keeps the carpet healthier.
Address spills immediately. Blot liquid spills with a clean cloth. Do not rub, as rubbing can spread the stain and damage carpet fibers. For solid spills, scoop them up carefully. Use appropriate carpet cleaning solutions. Always test the cleaner on an inconspicuous area first. Quick action prevents stains from setting. It also protects the carpet backing from moisture damage.
Consider using area rugs in high-traffic areas. This includes entryways, hallways, and spots in front of frequently used furniture. Area rugs absorb the brunt of daily wear and tear. They protect the underlying carpet from excessive friction and stretching. This helps your reattached border stay tight. Protecting your carpet with these measures can greatly extend its lifespan. For more ideas on how to safeguard your flooring, you might find our guide on what can I put over carpet to protect it very useful.
Control humidity levels in your home. Extreme changes in temperature and humidity can affect your carpet. High humidity can cause carpet fibers to swell. Low humidity can make them dry out. Use a dehumidifier in humid climates. Use a humidifier in very dry climates. Maintaining stable humidity helps the carpet fibers retain their structure and tension.
Rotate your furniture occasionally. This distributes wear patterns more evenly across the carpet. Heavy furniture can create indentations. Moving furniture around helps the carpet fibers recover. It also prevents excessive wear in one specific area, which can lead to loosening over time.
Finally, schedule professional carpet cleaning every 12-18 months. Professional cleaners use specialized equipment. They remove deep-seated dirt that vacuuming cannot reach. This cleaning revitalizes the carpet. It helps restore its texture and appearance. This regular deep cleaning extends the overall life of your carpet.
When to Call a Professional for Carpet Issues
While reattaching loose carpet is often a DIY task, some situations require professional help. Knowing when to call an expert saves you time and prevents further damage. I have seen many DIY projects that went wrong because people did not know their limits. It is okay to ask for help.
If your carpet has extensive damage, a professional might be necessary. This includes large tears, burns, or widespread delamination. Delamination is when the carpet backing separates from the fibers. These issues are complex. They require specialized repair techniques and tools that most homeowners do not have. Trying to fix them yourself might make the problem worse.
When dealing with a full-room stretch, a professional carpet installer has specialized equipment. Power stretchers are effective for large areas. They require training to use them safely and effectively. A professional can achieve a perfectly smooth, wrinkle-free finish. They can stretch the carpet correctly. If your carpet has many large wrinkles across the entire room, professional stretching is often the best solution.
If you suspect underlying subfloor problems, call an expert. This includes water damage, rot, or major unevenness. These issues need repair before addressing the carpet. A carpet professional can often identify subfloor problems. They can also recommend solutions. They might work with other tradespeople to fix the subfloor first. Reattaching carpet over a damaged subfloor will not solve the core issue.
When you lack the proper tools or confidence, call a professional. Renting or buying specialized carpet tools can be expensive. If you are not comfortable using tools like a knee kicker or power stretcher, it is safer to hire someone. A professional has the experience and knowledge to do the job correctly. They can finish the work efficiently.
Consider a professional if the carpet is very old or fragile. Older carpets may not withstand stretching well. They can tear or fray easily during the process. A professional can assess the carpet’s condition. They can advise if repair is viable. They might suggest replacement instead if the carpet is beyond repair.
Finally, if multiple attempts to reattach the carpet fail, seek professional help. Sometimes, the problem is more complex than it appears. A professional can diagnose the root cause. They can provide a lasting solution. Investing in professional help ensures your carpet looks good and lasts longer.
FAQ Section
How long does it take to reattach carpet around the border?
Reattaching carpet around the border typically takes 1 to 3 hours for a standard room. The time depends on the size of the room and the extent of the loose area. Your experience level also affects how fast you work. Gather all tools before starting to save time.
Can I reattach carpet without a knee kicker?
While possible for very small, minor loosening, a knee kicker is highly recommended. It provides the necessary leverage and force to stretch the carpet properly. Without it, achieving a tight, lasting reattachment is very difficult. You risk an uneven or temporary fix.
What causes carpet to loosen at the edges?
Carpet loosens at the edges due to several factors. These include normal wear and tear, insufficient stretching during initial installation, and changes in humidity or temperature. Damaged or old tack strips also contribute to the problem. Foot traffic often exacerbates these issues.
Is it hard to reattach carpet yourself?
Reattaching carpet can be challenging for beginners, but it is a manageable DIY project. It requires patience, the right tools, and careful attention to detail. Following step-by-step instructions precisely helps. Practice makes the process easier and improves results.
How often should carpet be stretched?
Carpet typically does not need stretching often if installed correctly. It might need stretching every 5-10 years if it experiences heavy traffic or significant environmental changes. Regular maintenance helps keep the carpet taut. Look for visible wrinkles or loose edges as signs it needs stretching.
Can I use glue to reattach loose carpet edges?
Using glue alone is not ideal for reattaching main carpet edges. Glue can leave hard spots and does not provide the necessary tension. Tack strips are designed to hold the carpet under tension. Glue may be used for minor fraying or small seam repairs, but not for stretching the main carpet.
Conclusion
Reattaching loose carpet around the border of your room is a rewarding DIY project. You now understand the common reasons for carpet loosening. You also know the essential tools required. With the step-by-step guide, you are ready to tackle the repair. This process restores your carpet’s neat appearance.
Remember to prepare your space thoroughly. Use the knee kicker or power stretcher for an effective stretch. Always trim and tuck the edges for a professional finish. By taking these steps, you can avoid tripping hazards and improve your home’s look. Maintain your carpet well after the repair. This prevents future issues. If the job seems too big, remember that professional help is available. Take control of your home’s flooring today. Reattach that loose carpet and enjoy a safer, more beautiful room.
- carpet repair
- DIY flooring
- carpet stretching

Elira Thomsen
Home Organization & DIY Living Expert
I'm Elira Thomsen, a lifelong enthusiast of clean, beautiful, and functional homes. With over a decade of hands-on experience in DIY home decor, smart cleaning solutions, and practical organization, I help everyday homeowners turn clutter into calm. Whether it's transforming a neglected nook into a cozy reading spot, mastering budget-friendly storage hacks, or refreshing a space with seasonal décor, I'm here to guide you every step of the way. My mission is simple — make home care easier, more inspiring, and truly rewarding.