· Tessa Winslow · Plumbing, Home Renovation · 17 min read
Basement Shower Drain Rough In
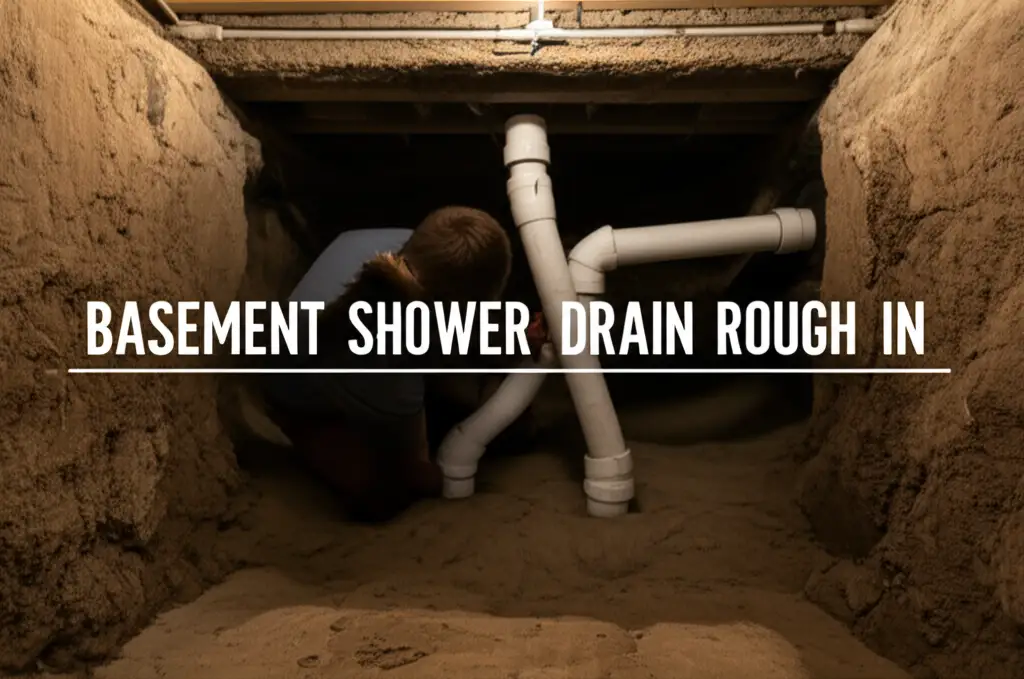
Basement Shower Drain Rough-In: Your Complete Guide
Imagine a beautiful, functional bathroom in your basement. It adds significant value and comfort to your home. A crucial first step for this dream is the basement shower drain rough-in. This process involves installing the vital plumbing pipes beneath your concrete slab. It sets the foundation for a reliable and efficient drainage system.
This article provides a comprehensive guide for your basement shower drain rough-in project. We will cover essential planning, necessary tools, and detailed installation steps. You will also learn about crucial inspections and common issues to avoid. By the end, you will understand how to approach this project with confidence.
Takeaway
- Thorough planning prevents future plumbing problems.
- Correct pipe sizing and slope are essential for proper drainage.
- Follow all local plumbing codes for a compliant system.
- Proper pressure testing and inspection ensure long-term system integrity.
What is a basement shower drain rough-in?
A basement shower drain rough-in involves installing the necessary drainage pipes and connections below the concrete slab before pouring. This crucial step sets up the foundation for your basement shower, ensuring proper waste removal and preventing water buildup when construction is complete.
Planning Your Basement Shower Drain Rough-In Project
Starting a basement shower drain rough-in project requires careful planning. This initial phase defines the success of your entire installation. Proper planning ensures your drain functions correctly and complies with local regulations. It also helps you avoid costly mistakes later on.
First, you determine the exact location of your new shower. Consider factors like proximity to existing waste lines and water supply. You also need to think about head room and overall bathroom layout. A well-thought-out layout makes the plumbing run smoother.
Local building codes and permits are very important. You must check with your local municipality before starting any work. They provide specific requirements for pipe sizing, venting, and trap installation. Securing the necessary permits keeps your project legal and safe. Ignoring codes can lead to major problems and fines.
You also consider if you will do this yourself or hire a professional. Many homeowners handle parts of the rough-in. However, complex connections or strict codes might require a licensed plumber. They ensure everything meets standards and passes inspection. Making informed decisions now saves time and money.
- Determine Shower Location: Pick the best spot for your shower. Consider existing plumbing lines. Think about the overall bathroom design.
- Check Local Building Codes: Contact your city or county building department. Understand all requirements for drain installation. Look into specific rules for basement plumbing.
- Obtain Necessary Permits: Apply for and secure all required plumbing permits. This step is mandatory for most major plumbing jobs. It ensures your project is legal and inspected.
- Plan Your Layout: Draw a detailed sketch of your new drain lines. Show connections to the main waste stack. Include pipe sizes and the exact path of the trench.
- Budget for Materials and Labor: Estimate costs for pipes, fittings, tools, and professional help if needed. A clear budget helps manage your project finances.
Essential Tools and Materials for a Successful Rough-In
Having the right tools and materials is critical for any plumbing project. The basement shower drain rough-in is no different. Using proper equipment makes the job safer and more efficient. It also helps ensure a professional finish. Investing in quality tools prevents frustration and redoing work.
For cutting concrete, you will need a concrete saw. This tool makes clean cuts in your basement floor. Safety gear, like eye protection, ear protection, and gloves, is essential when operating the saw. You also need a large hammer and chisel or a jackhammer to break up the concrete after cutting.
For the plumbing itself, you will need various items. Pipe cutters are necessary for precise cuts on PVC or ABS pipes. A tape measure ensures accurate pipe lengths. A level helps you achieve the correct slope for drainage. You will also need plumbing primer and cement for secure pipe connections.
Material choices include the type of pipe. ABS vs PVC shower drain is a common discussion. Both are widely used for drain lines. PVC is rigid and often preferred for underground use. ABS is slightly more flexible and generally black. Local codes may dictate which material you must use. Always check your area’s specific requirements before buying materials.
- Concrete Saw: For cutting through the basement concrete slab.
- Hammer and Chisel/Jackhammer: For breaking and removing cut concrete sections.
- Shovel and Trowel: For digging the trench and leveling the dirt.
- Pipe Cutters: To make clean, straight cuts on your chosen drain pipes.
- Tape Measure and Level: For accurate measurements and ensuring proper pipe slope.
- Plumbing Primer and Cement: To create strong, leak-proof joints between pipes and fittings.
- PVC or ABS Pipes and Fittings: Choose the correct diameter (typically 2 inches for showers) and various elbows, tees, and couplers.
- Shower Drain Body and Grate: The main component that connects to your shower pan.
- P-Trap: Essential for preventing sewer gases from entering your home.
- Cleanout Adapter: For future access to clear clogs.
Trenching and Excavation for Basement Drain Pipes
Once you have your plan and tools, the next major step is trenching. This involves cutting and removing a section of your concrete slab. It creates space for the new drain pipes. Accurate trenching ensures your pipes fit properly and have the correct slope for drainage. This phase is dusty and labor-intensive, but proper execution is key.
First, you mark the exact layout of your drain lines on the concrete floor. Use chalk or a marker for clear lines. This helps guide your concrete saw. Double-check your measurements against your plan. This ensures the trench aligns perfectly with your plumbing design.
Next, you cut the concrete slab. Use a wet-cut concrete saw to minimize dust. Always wear appropriate safety gear, including a respirator, eye protection, and hearing protection. Make straight, precise cuts along your marked lines. You might need to make multiple passes for a deeper cut.
After cutting, you break up the concrete sections within your marked area. A sledgehammer and chisel work for smaller sections. For larger areas, a jackhammer can speed up the process. Carefully remove the concrete pieces. Dispose of them properly according to local waste regulations.
Finally, you dig the trench. The trench depth must accommodate your pipes, fittings, and the required slope. Remember, drain pipes need a minimum slope of 1/4 inch per foot. This allows gravity to move wastewater efficiently. Dig the trench wide enough for easy pipe installation and backfilling. Ensure the bottom of the trench is smooth and free of sharp objects.
- Mark the Drain Path: Use chalk or marker to draw the exact lines where your drain pipes will go on the concrete. This guide is essential for accurate cutting.
- Cut the Concrete Slab: Use a concrete saw to cut along your marked lines. Make sure to wear safety glasses, hearing protection, and a dust mask.
- Break and Remove Concrete: Use a sledgehammer or jackhammer to break up the cut sections of concrete. Carefully lift and remove these pieces.
- Excavate the Trench: Dig the trench to the necessary depth. This depth accommodates the drain pipe, the P-trap, and the required slope.
- Ensure Proper Slope: Dig the trench bottom with a consistent downward slope of 1/4 inch per foot. This slope is critical for effective wastewater flow by gravity. A level can help you check the slope as you dig.
- Smooth the Trench Bottom: Remove any rocks or debris from the trench. A smooth bottom helps support the pipes evenly.
Installing the Drain Pipes and P-Trap
With the trench ready, you can start installing the drain pipes and P-trap. This is where your plumbing system takes shape. Correct assembly ensures smooth water flow and prevents future clogs or sewer gas issues. Pay close attention to every joint and connection for a reliable system.
First, position the shower drain body. This piece will sit directly under your planned shower area. It connects to the P-trap. Ensure its top flange will be flush with the finished floor level. Adjust the surrounding earth or gravel to support it firmly.
Next, assemble the P-trap. The P-trap is a U-shaped bend in the pipe. It holds a small amount of water. This water seal prevents sewer gases from entering your home. Connect the P-trap directly to the shower drain body. Use proper plumbing primer and cement for a strong, watertight seal. Allow adequate curing time as specified by the manufacturer.
Then, extend the drain line from the P-trap towards the main waste stack. Use the appropriate pipes and fittings. These include elbows and straight sections. Maintain the required slope of 1/4 inch per foot along the entire run. This slope is crucial for gravity drainage. Use a level often to check your progress.
Remember to install a cleanout. A cleanout is a capped opening in the drain line. It allows access for clearing future clogs. Place it in an accessible location, such as near the main waste stack or where the line changes direction. Ensure all connections are secure. A poorly glued joint can lead to leaks and major problems down the line.
- Position the Shower Drain Body: Place the main shower drain fitting in its exact location. Ensure it aligns with your planned shower area. It should be at the correct height for your finished floor.
- Assemble the P-Trap: Connect the P-trap directly to the shower drain body. The P-trap creates a water seal. This seal blocks sewer gases from entering your living space.
- Connect to the Main Drain Line: Run pipes from the P-trap towards the main waste line. Use appropriate fittings for turns and connections. For example, if you need general knowledge about drain lines, you might find useful information on how to clear blockages in other household systems, like how to clear dishwasher drain line. This highlights the importance of proper drain function across different appliances.
- Maintain Correct Slope: Ensure a consistent downward slope of 1/4 inch per foot for all horizontal drain pipes. This slope is essential for effective gravity drainage.
- Install Cleanouts: Add cleanout fittings at strategic points. These allow access for future snaking or maintenance. Position them where they are easy to reach.
- Secure All Joints: Use primer and solvent cement for all PVC or ABS joints. Apply them according to manufacturer instructions. This creates strong, leak-proof connections. Remember, a leaky drain system under a concrete slab is a major issue. Consider the specific properties when choosing materials, like those discussed in ABS vs PVC shower drain, to ensure compatibility and durability.
Connecting to the Main Waste Line and Venting
Once your shower drain line is assembled, you must connect it to your home’s main waste line. This connection carries the wastewater away from your basement. Proper venting is also essential for a functional and safe plumbing system. Venting prevents siphoning and ensures smooth drainage.
Locate your home’s main waste stack. This is the large vertical pipe that collects all wastewater. You will tie your new shower drain into this pipe. The connection must be made using appropriate fittings. Use a wye fitting or a sanitary tee for joining the new horizontal line to the vertical stack. Ensure the fitting is oriented correctly for flow.
Venting is critical. A vent pipe allows air into the drain system. This air pressure prevents a vacuum from forming when water drains. Without proper venting, water could get siphoned out of your P-trap. This would allow sewer gases to enter your home. The vent pipe typically runs vertically and connects to your home’s main vent stack.
You might need to install a backwater valve. Local codes often require this device for basement plumbing. A backwater valve prevents sewage from backing up into your home during heavy rains or municipal sewer issues. It allows water to flow out but closes if water tries to flow back in. Install it according to manufacturer instructions and local code requirements.
Always double-check all connections. Use strong, watertight seals. Any leaks in the main waste line connection can cause significant damage. Proper planning and careful installation in this phase prevent future problems.
- Locate Main Waste Stack: Find the primary waste pipe in your basement. This is where your new shower drain will connect.
- Make the Connection: Cut into the main waste stack. Install a wye or sanitary tee fitting. Connect your shower drain line to this fitting. Ensure the connection is watertight.
- Install Vent Piping: Run a vent pipe from your shower drain line. Connect it to the main vent stack or create a new vent to the outside. Proper venting prevents siphoning and ensures smooth drainage.
- Consider a Backwater Valve: Check local plumbing codes. Many areas require a backwater valve for basement drains. This device protects your home from sewage backups.
- Ensure Proper Slope: Maintain the correct slope for all horizontal drain lines. This allows gravity to effectively carry wastewater to the main stack.
Pressure Testing and Inspection of Your Drain System
After installing all pipes, fittings, and connections, you must perform a pressure test. This step is vital. It identifies any leaks in your system before you pour concrete. Finding and fixing leaks now prevents major headaches and costly repairs later. Do not skip this crucial check.
To perform a pressure test, you cap off all openings in the new drain system. This includes the shower drain, cleanouts, and any connections to existing lines. You then fill the system with water or air. If using water, fill the pipes until water rises above the highest fixture connection point. If using air, pump air into the system to a specified pressure, typically 5 PSI.
Monitor the pressure gauge or water level for a set period. Any drop indicates a leak. Locate the leak by checking all joints and connections. Once found, drain the system, make the necessary repairs, and re-test. Repeat this process until the system holds pressure without any loss. This ensures every joint is sealed properly.
Once your pressure test passes, schedule an inspection with your local building department. A licensed inspector will review your work. They check for compliance with all local plumbing codes. They ensure proper pipe sizing, slope, venting, and material use. They also verify the successful pressure test. Do not backfill your trench until the inspector gives approval. Passing this inspection is mandatory before proceeding to the next steps.
- Cap Off All Openings: Securely close all ends of your new drain lines. This includes the shower drain opening and any cleanouts.
- Perform a Water or Air Pressure Test: Fill the system with water or pressurized air. The specific method and pressure often depend on local code. For instance, understanding how drain systems handle water is key, even if it’s for different appliances like how to get the dishwasher to drain. This general knowledge about drainage can reinforce the importance of proper testing.
- Monitor for Leaks: Observe the water level or pressure gauge for at least 15-30 minutes. A drop indicates a leak.
- Locate and Repair Leaks: If a leak exists, find its source. Drain the system, fix the faulty connection, and re-test. Repeat until no leaks are present.
- Schedule a Plumbing Inspection: Contact your local building department for a rough-in plumbing inspection. An inspector must approve your work before you can backfill the trench and pour concrete.
- Obtain Approval: Ensure the inspector provides official approval. This approval is your green light to proceed with the next steps of your basement project.
Backfilling and Preparing for Concrete Pour
After your basement shower drain rough-in passes inspection, you are ready for the final steps before pouring concrete. This includes carefully backfilling the trench. Proper backfilling protects your newly installed pipes. It also creates a stable base for the new concrete slab. This step ensures the long-term integrity of your floor and plumbing.
First, gently backfill around the pipes. Use fine gravel or sand directly around the pipes. This material provides good support and prevents damage. Avoid using large, sharp rocks that could puncture or crack the pipes. Carefully compact this initial layer. A hand tamper or foot can work for this.
Next, continue filling the trench with a suitable fill material. This could be dirt removed during excavation, or new gravel. Layer the material in manageable depths. Compact each layer thoroughly. Proper compaction prevents future settling of the concrete slab. Uneven settling can lead to cracks in your new floor.
In cold climates, consider insulating the pipes. This step prevents freezing. Special pipe insulation wraps around the drain lines. This adds an extra layer of protection. This insulation is especially important for pipes running close to exterior walls or unheated areas.
Finally, reinstate your vapor barrier. If your existing concrete floor had one, you must replace it over your new trench. A vapor barrier prevents moisture from rising through the concrete. It keeps your basement dry and prevents mold growth. Overlap the new barrier with the old one, using construction tape to seal the seams. This also ties into broader basement considerations, such as how to sealing basement concrete floor before carpet, which is vital for any subsequent flooring installation.
- Gentle Backfilling: Start by carefully filling around the pipes with fine gravel or sand. This provides bedding and protects the pipes.
- Compacting Layers: Add fill material in layers, typically 4-6 inches deep. Compact each layer thoroughly before adding the next. This prevents future slab settling.
- Insulate Pipes (if needed): In cold climates, wrap drain pipes with insulation. This helps prevent freezing, especially for pipes near exterior walls.
- Reinstate Vapor Barrier: Lay down a new vapor barrier over the backfilled trench. Overlap it with the existing barrier on the old concrete slab. Seal all seams with construction tape. This prevents moisture from seeping through the concrete.
- Prepare for Concrete Pour: Ensure the backfilled area is level and smooth. The surface should be ready for the new concrete pour. The top of your shower drain body should be flush with the intended finished concrete surface.
Frequently Asked Questions About Basement Shower Drain Rough-In
Q1: What is the typical pipe size for a basement shower drain?
Most basement shower drains use 2-inch diameter pipes. This size provides good drainage for a standard shower. It also helps prevent clogs. Always check your local plumbing codes for specific requirements. Some areas might have different minimums depending on the fixture.
Q2: How much slope does a shower drain need?
Shower drain pipes need a minimum slope of 1/4 inch per foot. This means for every foot of horizontal pipe run, the pipe should drop by 1/4 inch. This specific slope ensures gravity can effectively move wastewater and solids through the pipe.
Q3: Do I need a P-trap for a basement shower drain?
Yes, you always need a P-trap for a basement shower drain. The P-trap holds a small amount of water. This water creates a seal. The seal prevents unpleasant sewer gases from entering your home through the drain. It is a critical component for health and safety.
Q4: Can I rough-in a shower drain myself?
Many homeowners with plumbing experience can rough-in a shower drain. You must research thoroughly and understand plumbing principles. Following local building codes is essential. If you lack confidence, hiring a licensed plumber is the safest choice. Incorrect installation causes major issues.
Q5: What is a backwater valve and do I need one?
A backwater valve prevents sewage from flowing back into your basement during sewer backups. It acts as a one-way gate. Local plumbing codes often require backwater valves for basement plumbing. Check with your local building department to determine if it is necessary for your project.
Q6: How deep should the trench be for a basement shower drain?
The trench depth depends on your pipe size, the P-trap height, and the required slope. Generally, you dig deep enough to comfortably lay the pipes. You also need space for the P-trap and for sufficient gravel bedding beneath and around the pipes while maintaining the 1/4 inch per foot slope.
Conclusion
Completing a basement shower drain rough-in is a significant step in your home renovation. It lays the groundwork for a functional and enjoyable basement bathroom. We have explored the entire process, from essential planning and gathering tools to digging trenches and installing pipes. We also covered connecting to the main waste line, venting, and crucial inspection procedures.
Remember, a successful rough-in requires attention to detail. It demands adherence to local building codes. Proper pipe sizing, correct slope, and strong, leak-proof connections are paramount. Always prioritize safety during the concrete cutting and excavation phases. Do not rush any step, especially the pressure testing and inspection. Taking your time now prevents costly repairs later.
You now possess the knowledge to approach your basement shower drain rough-in project with confidence. Whether you tackle this as a DIY project or choose to hire a professional, understanding these steps is invaluable. Start your basement bathroom journey today. Build a space that adds comfort and value to your home for years to come.
- basement plumbing
- shower drainage
- rough-in plumbing
- drain installation
- home improvement

Tessa Winslow
Cleaning Expert
With years of hands-on experience in home care and a love for transforming everyday spaces, I specialize in making cleaning feel approachable and even enjoyable. I share smart, sustainable solutions that blend cleaning, organization, and decor—so your home not only looks good, but feels good too. Whether you're tackling weekend chores or taking on a full DIY refresh, I’m here to help you create a cleaner, cozier space you’ll love coming home to.