· Mason Everett · Washing Machine Repair · 16 min read
How To Replace Water Valves For Washing Machine
Replace Your Washing Machine’s Water Valves with Confidence
Few things are more frustrating than a washing machine that does not work right. Maybe it is leaking water everywhere. Or perhaps it simply refuses to fill up. Often, the culprit is a faulty water valve. Learning how to replace water valves for washing machine models can save you time and money.
You can often fix this problem yourself without calling a professional. This guide helps you understand the symptoms of a bad valve. It lists the tools you need. I will walk you through each step of the replacement process. We will also cover essential safety measures.
Takeaway
- Identify Valve Issues: Look for leaks, no water flow, or unusual filling noises.
- Gather Supplies: Get the correct replacement valve, wrenches, and towels.
- Prioritize Safety: Always unplug the machine and turn off water before starting.
- Follow Steps: Disconnect hoses, remove the old valve, install the new one, and test thoroughly.
- Test and Observe: Slowly restore water and power, checking for any leaks.
Replacing your washing machine’s water valve involves disconnecting the appliance, turning off the water supply, carefully removing the old valve from the machine’s back panel, and then installing a new, compatible valve. This process requires basic tools and adherence to safety protocols for a successful repair.
Understanding Your Washing Machine’s Water Valves
Your washing machine relies on water valves to function properly. These small but important parts control water flow into the drum. They open to let water in for washes and rinses. They close to stop water flow when needed. Each washing machine has at least one valve, often two for hot and cold water.
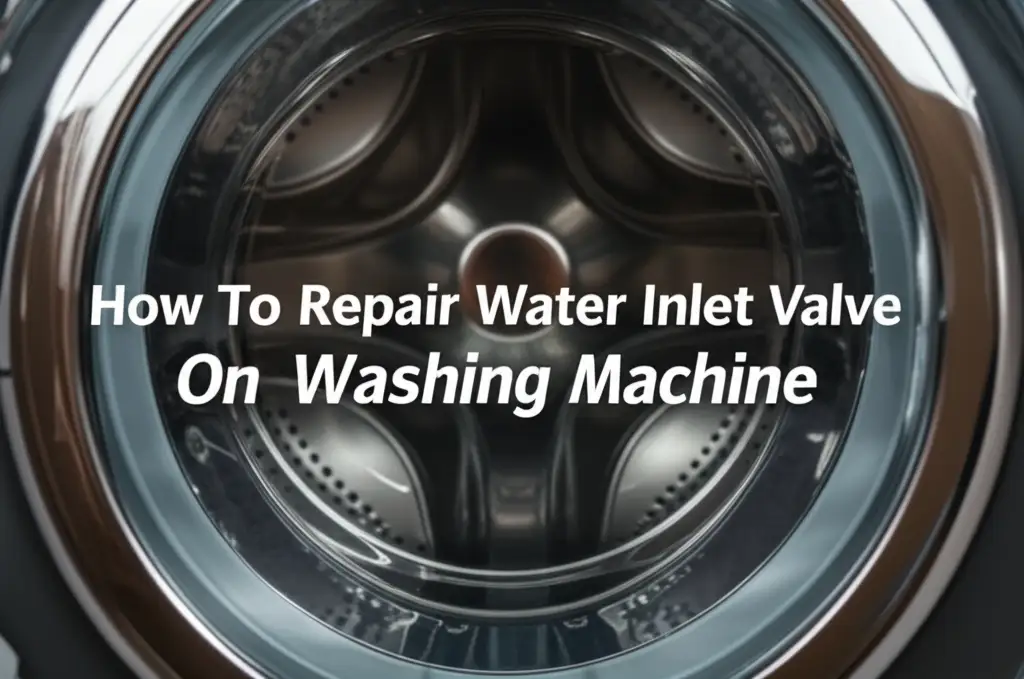
These valves are also known as water inlet valves. They are found where the water hoses connect to the back of the machine. The valves include a solenoid, which is an electromagnet. This solenoid opens or closes a small plunger when it receives an electrical signal. This mechanism ensures precise water delivery for each cycle.
Recognizing Faulty Washing Machine Water Valves
Detecting a bad water valve early can prevent bigger problems. Your washing machine might show several signs if its water valves are failing. Knowing these symptoms helps you decide if a replacement is necessary. It also helps avoid water damage.
One common sign is a leak at the back of the machine. This leak usually happens near where the hot and cold water hoses connect. The valve might crack, or its seals could wear out. You might see a small puddle or a drip after the machine runs a cycle. This indicates a problem with the valve’s ability to hold water.
Another clear symptom is the machine not filling with water. Or it might fill too slowly. This means the valve is not opening fully, or it is blocked. The solenoid inside the valve might be broken. It could also be clogged with mineral deposits. Sometimes, the machine might fill with the wrong temperature water. For example, it fills with only cold water when you selected hot. This suggests one of the two valves is failing.
You might also hear unusual noises. A buzzing sound when the machine fills could mean the valve is struggling to open. A continuous humming noise after the machine fills indicates the valve is not closing completely. This can lead to constant dripping inside the drum or an overflow. Pay attention to any odd sounds during the water intake phase. Understanding these signs helps you decide if you need to repair water inlet valve on washing machine.
Gathering Essential Tools and Parts for Valve Replacement
Starting any DIY repair needs the right tools and parts. This ensures the job goes smoothly and safely. Before you begin to replace water valves for washing machine, take time to collect everything you will need. Having the correct items stops frustrating delays.
First, you need basic hand tools. A set of pliers or an adjustable wrench helps with hose connections. A Phillips head or flathead screwdriver is useful for removing access panels. You will also need a bucket and towels. These catch any water that drains from hoses and the valve. Safety gloves protect your hands. A headlamp or flashlight improves visibility.
The most important part is the new water inlet valve itself. Washing machines have specific valve types. You must get one that matches your machine’s make and model. Check your appliance’s model number, usually found inside the door or on the back. Then, order the exact replacement part. You might also need new rubber washers for the water hoses. These ensure a tight, leak-free seal. You can often find these parts at appliance repair shops or online retailers. If you’re wondering where can I get a washing machine or parts, local appliance stores are a good start.
Choosing the Right Replacement Valve
Selecting the correct replacement valve is critical. Washing machine water inlet valves are not universal. They vary by brand, model, and even the machine’s age. Some machines use a single valve for both hot and cold water, while others have separate valves. Look for the part number on your existing valve. If you cannot find a number, use your washing machine’s model number. This ensures compatibility. Using an incorrect valve can lead to poor performance or further damage. Always double-check specifications before purchase.
Prioritizing Safety Before Starting Your Repair
Safety comes first with any home repair. This is especially true when dealing with water and electricity. Before you even think about how to replace water valves for washing machine, you must prepare the area properly. Ignoring safety steps can lead to serious injury or damage to your home.
The very first step is to disconnect the washing machine from its power source. Unplug the machine from the wall outlet. This removes the risk of electrical shock. Do not just turn off the machine; physically pull the plug. Ensure no one can accidentally plug it back in while you are working.
Next, you need to shut off the water supply to the washing machine. Look for the hot and cold water faucets behind the machine. They usually have red and blue handles. Turn these handles clockwise until they are completely closed. This stops water from flowing into the machine. If you cannot find individual shut-off valves for the washing machine, you might need to turn off the main water supply to your house. This ensures no water will unexpectedly spill during the repair.
Finally, drain any remaining water from the hoses. Place a bucket near the back of the machine. Carefully disconnect the hot and cold water hoses from the back of the washing machine. Allow any water inside the hoses to drain into the bucket. You can then lay towels on the floor to absorb any spills. These steps prepare your workspace and make the repair much safer. Remember, working with water and electricity requires caution. These safety measures protect you and your home.
Step-by-Step Guide to Replacing Washing Machine Water Valves
Replacing your washing machine’s water valves might seem complicated. However, by following clear steps, you can complete this DIY task. I will guide you through each part of the process. This section ensures you know exactly how to replace water valves for washing machine models safely and effectively.
Disconnect Power and Water: As discussed, unplug the machine first. Then, turn off both the hot and cold water supply valves completely. Use your bucket to catch any water as you detach the hoses from the back of the washer.
Move the Machine: Gently pull the washing machine away from the wall. This gives you enough space to access the back panel. Be careful not to strain the electrical cord or water hoses if they are still connected.
Access the Water Valve: The water inlet valve is usually located behind an access panel on the back of the machine. Use a screwdriver to remove the screws holding this panel in place. Carefully set the panel and screws aside. This exposes the internal components of the washing machine.
Locating the Water Inlet Valve
Once the back panel is off, you will see the water inlet valve. It is typically a plastic or metal block where the water hoses connect. Wires will also connect to it, powering the solenoids. Take a moment to observe how the hoses and wires attach to the valve. This helps you remember where everything goes when installing the new part. Some models have a single valve unit, while others have two separate valves for hot and cold water. This view helps you understand the full scope of your do it yourself washing machine repair.
Removing the Old Valve Safely
Now you are ready to remove the faulty valve.
- Disconnect Electrical Wires: Carefully pull off the electrical connectors from the solenoids on the valve. Take a picture with your phone first. This helps you reconnect them correctly later. Labeling them might also be useful.
- Disconnect Internal Hoses: Small hoses connect the valve to the washing machine’s tub. Use pliers to unclip these hoses. Gently pull them off the valve’s nozzles. Be ready for a small amount of water to leak out.
- Unscrew the Valve: The valve is usually held in place by one or two screws. Use your screwdriver to remove these screws. The valve should now be loose.
- Remove the Valve: Carefully slide the old water valve out of its position. You might need to wiggle it slightly. Dispose of the old valve responsibly.
Installing Your New Water Valve
With the old valve out, install the new one.
- Position the New Valve: Place the new valve into the same spot where the old one was. Make sure it fits securely.
- Secure with Screws: Reinsert the screws you removed earlier. Tighten them to hold the new valve firmly in place. Do not overtighten them, as this can crack the plastic.
- Reconnect Internal Hoses: Attach the small internal hoses to the new valve’s nozzles. Ensure they are pushed on completely. Re-secure any clips if present.
- Reconnect Electrical Wires: Attach the electrical connectors to the new valve’s solenoids. Refer to your picture or labels to ensure correct connections.
- Replace Back Panel: Carefully put the access panel back on the washing machine. Screw it firmly in place.
- Reconnect External Hoses: Attach the hot and cold water supply hoses to the corresponding inlets on the new valve. Hand-tighten them first, then use pliers or a wrench for a snug fit. Do not overtighten these connections. Too much force can strip the threads or damage the new valve. Use new rubber washers on these connections if your kit included them. This helps prevent future leaks.
This detailed process for how to replace water valves for washing machine ensures you complete the task correctly. Remember to take your time. Double-check each connection before moving to the next step.
Testing Your New Water Valve and Preventing Leaks
After installing the new water valve, testing is crucial. This step confirms the repair was successful. It also helps prevent any leaks or future issues. Do not skip this part. A thorough test saves you from potential water damage.
First, slowly turn on the hot and cold water supply valves behind the washing machine. Watch the connections closely. Look for any drips or trickles around the hoses leading into the new valve. Also, check the internal connections if possible, by observing through the access panel if you left it off for this initial check. If you see any leaks, turn the water off immediately. Then, tighten the connections a bit more. Sometimes, a connection just needs an extra quarter turn to seal properly.
Next, plug the washing machine back into the electrical outlet. Select a short wash cycle on your machine, like a quick rinse and spin. Start the cycle. Listen and watch as the machine begins to fill with water. Ensure water flows in smoothly and at the correct temperature. You should not hear any buzzing or loud noises from the new valve. Let the machine complete its cycle. Observe if it fills correctly, stops filling when it should, and drains properly. Pay attention during the fill cycles for any new leaks. If you fixed the water inlet valve on your washing machine, this test confirms the fix.
To prevent future leaks, ensure all hose connections are tight. Replace worn-out rubber washers whenever you disconnect hoses. Consider using thread sealant tape on the male threads of the water supply lines. This tape provides an extra layer of leak protection. Periodically check the hoses and valve area for any signs of moisture. Small checks can prevent big problems. Proper installation and careful testing mean your washing machine should operate smoothly.
Troubleshooting Common Issues After Valve Replacement
Sometimes, you might encounter issues even after following all steps to replace water valves for washing machine. Do not get discouraged. Many post-replacement problems have simple solutions. Knowing what to look for can help you fix things quickly.
One common problem is the machine still not filling with water. First, check if the water supply valves are fully open. Sometimes, they are only partially open. Also, ensure the machine is plugged in properly. Next, verify that the electrical connectors on the new valve are secure. A loose connection can prevent the solenoids from activating. You can also check if the water hoses are kinked behind the machine. A kink can stop water flow.
Another issue could be persistent leaks. If you still see water dripping, re-examine all hose connections. Make sure they are tight but not overtightened. Overtightening can strip threads or crack plastic. Check the rubber washers inside the hose connections. They might be old, damaged, or missing. Replacing them often solves minor leaks. If the leak comes from the valve body itself, the new valve might be faulty. This is rare, but it happens. In such cases, you might need a replacement valve from the supplier.
Unusual noises after replacement also happen. A constant buzzing sound during filling might mean the water pressure is too low. Or the valve is not opening fully. If the machine continually fills, even when off, the valve is likely stuck open. This can lead to overflows. Ensure the valve is seated correctly and its electrical connections are solid. These troubleshooting steps can help you pinpoint and fix most common problems. If the issue remains, you might need to consider more advanced washing machine troubleshooting or seek expert help.
When to Call a Professional for Valve Replacement
While learning how to replace water valves for washing machine is a rewarding DIY task, some situations call for professional help. Knowing your limits protects you and your home. Do not hesitate to contact an expert if you face certain challenges.
First, if you feel unsure about any step of the process, it is best to stop. Working with water and electricity carries risks. If you are not comfortable disconnecting wires or handling plumbing, a professional can complete the job safely. Your peace of mind is worth the cost of a service call.
Second, if you encounter unexpected problems, call for assistance. This could be stripped screws, broken parts during removal, or complex wiring. Sometimes, the valve is in a hard-to-reach spot. Or your machine might have an unusual design. Professionals have specialized tools and experience for these situations. They can diagnose and fix issues more efficiently.
Finally, if the problem persists after your DIY attempt, a professional inspection is wise. You might have correctly replaced the valve, but another issue could be at play. The problem might not have been the water valve at all. For example, a clogged drain or a faulty pressure switch can mimic valve problems. An experienced technician can quickly identify the true cause. They can also perform other do it yourself washing machine repairs if needed. Hiring an expert ensures a complete and correct repair. It saves you from further frustration and potential damage in the long run.
Frequently Asked Questions About Washing Machine Water Valve Replacement
How long does it take to replace washing machine water valves?
Replacing washing machine water valves typically takes 1 to 2 hours for most DIY enthusiasts. This time includes moving the machine, disconnecting water and power, removing the old valve, installing the new one, and testing the system. Gathering tools and parts before starting can help speed up the process.
Can I replace just one water valve or both?
You can replace just one water valve if only one is faulty. Most washing machines have separate valves for hot and cold water. However, if one valve fails due to age or wear, the other might soon follow. Replacing both at once can save you future trouble and a second repair job.
What is the average cost to replace washing machine water valves?
The cost to replace washing machine water valves varies. The part itself usually costs between $30 and $100, depending on the washing machine brand and model. If you hire a professional, labor costs can add $100 to $200, bringing the total to $130-$300 or more.
How do I know if my water valve is bad or if it’s another issue?
You can tell if a water valve is bad if your machine leaks from the back connections, fails to fill with water, fills too slowly, or constantly drips water into the tub. If the machine gets water but then suddenly stops, or fills with the wrong temperature, it also points to a valve issue.
Do all washing machine water valves fit all models?
No, washing machine water valves are not universal. Each washing machine model has a specific water inlet valve designed for it. Always check your appliance’s model number and purchase a replacement valve that matches. Using an incorrect valve can lead to improper function or damage.
Can a faulty water valve cause my washing machine to overflow?
Yes, a faulty water valve can definitely cause your washing machine to overflow. If the valve fails to close completely after filling, it will continue to let water into the drum. This constant flow will eventually lead to an overflow, causing water damage to your floor and home.
Conclusion
Replacing water valves for washing machine models is a practical skill for any homeowner. You can save money and keep your appliance running smoothly. We covered recognizing symptoms, gathering the right tools, and following a step-by-step replacement process. Remember, safety comes first: always unplug the machine and turn off the water supply before starting.
By taking your time and being careful, you can successfully complete this repair. If you ever feel uncertain or run into complex problems, do not hesitate to seek professional help. Your washing machine is an important part of your home. Keeping it in good working order helps you manage your household chores. Take pride in knowing you can handle common appliance issues yourself. You got this!
- washing machine repair
- water inlet valve replacement
- home appliance DIY
- plumbing repair

Mason Everett
Senior Writer
With a deep-rooted love for hands-on projects and over a decade in DIY home solutions, I focus on making home improvement accessible for everyone. At Cosy Home Creation, I share tried-and-true tips for enhancing your space—whether you're remodeling a room, upgrading your storage, or just making things a little more functional. My goal is simple, help you build a home that feels good to live in, one practical project at a time.