· Elira Thomsen · Recipes · 16 min read
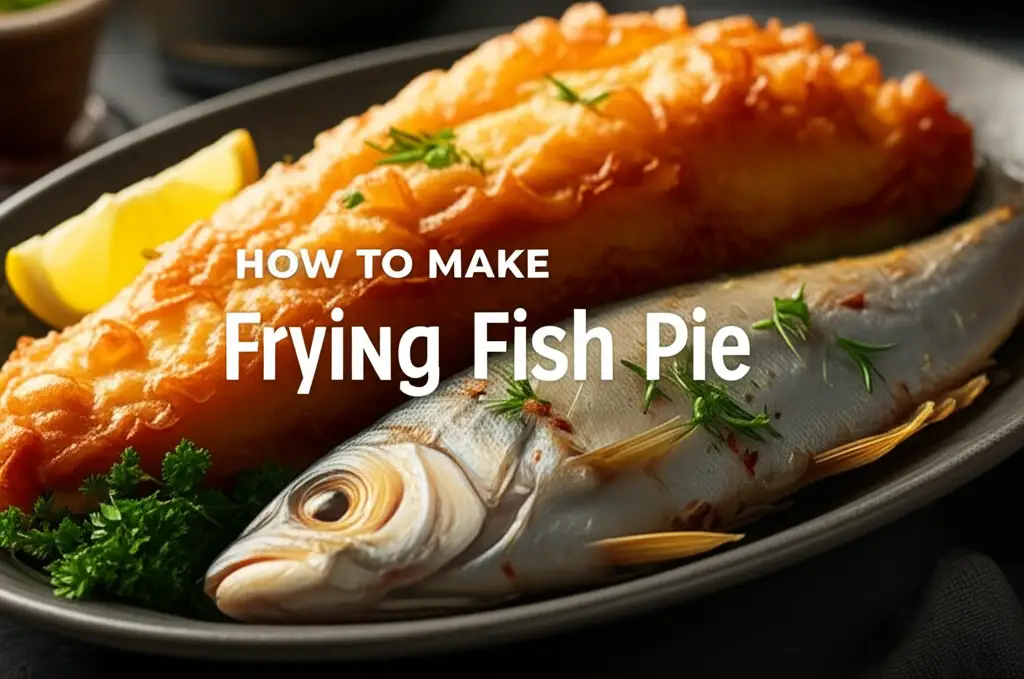
How To Make Frying Fish Pie
Crafting the Perfect Frying Fish Pie
Have you ever considered combining the crispiness of fried fish with the comforting warmth of a classic pie? It sounds unusual, but making a frying fish pie creates a unique texture and flavor experience. This dish offers a delightful twist on traditional fish pie. It brings a new dimension to your dinner table.
I love exploring new ways to enjoy familiar dishes. This article guides you through the process of making your own delicious frying fish pie. We will cover everything from choosing the right fish to assembling and baking your masterpiece. You will learn important frying techniques. We will also discuss creating a savory filling. Prepare to impress your family and friends with this innovative recipe.
Takeaway
- Select firm, white fish types for best frying results.
- Pre-cook fish by frying for a crispy texture before adding to the pie.
- Prepare a rich, creamy sauce and flavorful vegetables for the filling.
- Assemble the pie with layers of fried fish, filling, and a potato or pastry topping.
- Bake the pie until golden brown and bubbly for a comforting meal.
How To Make Frying Fish Pie
You make frying fish pie by first frying pieces of fish until crispy. Then, you combine the fried fish with a creamy sauce and cooked vegetables in a baking dish. Finally, you top the mixture with mashed potatoes or pastry and bake it in the oven until golden and heated through.
Selecting the Best Fish for Your Frying Pie
Choosing the right fish is the first step to a great frying fish pie. The type of fish affects both taste and texture. You want fish that holds its shape well when fried. It should also flake nicely in the pie.
I always recommend using firm, white fish for this recipe. Cod, haddock, pollock, or even tilapia work very well. These fish types have mild flavors. They also become beautifully flaky when cooked. Avoid very oily fish like salmon or mackerel for the main fried component. Their strong flavor might overpower the pie, and they can become too soft. You can add a small amount of smoked haddock for extra flavor. This adds a depth that enhances the whole dish. Make sure your fish is fresh. Fresh fish smells clean, not fishy. Its flesh should be firm and shiny.
When preparing the fish, cut it into uniform pieces. Aim for pieces about 1 to 1.5 inches in size. This ensures even frying. It also makes for easier serving later. Pat the fish dry with paper towels before frying. Removing moisture is key for a crispy crust. Wet fish will steam instead of fry. This prevents it from getting golden and crisp. Proper fish selection makes a big difference in your pie.
Essential Ingredients for a Delicious Frying Fish Pie
Gathering your ingredients is vital for a smooth cooking process. A frying fish pie needs several components. Each part adds to the final flavor and texture. Think about the creamy filling, the savory fish, and the topping.
Here is a list of what you will need:
For the Fish:
- 1.5-2 lbs firm white fish (cod, haddock, pollock), cut into 1-1.5 inch pieces
- All-purpose flour for dredging
- Salt and black pepper to taste
- Vegetable oil or other neutral oil for frying
For the Creamy Filling:
- 2 tablespoons butter
- 2 tablespoons all-purpose flour
- 2 cups milk (whole milk works best for richness)
- 1/2 cup heavy cream (optional, for extra richness)
- 1 cup mixed frozen peas and carrots
- 1/2 cup chopped fresh parsley
- 1 teaspoon Dijon mustard (optional, for a slight tang)
- Salt, black pepper, and a pinch of nutmeg to taste
For the Topping (choose one):
- Mashed Potato Topping:
- 2 lbs starchy potatoes (Russet or Yukon Gold)
- 1/4 cup milk or cream
- 2 tablespoons butter
- Salt and pepper to taste
- Puff Pastry Topping:
- 1 sheet (about 14 oz) frozen puff pastry, thawed
- 1 egg, beaten (for egg wash)
- Mashed Potato Topping:
Having all ingredients ready saves time. It helps you focus on cooking. The quality of your ingredients directly impacts the taste. Fresh herbs and good quality fish make a big difference. I like to measure everything out beforehand. This way, I do not forget anything during the cooking process. Your pie will taste much better with fresh, high-quality items.
Mastering the Art of Frying Fish for Your Pie
Frying the fish correctly is the signature step for this unique pie. It gives the pie its “frying” characteristic. The goal is to achieve a crispy exterior and tender interior. This texture contrasts beautifully with the creamy filling.
Start by patting your fish pieces very dry. This is crucial for crispiness. Next, season the fish with salt and pepper. Lightly dredge each piece in flour. The flour creates a thin coating. This helps the fish brown evenly. It also prevents sticking. Heat about an inch of vegetable oil in a large, heavy-bottomed skillet or a fish fryer over medium-high heat. The oil should reach about 350-375°F (175-190°C). You can test the oil by dropping a tiny piece of flour into it. It should sizzle immediately. Do not overcrowd the pan. Fry the fish in batches if needed. Overcrowding lowers oil temperature. This leads to soggy fish.
Fry each side for 2-3 minutes. The fish should turn golden brown and crispy. Once cooked, transfer the fried fish to a plate lined with paper towels. This drains excess oil. Remember, the fish will bake again in the pie. Do not overcook it during frying. You want it just done enough to be crispy. A light, golden color is perfect. This frying step adds an incredible layer of flavor and texture. It really sets this pie apart from a traditional one.
Choosing Your Frying Method
You have options for how you fry the fish. Each method has benefits. A deep fryer provides consistent results. It ensures full submersion in hot oil. This leads to very even browning. If you use a deep fryer, ensure you know how to light a fish fryer safely. This equipment is great for achieving maximum crispiness.
Shallow frying in a skillet is also very common. This method uses less oil. You fry the fish in batches. You need to flip the fish to cook both sides. Pan-frying, which uses even less oil, can also work. For the best crispy texture, I suggest shallow or deep frying. The amount of oil impacts the crispiness. More oil usually means more consistent crisp. Choose the method that suits your kitchen. Your comfort level with frying is also important.
Achieving the Perfect Crispy Texture
Several factors contribute to crispy fried fish. First, fish dryness before coating is key. Water on the fish makes the oil splatter. It also creates steam, which prevents crisping. Second, maintain the correct oil temperature. If the oil is too cool, the fish absorbs too much oil. This makes it greasy and soft. If it is too hot, the outside burns before the inside cooks. A consistent temperature gives golden, crispy results.
Third, do not overload your frying vessel. Frying in batches keeps the oil temperature stable. It allows each piece of fish enough space to cook properly. Overcrowding lowers the oil temperature quickly. This results in soft, not crisp, fish. You want to hear that sizzle as the fish enters the hot oil. That sound signals good frying. Using fresh oil also helps. Old oil can impart off-flavors and does not fry as cleanly. Following these tips ensures your fried fish is perfectly crispy. It will be a highlight in your pie.
Crafting the Creamy, Flavorful Fish Pie Filling
The heart of any good fish pie is its creamy filling. For our frying fish pie, this filling acts as a luscious base. It complements the crispy fried fish. This part of the recipe brings all the flavors together.
Begin by melting butter in a large saucepan over medium heat. Add the flour to the melted butter. Stir constantly for one minute. This creates a roux, which thickens your sauce. It also cooks out the raw flour taste. Slowly whisk in the milk, a little at a time. Continue whisking until the sauce is smooth and thickens. This usually takes about 5-7 minutes. Make sure there are no lumps. A smooth sauce is a happy sauce.
Once the sauce is thick, stir in the heavy cream, if using. Add the Dijon mustard, salt, pepper, and a pinch of nutmeg. Nutmeg adds a classic warmth to creamy sauces. Stir in the frozen peas and carrots. Cook for a few more minutes until the vegetables are tender. Finally, gently fold in the chopped fresh parsley. The sauce should be rich and flavorful. It needs to be thick enough to hold the fish pieces. This creamy mixture will absorb into the fried fish. It will create a delightful blend of textures. This filling elevates the entire pie.
Building Your Frying Fish Pie: Layers of Flavor
Assembling the pie is where all your hard work comes together. Each layer adds to the final experience. Proper layering ensures a balanced bite. It also makes serving easier.
First, take an oven-safe baking dish. A 9x13 inch (23x33 cm) dish or a large oval pie dish works well. Spread a thin layer of the creamy sauce mixture on the bottom of the dish. This prevents the fish from sticking. It also adds flavor from the base up. Next, arrange the fried fish pieces over this layer of sauce. Try to distribute them evenly. You want every serving to get some crispy fish.
Pour the remaining creamy sauce and vegetable mixture over the fried fish. Gently spread it out with a spoon. Ensure all the fish is covered by the sauce. This helps keep the fish moist during baking. It also allows the flavors to meld. The sauce should fill the dish nicely. Leave enough room for your chosen topping. Your pie is now ready for its crowning glory. This careful assembly leads to a perfectly balanced and delicious pie.
Traditional Mashed Potato Topping
A classic mashed potato topping provides a comforting cap for your pie. It browns beautifully and offers a soft contrast to the fried fish. Start by peeling and cutting your potatoes into even chunks. Boil them in salted water until they are very tender. This takes about 15-20 minutes. Drain the potatoes well. Return them to the hot pot to dry out for a minute. This removes excess moisture.
Mash the potatoes until smooth. Add butter and milk or cream. Season with salt and pepper to taste. Adjust the consistency with more milk if needed. The mashed potatoes should be creamy but firm enough to pipe or spread. Spread the mashed potatoes evenly over the fish and sauce mixture. You can use a fork to create ridges. These ridges will brown nicely in the oven. For a prettier finish, I like to use a piping bag with a star tip. This creates elegant swirls.
Crispy Pastry Crust Variations
If you prefer a crispy, flaky top, a pastry crust is a wonderful option. Puff pastry is especially good for this. It bakes up light and golden. It adds another layer of texture. Thaw one sheet of frozen puff pastry according to package directions. Lightly flour your work surface. Roll the pastry out slightly larger than your baking dish.
Carefully place the pastry over the fish mixture. Trim any excess dough. You can crimp the edges to seal them. This also makes a nice border. Cut a few small slits in the top of the pastry. This allows steam to escape during baking. Brush the top of the pastry with a beaten egg wash. This gives it a beautiful golden sheen. You can also use shortcrust pastry. A shortcrust pastry makes a firmer, more biscuit-like crust. Both options are delicious.
Baking Your Frying Fish Pie to Golden Perfection
Baking the pie is the final step. This process heats the pie through. It also crisps the topping. The aromas that fill your kitchen are wonderful.
Preheat your oven to 375°F (190°C). Place the assembled pie on a baking sheet. This catches any drips that might bubble over. Bake the pie for 25-35 minutes. The exact time depends on your oven and the topping you chose. If you used mashed potato, bake until the topping is golden brown and crispy. The filling should be bubbly around the edges.
If you used a puff pastry topping, bake until the pastry is puffed and golden. It should be deep golden brown. The internal temperature of the pie should reach 165°F (74°C). You can use a thermometer to check. If the topping is browning too quickly, you can loosely cover it with aluminum foil. This prevents burning. Remove the foil for the last 5-10 minutes of baking to allow for final crisping. The pie should look inviting and delicious.
Serving Your Homemade Frying Fish Pie
Once your frying fish pie comes out of the oven, it needs a moment. Resist the urge to dive in immediately. Resting the pie is an important step. This allows the filling to set. It also keeps the pie from falling apart when you serve it.
Let the pie rest for 10-15 minutes after removing it from the oven. This short rest makes a big difference in presentation. The filling will thicken slightly as it cools. This makes for cleaner slices. I like to serve this pie straight from the baking dish. It looks rustic and inviting.
Serve individual portions onto plates. A large spoon or spatula works best. This pie is a complete meal on its own. You can add a simple side dish to complement it. A fresh green salad with a light vinaigrette is perfect. Steamed green beans or broccoli also pair well. These sides add freshness and balance the richness of the pie. A glass of crisp white wine can also be a nice addition. Enjoy the comforting flavors and textures of your homemade frying fish pie.
Tips for Elevating Your Frying Fish Pie
Making a good frying fish pie is one thing. Making an amazing one involves a few extra touches. These tips can elevate your dish. They bring out deeper flavors and offer variations.
Consider adding different seafood to your pie. A handful of shrimp or scallops can be a luxurious addition. Add them to the sauce during the last few minutes of cooking. They will cook quickly. For an extra layer of flavor, try using a splash of white wine in your sauce. Add it after the flour, before the milk. Let it reduce slightly. This adds a bright, acidic note. You can also infuse your milk with aromatics. Add a bay leaf, a slice of onion, or a few peppercorns to the milk. Heat it gently, then strain it before adding to the roux. This adds subtle depth.
For an even richer potato topping, mix in some grated cheese. Sharp cheddar or Parmesan cheese adds a savory kick. A sprinkle of paprika on top of the potatoes before baking adds color. You can also make this pie ahead of time. Assemble the pie, cover it, and refrigerate it for up to 24 hours. Add about 10-15 minutes to the baking time if baking from cold. If using a fish fryer for the fish, ensure it is properly cleaned before reuse. These small adjustments can make your frying fish pie truly special.
Troubleshooting Common Frying Fish Pie Issues
Even experienced cooks can face challenges. Knowing how to fix common problems helps you achieve success. Here are solutions for typical frying fish pie issues.
Problem 1: Soggy Fried Fish
- Cause: Fish was not dry enough before frying, or oil was not hot enough.
- Solution: Always pat fish completely dry. Ensure oil reaches the correct temperature (350-375°F or 175-190°C). Fry in batches to maintain oil temperature.
Problem 2: Bland Filling
- Cause: Not enough seasoning, or flavors did not meld.
- Solution: Do not be shy with salt and pepper. Taste the sauce before adding fish. Consider adding more herbs, a pinch of cayenne for heat, or a squeeze of lemon juice at the end. Infusing milk with aromatics also helps.
Problem 3: Dry Fish in the Pie
- Cause: Fish was overcooked during frying or baking.
- Solution: Fry fish only until golden and just cooked through. Remember, it bakes again. Ensure the sauce covers the fish well in the pie to keep it moist.
Problem 4: Topping Not Browning
- Cause: Oven temperature too low, or not enough baking time.
- Solution: Check oven temperature with an oven thermometer. Increase baking time. For potato topping, you can finish it under the broiler for a few minutes. Watch it closely to prevent burning. For pastry, ensure egg wash is applied evenly.
Problem 5: Pie is Watery
- Cause: Vegetables released too much water, or sauce was too thin.
- Solution: Make sure your sauce is thick enough before adding vegetables. If using fresh vegetables, briefly sauté them before adding to the sauce. This helps reduce their water content. If the pie looks watery after baking, it might need a longer resting time.
By understanding these issues, you can prevent them. You can also fix them if they happen. This ensures your frying fish pie is always a triumph. Remember that practice makes perfect. Each pie you make teaches you something new.
FAQ Section
Can I use frozen fish for frying fish pie?
Yes, you can use frozen fish. Thaw it completely in the refrigerator overnight. Then, pat the fish very dry with paper towels. Remove all excess moisture before dredging and frying. This prevents a watery pie and ensures crispy fish.
What kind of oil is best for frying fish?
Use a neutral-flavored oil with a high smoke point. Good options include vegetable oil, canola oil, sunflower oil, or peanut oil. These oils do not impart a strong taste to the fish. They also handle high heat well for frying.
Can I make the fish pie filling ahead of time?
You can prepare the creamy sauce and cook the vegetables a day in advance. Store them separately in airtight containers in the refrigerator. Fry the fish just before assembling the pie. This ensures the fish stays crispy.
How do I store leftover frying fish pie?
Store any leftover pie in an airtight container in the refrigerator. It stays good for up to 2-3 days. Reheat individual portions in the microwave or oven until heated through. The fried fish might lose some crispness, but the flavor will remain good.
Can I add cheese to the filling?
Yes, you can add cheese to the filling for extra flavor. Stir in grated cheddar, Gruyere, or a blend of your favorite cheeses into the hot sauce. Add about 1/2 cup to 1 cup of cheese until it melts and incorporates smoothly.
What vegetables go well in fish pie?
Besides peas and carrots, you can add other vegetables. Diced celery, leeks, corn, or chopped spinach work well. Briefly sauté harder vegetables like celery or leeks before adding them to the sauce. This ensures they are tender in the finished pie.
Conclusion: Enjoying Your Frying Fish Pie Masterpiece
You have now learned how to make frying fish pie. This unique dish combines comforting flavors with satisfying textures. We covered selecting the right fish, mastering frying techniques, and building a flavorful pie. Remember the importance of dry fish for crispiness. A rich, creamy sauce ties everything together. The golden topping adds the final touch.
I hope you feel confident to try this recipe in your own kitchen. It truly is a rewarding experience. The process of making a homemade frying fish pie brings a special touch to any meal. This dish is perfect for family dinners or a cozy night in. Give it a try soon. You will create a memorable meal that everyone will love.
- fish pie recipe
- fried fish
- homemade pie
- seafood comfort food
- savory pie

Elira Thomsen
Home Organization & DIY Living Expert
I'm Elira Thomsen, a lifelong enthusiast of clean, beautiful, and functional homes. With over a decade of hands-on experience in DIY home decor, smart cleaning solutions, and practical organization, I help everyday homeowners turn clutter into calm. Whether it's transforming a neglected nook into a cozy reading spot, mastering budget-friendly storage hacks, or refreshing a space with seasonal décor, I'm here to guide you every step of the way. My mission is simple — make home care easier, more inspiring, and truly rewarding.