· Elira Thomsen · Home Decor · 15 min read
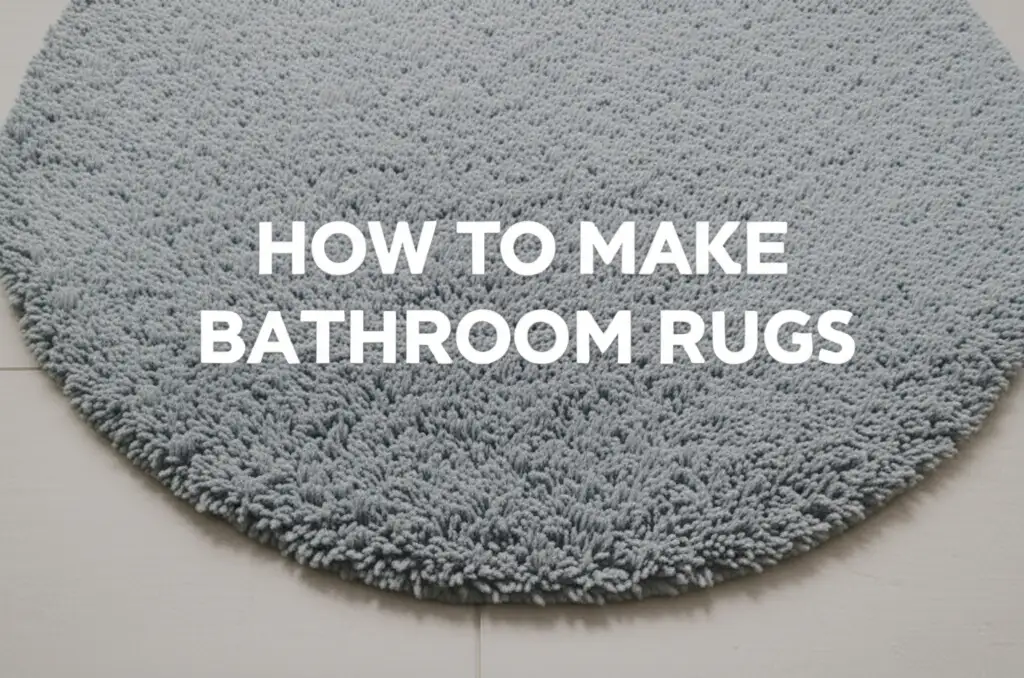
How To Make Bathroom Rugs

Craft Your Own Comfort: How To Make Bathroom Rugs
Have you ever wanted to add a truly unique touch to your bathroom? Store-bought rugs are fine, but they rarely match your exact vision. Creating your own bathroom rugs brings a special kind of satisfaction. You get to choose every detail, from the color to the texture. Plus, a handmade rug adds warmth and personality to any bathroom space. This article will show you how to make bathroom rugs, covering everything from material selection to various crafting methods. I will guide you through the process, ensuring you can create beautiful and functional rugs for your home.
Takeaway
- Choose absorbent, quick-drying, and non-slip materials.
- Select a rug-making method that fits your skill level.
- Always add a non-slip backing for safety.
- Care for your handmade rug properly to ensure it lasts.
Main Query Answer
To make bathroom rugs, gather suitable absorbent and quick-drying materials like cotton or microfiber, along with non-slip backing. Choose a method such as tufting, crocheting, or rag rug creation. Follow specific steps for your chosen technique, ensuring the finished rug has a secure, anti-slip base for safety.
Why Create Your Own Bathroom Rug?
Making your own bathroom rug offers many benefits beyond just having a floor covering. It gives you full control over the design. You can pick colors and patterns that perfectly match your existing decor. This means your rug will fit your bathroom style exactly.
Another great reason is cost savings. High-quality bathroom rugs from stores can be expensive. By making one yourself, you often spend less on materials. This allows you to get a custom look without breaking the bank. It is also a rewarding hobby. Creating something useful with your hands feels good. You can truly personalize your space.
Handmade rugs also offer unique safety features. You can specifically choose non-slip backing materials. This helps prevent slips and falls on wet bathroom floors. Store-bought rugs might not always have the grip you need. A custom rug ensures maximum safety and comfort.
Selecting the Right Materials for Your Bathroom Rug
Choosing the correct materials for your bathroom rug is important. Bathroom rugs face unique challenges. They must handle moisture and frequent foot traffic. The right materials ensure your rug is absorbent, quick-drying, and safe.
Think about how much water your rug will encounter. It needs to soak up water efficiently. At the same time, it should dry fast to prevent mold and mildew. Safety is also a top concern. A good rug stays in place on slippery bathroom floors.
Fabric Choices for Absorbency
Many fabrics work well for bathroom rugs. Cotton is a popular choice. It absorbs water well and feels soft underfoot. Organic cotton is also available for an eco-friendly option. Bamboo fabric is another excellent choice. It is highly absorbent and has natural anti-bacterial properties.
Microfiber is known for its super absorbency and quick-drying nature. It feels plush and soft. Chenille fabric also works great. It is soft and has good absorbency. When picking fabric, consider its weight and texture too. These factors impact how your rug feels and looks.
Backing Materials for Non-Slip Safety
A non-slip backing is a must for any bathroom rug. This layer prevents the rug from sliding on tiled floors. There are several options for backing materials. Latex liquid is a common choice. You paint it directly onto the back of your finished rug. It dries to form a grippy, rubber-like surface.
Another option is non-slip rug pads. You place these under your rug. They add an extra layer of cushioning and grip. Some fabrics come with pre-attached non-slip dots or a rubberized backing. Always check the material care instructions for cleaning. A rug pad may extend the life of your rug. For more on keeping your rug clean, you might find this article helpful: How To Clean Area Rugs Inside.
Essential Tools and Supplies for Rug Making
Gathering your tools before you start makes the process smooth. The specific tools you need depend on the rug-making method you choose. However, some basic supplies are useful for almost any project. Having everything ready saves time and frustration.
Make sure your workspace is clean and well-lit. Protect your surfaces with a drop cloth if needed. Organizing your supplies keeps your project moving forward. This preparation ensures a pleasant crafting experience.
Basic Supplies for Any Method
Regardless of the method, you will need a few common items. Fabric scissors are essential for cutting materials. A measuring tape helps you size your rug correctly. A sturdy needle and strong thread are useful for finishing edges or attaching components. You might also need a fabric marker or chalk for drawing patterns.
Non-slip backing material is critical. This could be liquid latex or a non-slip grip fabric. Make sure to have a dedicated workspace. This helps keep your materials organized.
Specific Tools for Different Techniques
Different rug-making methods require unique tools.
- For Tufted Rugs: A tufting gun is the main tool. You will also need a tufting frame, primary tufting cloth, and yarn. Shears or clippers help trim the pile.
- For Latch Hook Rugs: A latch hook tool is needed. You also use a mesh rug canvas and pre-cut yarn pieces.
- For Braided Rugs: You primarily need strips of fabric. A large needle and strong thread are helpful for joining braids.
- For Crocheted or Knitted Rugs: A large crochet hook or knitting needles are necessary. You will also need thick yarn or fabric strips cut into yarn-like strands.
- For Rag Rugs (No-Sew): Simply fabric strips and a non-slip mat with holes. A crochet hook can help pull strips through.
Consider the complexity of the tools. Some methods are very simple, using tools you may already own. Others require a small investment in specialized equipment. Think about your comfort level with each type of tool.
Popular Methods to Create Bathroom Rugs
There are many fun ways to make bathroom rugs at home. Each method offers a different look and feel. Your choice depends on your skill level and the kind of rug you want. Exploring these options helps you find the best fit.
Some methods are great for beginners. Others offer more advanced crafting opportunities. No matter your experience, there is a method for you. You can even combine techniques for a truly unique rug.
Loop and Tufted Rugs
Tufting creates soft, plush rugs with a dense pile. A tufting gun pushes yarn through a fabric backing. This makes loops or cut piles. It is a faster method than many traditional rug techniques. Latch hooking is a simpler version. You use a latch hook tool to tie short pieces of yarn onto a grid fabric. Both methods result in a beautiful, textured rug. These rugs feel luxurious underfoot.
Braided Rugs
Braided rugs have a classic, charming look. You create them by braiding long strips of fabric together. Then you coil and sew these braids into a flat mat. This method is great for using up old clothes or fabric scraps. Cotton jersey or old towels work well. The result is a durable and rustic rug. You can make them round, oval, or rectangular. This method allows for unique color combinations.
Crocheted or Knitted Rugs
If you enjoy yarn crafts, crocheting or knitting a rug is a good choice. You use thick yarn or fabric strips cut into wide strands. Large crochet hooks or knitting needles are necessary for these projects. This method creates a soft, pliable rug. You can make various patterns, from simple stitches to more complex designs. This kind of rug feels very cozy.
Rag Rugs (No-Sew)
Rag rugs are perfect for beginners or those who prefer no-sew projects. You create them by looping or knotting fabric strips through a grid mat. This method is excellent for upcycling old t-shirts, towels, or sheets. The process is simple and requires minimal tools. You end up with a colorful, textured rug. These rugs are often very absorbent and easy to wash.
Sewn Fabric Rugs
Sewn fabric rugs involve layering and stitching pieces of fabric together. You can use quilting techniques to create intricate patterns. Or, simply stitch together layers of absorbent fabric. This method offers great control over the final shape and size. You can add batting for extra softness. This method is good if you have a sewing machine. Ensure the fabrics are durable and machine washable.
Step-by-Step Guide: Making a Tufted Bathroom Rug (Example Method)
Making a tufted bathroom rug is a fun and rewarding process. It gives you a dense, soft rug with a professional finish. I will walk you through the steps for creating a beautiful tufted rug. This method requires a few specialized tools but yields impressive results.
This guide focuses on using a tufting gun. Other methods are simpler, but tufting offers great design freedom. Prepare your workspace before you begin. This helps avoid interruptions and keeps everything organized.
Planning and Design
First, decide on your rug’s size and shape. Consider where it will go in your bathroom. Will it be in front of the sink or by the shower? Draw your design onto the primary tufting cloth. Use a fabric marker or pen. Keep your design simple if you are a beginner. This might include basic shapes or stripes.
Choose your yarn colors. Consider how they will look with your bathroom’s existing decor. For ideas on color matching, you might check out: What Color Rugs For Tell Bathroom. High-quality acrylic or wool yarns work best for tufting. They are durable and hold their shape well.
Setting Up Your Frame
A tufting frame holds your primary tufting cloth taut. This is crucial for successful tufting. Stretch the tufting cloth tightly onto the frame. Use carpet tacks or staples to secure it. The cloth should be drum-tight. Any looseness can cause problems when tufting.
Make sure the frame is stable. You will be applying pressure with the tufting gun. A wobbly frame makes the process harder. Set up your frame at a comfortable working height. This helps prevent back strain during the project.
Tufting Process
Load your tufting gun with your chosen yarn. Follow the gun’s instructions carefully. Begin tufting by pushing the gun through the cloth. Move it steadily along your drawn lines. Maintain a consistent speed. This helps create an even pile height. Overlap your lines slightly to ensure full coverage. Work from one area of your design to the next.
Change yarn colors as needed for your design. Remember to keep the yarn feeding smoothly into the gun. Avoid pulling too hard on the yarn as you work. This can break the yarn or damage the tufting cloth. Take breaks if your hands get tired.
Finishing Touches
Once you finish tufting your entire design, remove the cloth from the frame. Trim any excess fabric around your design. Leave a border of a few inches. Apply rug adhesive to the back of the tufted area. This locks the loops in place. Let the adhesive dry completely. This step is important for preventing shedding and ensuring durability.
Trim the pile on the front of the rug to your desired height. You can use electric shears for a very even cut. Vacuum the rug to remove loose fibers. Your rug is almost ready for its non-slip backing.
Adding Non-Slip Backing and Finishing Your Rug
Ensuring your handmade bathroom rug is safe is as important as making it beautiful. A non-slip backing prevents accidents on wet floors. Finishing the edges gives your rug a professional and lasting look. Do not skip these steps.
A secure rug keeps you and your family safe. It also helps your rug stay in place and look neat. These finishing steps add to the rug’s functionality and lifespan.
Applying Non-Slip Underlays
There are two main ways to add non-slip properties. The first is to apply liquid latex directly to the back of your rug. Paint a thin, even coat over the entire back surface. Let it dry completely according to product instructions. This forms a durable, slip-resistant layer. You may need a second coat for extra grip.
The second method uses a non-slip rug pad. Cut the pad slightly smaller than your rug. Place it directly underneath the rug on the floor. This provides grip and adds extra cushioning. You can also sew or glue a non-slip fabric to the back of your rug. Always choose a backing that can withstand moisture.
Edging and Sealing
Finishing the edges of your rug prevents fraying. It also gives it a clean, polished look. For tufted rugs, you can fold the excess primary cloth around to the back. Glue it down with fabric adhesive or hot glue. Some people also bind the edges with a fabric strip. This gives a neat border.
For crocheted or knitted rugs, weave in all loose yarn ends. For rag rugs, ensure all fabric strips are securely knotted or looped. For sewn rugs, hem all raw edges. Proper edging makes your rug more durable. It also makes it look professionally made.
Care and Maintenance for Handmade Bathroom Rugs
Taking care of your handmade bathroom rug helps it last longer. Proper cleaning prevents mildew and keeps your rug fresh. Different rug materials and methods need specific care. Always check the material guidelines for your chosen fabric.
Regular care keeps your bathroom looking tidy. It also extends the life of your beautiful creation. A little attention goes a long way.
Regular Cleaning
Bathroom rugs collect lint, hair, and dust quickly. Vacuum your rug regularly, at least once a week. Use a light setting or a handheld vacuum. This prevents dirt from building up in the fibers. Shake your rug outdoors to remove loose debris. This simple step keeps your rug fresh between washes.
Promptly address any spills or wet spots. Blot them with a clean towel. Do not rub, as this can spread the stain. Regular vacuuming is key for maintaining its appearance. For more insights on cleaning rugs, you might find this useful: Are You Only Supposed to Vacuum Rugs.
Deep Cleaning
Most handmade bathroom rugs can be machine washed. Use a gentle cycle with cold water. A mild detergent is best. Avoid using bleach, as it can damage fibers and colors. If your rug is very large or delicate, hand wash it in a tub. Gently scrub with a soft brush.
After washing, air dry your rug completely. Hang it over a drying rack or clothesline. Ensure good air circulation. Do not put a rubber-backed rug in a hot dryer. High heat can melt or damage the non-slip backing. Make sure the rug is fully dry before placing it back on the floor. This prevents mildew growth. For tips on cleaning specific types of bathroom rugs, consider reading: How To Clean A Bathroom Carpet.
Drying and Storage
Proper drying is very important for bathroom rugs. Moisture left in the rug can lead to mold and bad odors. Always dry your rug thoroughly after washing or heavy use. Hang it up so air can circulate around all sides. If possible, dry it in a sunny spot. Sunlight helps kill bacteria.
When not in use, store your rug in a dry, well-ventilated area. Roll it up rather than folding it. Folding can create creases. Store it in a breathable bag or container. Avoid plastic bags, which can trap moisture. Proper storage helps your rug maintain its shape and freshness.
FAQ Section
How often should I wash my homemade bathroom rug?
Wash your homemade bathroom rug every 1-2 weeks. This frequency helps keep it clean and fresh. Bathroom rugs absorb moisture and can grow bacteria. Regular washing prevents this buildup and keeps your bathroom hygienic.
Can I put a handmade rug with a rubber backing in the washing machine?
You can usually put a handmade rug with a rubber backing in the washing machine. Use a gentle cycle and cold water. Avoid hot water and high heat in the dryer. High heat can damage or melt the rubber backing. Always air dry rubber-backed rugs.
What are the best materials for a quick-drying bathroom rug?
Microfiber, bamboo, and cotton are excellent choices for a quick-drying bathroom rug. Microfiber is highly absorbent and dries rapidly. Bamboo also offers good absorbency and quick drying. Cotton is a classic choice, known for its absorbency and breathability.
How do I prevent my handmade bathroom rug from slipping?
To prevent your handmade bathroom rug from slipping, apply liquid latex to the back. This creates a non-slip surface. Alternatively, use a separate non-slip rug pad underneath the rug. Always ensure the rug has a secure grip on your bathroom floor.
Can I use old clothes to make a bathroom rug?
Yes, you can absolutely use old clothes to make a bathroom rug. T-shirts, towels, and denim jeans are excellent choices. Cut them into strips and use methods like braiding, crocheting, or rag rug techniques. This is a great way to upcycle fabric.
How do I make my bathroom rug extra soft?
To make your bathroom rug extra soft, choose plush materials. Microfiber chenille or thick cotton yarn are good options. You can also add a layer of soft batting or fleece between fabric layers if sewing. For tufted rugs, use a higher pile height.
Conclusion
Making your own bathroom rugs is a rewarding project. You gain a beautiful, customized item for your home. You save money and use your creativity. We discussed different methods, from tufting to rag rugs. We also covered essential materials like absorbent fabrics and non-slip backings.
Remember, proper care ensures your handmade bathroom rugs last. Regular cleaning and correct drying are important steps. I encourage you to try one of these methods. Your bathroom will thank you for the unique, personal touch. Start crafting your perfect bathroom rug today!


