· Elira Thomsen · DIY Projects · 18 min read
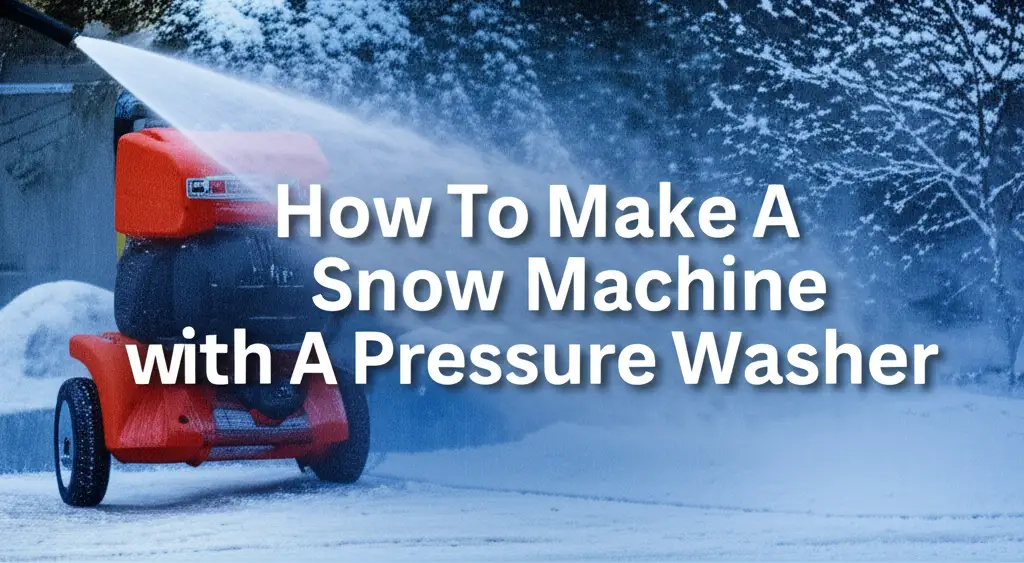
How To Make A Snow Machine With A Pressure Washer
Craft Your Own Winter Wonderland: Making a Snow Machine
Have you ever dreamt of a pristine, white blanket of snow covering your yard, even when nature does not cooperate? Imagine turning your backyard into a snowy playground for the kids, or adding a festive touch to holiday decorations. Making your own snow machine might sound like a dream, but it is a rewarding DIY project. With the right tools and steps, you can learn exactly how to make a snow machine with a pressure washer. This guide will walk you through the entire process. We cover everything from gathering essential parts to safe operation and maintenance. Prepare to transform your outdoor space into a snowy paradise with a homemade snow maker.
Takeaway:
- Gather specific equipment: a pressure washer, air compressor, specialized nozzles, and a reliable water source.
- Assemble components correctly: connect air and water lines to form a fine mist.
- Ensure ideal weather conditions: temperatures below freezing are essential for snow production.
- Prioritize safety: wear protective gear and follow all operational guidelines.
- Maintain your machine: proper cleaning and storage extend equipment life.
You can make a snow machine with a pressure washer by combining its high-pressure water output with an air compressor’s airflow. This setup creates a fine mist of water droplets, which then freeze into snow crystals when released into freezing air. The right nozzles and conditions are essential for success.
Understanding How Snow Machines Work
Making snow involves a simple but precise process. It mimics natural snow formation. Snow machines need three things: water, air, and freezing temperatures. Your DIY snow machine, built with a pressure washer, combines these elements. The pressure washer provides high-pressure water. An air compressor adds high-pressure air. When these two meet at a special nozzle, they create a fine mist. This mist atomizes into tiny water droplets. In freezing air, these droplets turn into ice crystals. These crystals fall as snow.
The air pressure helps break water into smaller particles. It also helps cool the water. The water pressure pushes the water through the nozzle. Both pressures must be balanced for optimal snow production. If the droplets are too large, they fall as rain or sleet. If they are too small, they evaporate before freezing. Achieving the right droplet size is key to successful snowmaking. This setup lets you create your own winter fun.
Essential Components for Your DIY Snow Machine
Building a homemade snow machine requires specific equipment. Each part plays a crucial role in the snowmaking process. Gathering everything before you start saves time and effort. I made a list of the main items you will need.
Pressure Washer
A good pressure washer is the heart of your snow machine. It must provide sufficient water pressure. Look for a unit with at least 1500 PSI (pounds per square inch). Higher PSI, up to 2000 PSI or more, offers better atomization. Gas-powered pressure washers often work better. They deliver more consistent power. Electric models can work for small projects. Ensure your pressure washer is in good working condition. Regular maintenance of your pressure washer helps ensure its longevity and performance.
Air Compressor
The air compressor works with the pressure washer. It pushes air into the water stream. This helps create the fine mist needed for snow. You need an air compressor that delivers at least 5-10 CFM (cubic feet per minute) at 90 PSI. A larger tank volume is also helpful. It provides a more stable air supply. Make sure the compressor has a good air filter. This keeps contaminants out of your snow.
Snowmaking Nozzles
Special nozzles are critical for making snow. They are different from standard pressure washer nozzles. Snowmaking nozzles are designed to mix water and air precisely. They create the ideal spray pattern for freezing. You may need a mix of fan and atomizing nozzles. Some DIY enthusiasts even use misting nozzles. Research specific “snow machine nozzles” online. These nozzles are what make the fine droplets.
Water Source
You need a reliable water source. A standard garden hose connection works for most setups. Ensure the water flow is steady. You want good water pressure from your tap. A higher flow rate allows for more snow production. Make sure the hose is long enough to reach your desired snowmaking area. Consider using a filter if your water has many sediments.
Air and Water Hoses
You need separate hoses for air and water. Use high-pressure hoses for both. The water hose connects to your pressure washer. The air hose connects to your air compressor. Ensure all connections are secure. Leaks can reduce efficiency and be dangerous. Use hoses rated for the pressure levels of your equipment.
Safety Gear
Safety is paramount when operating a homemade snow machine. You work with high pressure and cold temperatures. Always wear appropriate safety gear. This includes:
- Eye protection: Goggles or safety glasses protect from spray and ice particles.
- Hearing protection: Earplugs or earmuffs protect from compressor noise.
- Gloves: Insulated, waterproof gloves protect your hands from cold and frostbite.
- Warm clothing: Dress in layers to stay warm in freezing conditions.
- Sturdy footwear: Waterproof boots help keep your feet dry and warm.
Other Accessories
You might need some additional items for your setup. These include:
- Hose connectors and clamps: To secure all parts.
- Pressure gauges: To monitor air and water pressure.
- Ball valves: To control water and air flow independently.
- A sturdy stand or tripod: To mount your nozzle setup. This helps direct the snow where you want it. This also keeps the nozzle steady.
Having all these components ready ensures a smooth setup. It also helps you get right to the fun part: making snow.
Step-by-Step Guide to Assembling Your Snow Machine
Assembling your DIY snow machine is straightforward. Follow these steps carefully. You will connect the pressure washer, air compressor, and nozzle assembly. This guide ensures a safe and functional setup.
Step 1: Prepare Your Work Area
Choose an open, clear area outdoors. Make sure the ground is level. The area should allow for easy movement around your equipment. Ensure you have access to a power outlet for electric units. You also need a water spigot. Check that nothing blocks the area where the snow will fall.
Step 2: Set Up Your Pressure Washer
Place your pressure washer on a stable surface. Connect your garden hose to the pressure washer’s water inlet. Turn on the water supply. Plug in or start your pressure washer according to its manual. Do not turn it on yet. Ensure all connections are tight. This prevents leaks during operation.
Step 3: Position Your Air Compressor
Place your air compressor near the pressure washer. Connect the air hose to the compressor’s air outlet. Make sure the air hose is long enough. It needs to reach your nozzle assembly comfortably. Check the compressor’s oil levels if it is a piston model. Turn on the compressor to build pressure.
Step 4: Assemble the Nozzle Manifold
This is where the magic happens. You need a short pipe or manifold. This manifold holds your snowmaking nozzles. It will have an inlet for water and an inlet for air.
- Attach your snowmaking nozzles to the manifold. Use sealant tape on threads for a tight seal.
- Connect the pressure washer hose to the water inlet on the manifold.
- Connect the air compressor hose to the air inlet on the manifold.
- Install ball valves on both the water and air lines leading to the manifold. This gives you independent control over each flow.
A custom setup like this shows that you can create specialized equipment without buying a pre-made snow machine. Much like you might make pasta without a maker, you are crafting snow without a factory snow gun.
Step 5: Mount Your Nozzle Assembly
Mount the assembled nozzle manifold onto a sturdy tripod or stand. Elevate the manifold. This allows snow to fall freely. Point the nozzles slightly upwards and outwards. This helps spread the snow. Ensure the stand is stable. It must withstand the forces of high-pressure water and air. Secure the manifold firmly to the stand.
Step 6: Test Connections and Initial Setup
Before full operation, double-check all connections. Look for any loose fittings. Ensure all hoses are clear of kinks. Test the water flow through the pressure washer first. Then, test the air compressor. Make sure both systems build pressure as expected. This pre-check helps prevent issues. This also ensures safety. You are almost ready to make snow.
This assembly process forms the core of your homemade snow machine. Follow these steps precisely. You will have a robust setup for winter fun. Think of this as another fulfilling DIY project. It is similar to when you do it yourself a washing machine repair.
Optimizing Conditions for Perfect Snow
Making good snow involves more than just assembling equipment. You must also understand and control the environmental conditions. These factors are crucial for successful snow production.
Temperature is Key
Snowmaking requires freezing temperatures. The ideal air temperature is 28°F (-2°C) or colder. The colder it is, the more efficient your snow production becomes. Below 20°F (-6°C) is excellent. Do not attempt to make snow if temperatures are above freezing. The water will simply turn into rain or ice. Check local weather forecasts carefully before starting.
Humidity Matters
Low humidity helps make snow. Dry air allows water droplets to freeze faster. High humidity, even at freezing temperatures, can hinder snow production. If the air is very humid, the water struggles to give up its latent heat. This means it takes longer to freeze. On a clear, crisp, cold night, conditions are often perfect.
Water Quality and Pressure
Use clean water. Debris can clog nozzles. Good water pressure from your source helps the pressure washer operate efficiently. A steady water supply prevents interruptions. Ensure your pressure washer maintains its specified PSI output. Consistency is vital for a fine mist.
Airflow and Pressure Balance
This is a critical balance. The air compressor and pressure washer must work in harmony.
- Too much water, not enough air: You get coarse ice particles or rain.
- Too much air, not enough water: You get no snow, just a dry spray.
- Adjust air and water valves slowly. Find the sweet spot where you see fine, consistent snow falling. Start with moderate settings. Then, make small adjustments. Look for a plume of white, fluffy snow.
Wind Conditions
Wind can impact snow distribution. A gentle breeze can help spread the snow evenly. Strong winds, however, can blow your snow away. They can also make it difficult to aim your machine. Try to pick a calm day or evening for snowmaking. If wind is unavoidable, try to position your machine upwind. This helps direct the snow.
Troubleshooting Common Issues
- No snow, just water spray: The temperature is too warm, or the air-to-water ratio is off. Increase air pressure or reduce water flow.
- Icy chunks instead of fluffy snow: Droplets are too large. Increase air pressure. Consider using finer nozzles.
- Machine runs, but little snow: Check for clogged nozzles. Ensure both water and air lines have adequate pressure.
By carefully managing these conditions, you maximize your chances of making beautiful, fluffy snow. Patience and observation are your best tools during this optimization phase.
Safety First: Operating Your Homemade Snow Machine
Safety should always be your top priority. Operating a homemade snow machine involves high pressures, electricity, and freezing temperatures. Ignoring safety can lead to serious injury or damage. I always ensure safety checks before any project.
Wear Personal Protective Equipment (PPE)
I cannot stress this enough. Always wear:
- Safety Goggles/Glasses: Protect your eyes from high-pressure spray, ice particles, or debris.
- Hearing Protection: Pressure washers and air compressors are loud. Earplugs or earmuffs prevent hearing damage.
- Insulated, Waterproof Gloves: Protect your hands from extreme cold and possible frostbite.
- Warm, Layered Clothing: Stay warm to prevent hypothermia. Your body will get cold quickly in freezing weather.
- Waterproof Boots: Keep your feet dry and warm. The ground will get wet and icy.
Electrical Safety
If using electric pressure washers or compressors:
- Use Ground Fault Circuit Interrupter (GFCI) outlets. This protects against electric shock.
- Do not use frayed or damaged power cords. Replace them immediately.
- Keep electrical connections dry. Avoid standing water around power sources.
- Never operate in standing water. This is a severe electrical hazard.
High-Pressure Safety
Both air and water lines operate under high pressure.
- Check all connections before starting. Ensure hoses are secure and free of leaks. A leaking high-pressure hose can cause serious injury.
- Never point the nozzle at people or pets. The force of the water and air can cause severe injury.
- Be aware of recoil. When starting or stopping, the sudden pressure change can cause the nozzle assembly to move. Secure your stand firmly.
- Do not modify pressure settings beyond manufacturer limits. This can damage your equipment or cause it to burst.
Cold Weather Operation
- Prevent freezing: After each use, drain all water from hoses, pumps, and the manifold. Water left inside can freeze and crack components.
- Do not touch metal components with bare hands. You can get frostbite.
- Be mindful of icy surfaces. The area around your machine will become very slippery. Lay down mats or use sand to prevent falls.
- Do not operate unattended. Always supervise your snow machine. This helps you react quickly to any issues.
Child and Pet Safety
Keep children and pets away from the operating area. Explain the dangers of high-pressure equipment and cold temperatures. Supervise them closely if they are near the snowmaking zone.
By following these safety guidelines, you can enjoy the fun of making snow without putting yourself or others at risk. A safe snow machine is a successful snow machine.
Maintenance and Storage for Longevity
Proper maintenance and storage ensure your homemade snow machine lasts many seasons. Neglecting these steps can lead to damaged equipment. It also reduces the lifespan of your pressure washer and air compressor. After all, you invest time and money into these tools. Protecting them makes sense.
After Each Use
- Drain All Water: This is the most crucial step. Water left in the pressure washer pump, hoses, or nozzle manifold will freeze and expand. This can cause severe cracks and damage. Disconnect all hoses. Run the pressure washer for a few seconds (without water supply) to clear residual water from the pump. Tilt and shake hoses to ensure they are empty.
- Clean Nozzles: Snowmaking nozzles can get clogged. Use a small wire or needle to clear any debris. Rinse them with clean water.
- Wipe Down Equipment: Clean off any snow, ice, or dirt from the pressure washer, air compressor, and manifold. This prevents corrosion and keeps parts moving freely.
- Inspect Hoses and Connections: Look for any signs of wear, cracks, or leaks in your hoses. Check that all fittings are still tight. Replace damaged parts promptly.
Seasonal Storage (Winterizing)
When the snowmaking season ends, prepare your equipment for long-term storage.
- Pressure Washer Winterization:
- Add pump protector/antifreeze: Many pressure washer brands offer specific pump protector solutions. These prevent freezing and lubricate the pump. Follow the product instructions.
- Drain fuel (gas models): If you have a gas pressure washer, drain the fuel tank. Run the engine until it runs out of gas. This prevents fuel degradation and carburetor issues.
- Store in a dry, protected area: A garage or shed is ideal. Protect it from extreme temperature fluctuations.
- Air Compressor Winterization:
- Drain air tank: Open the drain valve at the bottom of the air tank. Water condenses in the tank over time. Draining it prevents rust.
- Check oil levels: If your compressor uses oil, ensure it is at the correct level. Consider an oil change if due.
- Store in a dry place: Protect it from moisture and dust.
- Nozzle Manifold and Hoses:
- Store nozzles separately: Keep them clean and dry. Consider placing them in a small bag to prevent dust buildup.
- Coil hoses neatly: Hang them on hooks or coil them to prevent kinks. Store them in a place where they won’t be crushed or damaged. Ensure they are completely dry before storing.
- For anything that could experience water exposure, like wood components you might use for a stand, consider techniques for how to make wood waterproof for the bathroom to extend their life.
Proper care extends the life of your equipment. It also ensures your snow machine is ready for action next winter. Regular maintenance means more fun and less hassle.
Creative Uses and Advanced Tips for Your Snow Machine
Once you master basic snowmaking, you can explore more creative uses and advanced techniques. Your homemade snow machine offers more than just simple backyard snow. I have experimented with a few ideas.
Backyard Winter Wonderland
Transform your entire yard into a snowy spectacle.
- Snow forts and sculptures: Once you have enough snow, pack it down. Build snow forts, igloos, or create snow animals. This is a classic winter activity.
- Sledding hills: If you have a slight incline, cover it with snow. This creates a small sledding slope for kids.
- Winter parties: Host a unique winter party. The fresh snow adds a magical touch. You can even set up outdoor lighting to enhance the atmosphere.
Enhancing Holiday Decorations
Snow adds a festive touch to holiday displays.
- Tree dusting: Lightly dust your outdoor Christmas trees and bushes with snow. This creates a natural, frosted look.
- Entrance pathways: Line your walkway with snow to welcome guests. Combine it with holiday lights for a dazzling effect.
- Photo opportunities: Create a snowy backdrop for family photos. These will be memorable pictures.
Advanced Snowmaking Techniques
- Temperature and Humidity Monitoring: Invest in a digital thermometer and hygrometer. Accurate readings help you dial in the perfect conditions. Some professional snowmakers use wet-bulb temperature readings. This combines temperature and humidity for a precise calculation.
- Multiple Nozzle Setups: For larger areas, consider building a manifold with multiple nozzles. This increases your snow output. You will need a more powerful pressure washer and air compressor to support this.
- Automated Controls: More advanced DIYers might explore adding automation. You can use smart plugs or timers to control the pressure washer and air compressor. This allows for scheduled snowmaking during optimal overnight conditions.
- Water Filtration Systems: If your tap water has many impurities, a good water filter can prevent nozzle clogging. It also ensures cleaner snow.
Safety Reminder for Advanced Use
Always remember safety, even with advanced setups. Ensure all electrical components are rated for outdoor use. Check connections more frequently with higher pressures or more complex systems.
Your DIY snow machine is a tool for endless winter fun. With a bit of creativity and attention to detail, you can turn any cold night into a snowy adventure. Embrace the possibilities and enjoy your personal winter wonderland!
Frequently Asked Questions
What temperature do I need to make snow?
You need temperatures at or below 28°F (-2°C) to make snow. The colder it gets, the better the snow production. Below 20°F (-6°C) is ideal. High humidity at freezing temperatures can make it harder for water to freeze. So, look for cold, dry conditions for best results.
Can any pressure washer make snow?
No, not any pressure washer. You need a pressure washer with at least 1500 PSI, and preferably higher (2000+ PSI). Gas-powered models often perform better due to consistent power. The pressure washer must pair with an adequate air compressor and specialized snowmaking nozzles to create a fine mist for freezing.
How much water does a snow machine use?
The amount of water used depends on the size and efficiency of your machine. A typical DIY pressure washer snow machine can use anywhere from 1 to 5 gallons of water per minute. This can vary based on your pressure washer’s GPM (gallons per minute) rating and how long you operate the machine.
Is homemade snow safe?
Yes, homemade snow is generally safe, as it is just frozen water. However, ensure your water source is clean. Avoid adding any chemicals. Also, be mindful of any oil residue from your air compressor if it is an oil-lubricated model. Regular maintenance helps ensure clean operation.
What kind of air compressor do I need?
You need an air compressor that can deliver a sufficient volume of air, typically 5-10 CFM (cubic feet per minute) at 90 PSI. A larger tank volume helps maintain consistent airflow. The compressor’s performance is crucial for properly atomizing the water into fine droplets.
How long does it take to make snow?
The time it takes to make a significant amount of snow varies greatly. Factors include temperature, humidity, machine size, and water/air flow rates. You might see light snowfall within minutes. To cover a sizable area with a few inches of snow, it could take several hours or even overnight. Patience is key.
Conclusion
Making a snow machine with a pressure washer is a rewarding DIY project. You turn a common cleaning tool into a source of winter magic. We explored how snow forms, the key components needed, and a step-by-step assembly guide. We also covered how to optimize conditions for perfect snow. Remember, safety always comes first. Always wear proper gear and follow operational guidelines. Maintaining your equipment ensures it serves you well for many winters to come.
This homemade snow maker offers endless fun and creative possibilities. You can build snow forts, decorate for the holidays, or simply enjoy a beautiful snowy landscape. Embrace the cold weather and transform your backyard. Start building your own snow machine today and make your winter dreams a reality. What will you create with your new snow-making ability?
- DIY snow machine
- Pressure washer snow maker
- Homemade snow
- Winter outdoor activities
- Snowmaking tips
- Outdoor fun

Elira Thomsen
Home Organization & DIY Living Expert
I'm Elira Thomsen, a lifelong enthusiast of clean, beautiful, and functional homes. With over a decade of hands-on experience in DIY home decor, smart cleaning solutions, and practical organization, I help everyday homeowners turn clutter into calm. Whether it's transforming a neglected nook into a cozy reading spot, mastering budget-friendly storage hacks, or refreshing a space with seasonal décor, I'm here to guide you every step of the way. My mission is simple — make home care easier, more inspiring, and truly rewarding.