· Tessa Winslow · Grilling Guides · 19 min read
How To Light Weber Grill With Charcoal
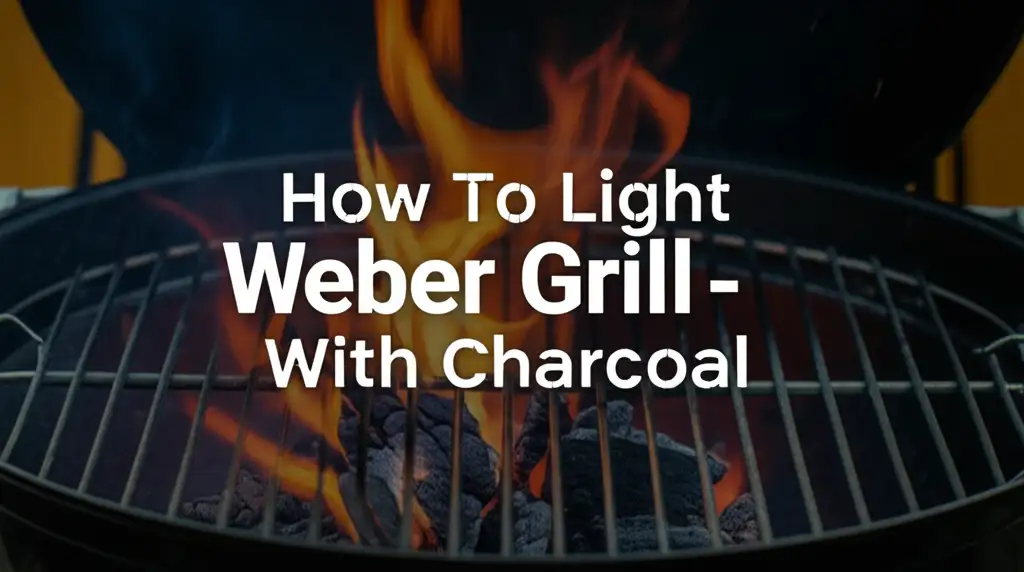
How To Light Your Weber Grill With Charcoal
Summer evenings call for the savory aroma of barbecue. Many people dream of perfectly grilled steaks or smoky chicken. The secret often lies in starting your charcoal grill just right. If you own a Weber grill, you already have an excellent tool. Learning how to light your Weber grill with charcoal correctly is the first step to becoming a grill master.
This guide will walk you through everything you need. You will discover different methods for lighting charcoal. We will cover important safety steps. By the end, you will light your Weber grill with confidence. Get ready to enjoy delicious meals cooked over glowing charcoal.
Takeaway:
- Use a charcoal chimney starter for the easiest and most consistent lighting.
- Always arrange charcoal for direct or indirect heat before lighting.
- Prioritize safety by using gloves and keeping flammable materials away.
- Allow charcoal to ash over before starting to cook.
- Control grill temperature by adjusting the Weber’s air vents.
Lighting Your Weber Charcoal Grill
To light your Weber grill with charcoal, prepare your grill and choose a lighting method. The most common and effective ways include using a charcoal chimney starter, lighter fluid, or an electric starter. Always ensure your grill is on a stable, non-flammable surface, and remember to open all grill vents for proper airflow, which helps the charcoal ignite and burn.
Gathering Your Essential Grilling Supplies
Before you start any fire, you need to prepare. Having all your tools ready makes the process smooth. This preparation saves time and ensures safety. You want to focus on the cooking, not finding missing items.
A successful charcoal grilling session begins with the right equipment. Your Weber grill is the main component. Make sure it is clean and ready for use. We will discuss specific items you need to light the charcoal.
Essential Tools and Materials
Having the correct tools on hand speeds up the lighting process. It also makes the whole experience much safer. I always gather my supplies before I even think about touching the charcoal. This simple habit prevents last-minute scrambling.
First, you need charcoal. Choose between briquettes or lump charcoal. Briquettes burn longer and provide consistent heat. Lump charcoal burns hotter and imparts a more natural smoky flavor. Both work well in a Weber grill. You should select the type that best suits your cooking style.
Next, consider your lighting method. A charcoal chimney starter is widely recommended. It uses newspaper or fire starter cubes to ignite the charcoal quickly. Some people prefer lighter fluid for convenience. Others use electric starters for a flameless approach. Each method has its own steps and benefits.
Safety gear is also crucial. Heat-resistant gloves protect your hands from burns. Long tongs help you move hot charcoal safely. A fire extinguisher or a bucket of sand should always be nearby. These items are for emergencies only. Always be prepared for unexpected situations when working with fire.
Finally, think about grill maintenance. A clean grill performs better and lasts longer. Before you light any charcoal, give your grates a quick check. If you have rust or tough residue, a good cleaning helps ensure even cooking. Learning how to clean flat top grill rust can prepare you for keeping your grill in top shape.
The Charcoal Chimney Starter Method
The charcoal chimney starter is my favorite way to light charcoal. It is simple, effective, and avoids chemical tastes from lighter fluid. This method ensures your charcoal heats evenly and consistently. You will achieve a perfect cooking temperature every time.
A chimney starter is a cylindrical metal container. It has a grate at the bottom and handles on the side. You fill it with charcoal, then place paper or fire starters underneath. This design creates a draft, pulling air up through the charcoal. This process helps the charcoal ignite quickly and thoroughly.
Step-by-Step Chimney Use
Using a chimney starter is straightforward. First, you need to prepare your Weber grill. Remove the cooking grate from your grill. Open all the bottom vents on your Weber. These vents provide the oxygen needed for the charcoal to burn properly. Poor airflow will make lighting very difficult.
Next, load the chimney starter with charcoal. Fill the bottom section with a few sheets of crumpled newspaper or a couple of fire starter cubes. Then, fill the top section with your desired amount of briquettes or lump charcoal. Do not pack the charcoal too tightly. Air needs to circulate through it.
Place the loaded chimney starter directly on the charcoal grate inside your Weber grill. Light the newspaper or fire starter cubes from the bottom openings of the chimney. The flames will ignite the bottom layer of charcoal. As they burn, the heat rises, igniting the charcoal above.
Wait patiently as the charcoal burns. You will see smoke at first, then flames. After about 15-20 minutes, the charcoal on top will start to turn gray and ash over. The briquettes will glow orange. This means they are ready. You can tell they are ready when most of the charcoal has a light ash coating. For comparison, lighting a charcoal grill is similar in principle to how you might light a fish fryer – you need a concentrated heat source to get the fuel burning efficiently.
Once the charcoal is ready, carefully pour the hot coals from the chimney into your Weber grill. Use heat-resistant gloves for this step. Arrange the coals in your desired configuration for direct or indirect cooking. Replace the cooking grate. Give the grill five minutes to heat up before cooking.
Using Lighter Fluid for Quick Ignition
Lighter fluid offers a quick and easy way to ignite charcoal. Many grillers use this method for its convenience. It helps charcoal catch fire quickly. However, it requires careful application and understanding of its potential drawbacks.
Lighter fluid is a petroleum-based product. It works by soaking into the charcoal and evaporating into flammable vapors. When you ignite these vapors, they set the charcoal alight. This process is very fast. You get burning coals much faster than with some other methods.
Application and Safety Warnings
Using lighter fluid correctly is important for taste and safety. Start by arranging your charcoal in a pyramid shape on the Weber grill’s charcoal grate. This shape helps the fluid spread and the flames climb. Ensure all bottom vents on your Weber grill are fully open. Good airflow is essential for the charcoal to burn well.
Next, apply the lighter fluid. Squirt it evenly over all the charcoal. Do not drench the coals excessively. A moderate amount is enough to get them burning. Let the fluid soak into the charcoal for about 30 seconds to a minute. This allows the vapors to build up. Never apply lighter fluid to hot or burning coals. This can cause dangerous flare-ups.
Stand back and carefully light the charcoal. Use a long match or a grill lighter. The coals will ignite quickly, often with a whoosh sound. Allow the fluid to burn off completely. You will see large flames at first. These flames will die down as the fluid burns away. The charcoal will then begin to turn gray.
Wait until the charcoal is fully ashed over before you start cooking. This typically takes 15-20 minutes after the flames subside. If you cook too soon, your food might pick up a chemical taste from the lighter fluid. Patience ensures clean-tasting food. Always store lighter fluid safely away from heat. Keep it out of reach of children.
Electric Charcoal Starter Techniques
An electric charcoal starter offers a clean and flameless way to ignite your charcoal. This method is convenient and eliminates the need for lighter fluid or newspaper. It works by using an electric heating element to directly ignite the coals. Many grillers prefer this method for its simplicity and safety.
Electric starters consist of a heating coil attached to a handle and power cord. You plug it into an electrical outlet. The coil gets very hot. When placed directly on charcoal, it transfers this heat, causing the coals to ignite. This process is very efficient.
How to Use an Electric Starter
Using an electric charcoal starter is simple and straightforward. First, arrange your charcoal on the bottom grate of your Weber grill. Form a small pile or pyramid. Make sure the charcoal is not spread too thin. You want the coals to touch the heating element.
Next, plug in the electric starter. Place the heating coil directly into the charcoal pile. Ensure it is buried deep enough to make good contact with several briquettes or pieces of lump charcoal. The coil will begin to heat up quickly. You will see the coals start to smoke.
Keep the electric starter in place for 8-10 minutes. The coals directly touching the coil will begin to glow red and then ash over. Once these coals are fully lit, you can remove the electric starter. Unplug it immediately and place it on a heat-resistant surface to cool down. Do not touch the coil. It remains very hot for a while.
After removing the starter, the ignited coals will start to light the surrounding charcoal. The heat spreads through conduction. You can gently nudge the unlit charcoal closer to the lit coals to speed up the process. All the bottom vents on your Weber grill should be open during this time to promote airflow. This helps the fire spread.
Allow the charcoal to continue burning until it is mostly covered in a light gray ash. This usually takes another 10-15 minutes after removing the starter. Once the coals are ready, spread them out for direct or indirect cooking. Replace your cooking grate. Your Weber grill is now ready for grilling.
Arranging Charcoal for Perfect Heat
After lighting your charcoal, how you arrange it in your Weber grill matters greatly. The charcoal setup directly impacts the heat distribution. This determines how your food cooks. There are two primary methods for arranging charcoal: direct heat and indirect heat. Each serves a different grilling purpose.
Understanding these setups helps you control your cooking environment. You can achieve perfectly seared steaks or slow-smoked ribs. Your Weber grill is designed to accommodate both methods easily. Proper arrangement is key to successful grilling outcomes.
Direct Heat Setup
Direct heat cooking means placing food directly over the lit coals. This method is best for foods that cook quickly. Think about burgers, hot dogs, thin steaks, or vegetables. The intense heat sears the outside quickly, creating a delicious crust. This method cooks food fast.
To set up for direct heat, spread the hot charcoal evenly across the entire charcoal grate. This creates a uniform cooking surface. Ensure the coals are in a single layer. This ensures consistent heat distribution. If you need hotter temperatures, you can pile the coals slightly denser. However, a single, even layer is usually sufficient for most direct grilling.
Place your cooking grate back onto the grill. Close the lid for a few minutes to allow the grate to heat up. This helps prevent sticking. When the grate is hot, place your food directly above the coals. Turn food as needed to ensure even cooking. Keep a close watch on the food to prevent burning.
Indirect Heat Setup
Indirect heat cooking involves placing food next to, not directly over, the hot coals. This method is ideal for larger cuts of meat or foods that require longer cooking times. Examples include whole chickens, roasts, or racks of ribs. Indirect heat cooks food slowly and evenly. It prevents burning on the outside while ensuring the inside cooks through.
To set up for indirect heat, push the hot charcoal to one side of the charcoal grate. Alternatively, divide the coals into two piles on opposite sides. This creates an empty space in the middle of the grill. This space is where you will place your food. The heat circulates around the food, cooking it gently.
If you are smoking, you can add wood chips to the lit coals. This infuses your food with a smoky flavor. Place a drip pan in the empty space under the cooking grate. This pan catches drippings and helps prevent flare-ups. It also keeps your grill cleaner. Replace the cooking grate. Place your food over the drip pan, not directly over the coals. Close the lid to allow the heat to circulate. Monitor the grill temperature and adjust vents as needed for consistent heat.
Controlling Grill Temperature with Vents
Once your charcoal is lit and arranged, temperature control becomes the next important step. Your Weber grill has adjustable air vents. These vents are your primary tools for managing the heat. Mastering their use is crucial for successful grilling.
Proper temperature control ensures your food cooks perfectly. Too much heat can burn your food. Too little heat will leave it undercooked. Learning to use the vents effectively gives you precise control over your grilling. This allows you to cook a wide variety of dishes.
Using the Bottom Vents
The bottom vents on your Weber grill are located at the base of the kettle. These vents control the amount of oxygen flowing into the firebox. Oxygen feeds the fire. More oxygen means a hotter fire. Less oxygen makes the fire cooler.
To increase the grill temperature, open the bottom vents wider. This allows more air to enter, feeding the coals. The coals will burn hotter and faster. For maximum heat, open them completely. You will see a noticeable rise in temperature. This is useful for searing or quick cooks.
To decrease the grill temperature, close the bottom vents partially. This restricts the airflow to the coals. The fire will slow down and burn cooler. For very low temperatures, close them almost entirely. Never close them completely unless you want to extinguish the fire. Always leave a small crack for safety and to keep the coals burning.
Using the Top Vent
The top vent, located on the lid of your Weber grill, also plays a role in temperature control. It primarily allows hot air and smoke to escape. This vent also helps draw fresh air in through the bottom vents. This creates a natural convection current inside the grill.
When you open the top vent wider, more hot air escapes. This can slightly reduce the internal temperature, but its main role is to promote airflow. It helps prevent stale, smoky air from building up inside the grill. Keeping it open ensures good circulation.
For general grilling, I keep the top vent at least partially open. If I am aiming for very high heat, I open both top and bottom vents fully. For low and slow cooking, I close the bottom vents almost completely and leave the top vent partially open. Always position the top vent on the side opposite the charcoal when using indirect heat. This draws the heat and smoke across the food. Adjusting both sets of vents gives you ultimate control over your grill’s temperature. Practice helps you get a feel for how your specific grill responds to vent adjustments.
Safety First: Important Grilling Precautions
Grilling with charcoal involves fire and heat. Safety must always be your top priority. Accidents can happen quickly. Taking proper precautions prevents injuries and property damage. A safe grilling experience is an enjoyable grilling experience.
Always approach your hot grill with caution. Never leave a burning grill unattended. Ensure children and pets stay away from the grilling area. A few simple rules can prevent most grilling mishaps. Your safety and the safety of those around you are paramount.
Safe Grilling Practices
Before lighting your Weber grill, choose a safe location. The grill should be on a flat, stable surface. Place it away from flammable structures, such as wooden decks, fences, or overhanging tree branches. A concrete patio or open grassy area is ideal. Never use your charcoal grill indoors or in a garage. Charcoal produces carbon monoxide, a dangerous, odorless gas. Adequate ventilation is always necessary.
Wear appropriate gear. Heat-resistant gloves protect your hands when handling hot grates or charcoal. Use long-handled tools, like tongs and spatulas, to keep your hands away from the heat. Avoid loose clothing that could accidentally catch fire. Tie back long hair.
Keep a fire extinguisher or a bucket of sand or water nearby. These are for emergencies only. Do not use water on a grease fire, as it can spread the flames. Instead, close the grill lid and vents to smother the fire. For grease fires, baking soda can also work.
When finished grilling, allow the charcoal to cool completely. This can take several hours, even overnight. Close all vents to cut off oxygen and extinguish the coals. Once the coals are cold, wrap them in aluminum foil. Dispose of them in a non-combustible metal container. Never discard hot coals in plastic trash cans or directly on the ground.
Maintain your grill regularly. Clean out old ash from the bottom of the kettle after each use. Excessive ash can block airflow and make lighting difficult. Regularly cleaning your grill prevents grease buildup, which can cause flare-ups. A well-maintained grill is a safer grill. Always check for loose parts or damaged components before lighting.
Troubleshooting Common Lighting Issues
Even experienced grillers sometimes face issues lighting charcoal. It can be frustrating when your coals just won’t catch or burn evenly. Understanding common problems helps you fix them quickly. Most issues relate to airflow, moisture, or improper setup.
Do not get discouraged if your first attempt isn’t perfect. Grilling is a skill that improves with practice. We will look at typical problems and how to solve them. Soon, you will light your Weber grill with ease every time.
Charcoal Not Catching Fire
The most common reason charcoal won’t light is a lack of airflow. Fire needs oxygen to burn. Check your Weber grill’s bottom vents. Are they fully open? If not, open them all the way. Sometimes, old ash buildup can block these vents. Make sure the bottom of your grill is clear of ash. This ensures proper oxygen flow.
Another reason could be damp charcoal. Charcoal absorbs moisture from the air. If stored improperly, it can become difficult to light. Try using fresh, dry charcoal. Store your charcoal in an airtight container in a dry place. If you suspect your charcoal is damp, try lighting a smaller batch first.
If using a chimney starter, ensure you have enough kindling. A few sheets of crumpled newspaper work well. If using fire starter cubes, make sure they are placed directly under the charcoal. The kindling needs to generate enough heat to ignite the charcoal above. Pack the chimney properly. Do not stuff it too tightly, as this restricts airflow within the charcoal itself.
Uneven Burn or Low Heat
If your charcoal lights but burns unevenly, or does not get hot enough, consider a few factors. First, check your charcoal amount. Are you using enough coals for the cooking you plan? For most grilling, you need a good layer of coals to generate consistent heat. A sparse layer will not hold temperature well.
Also, re-evaluate your charcoal arrangement. If coals are too spread out, they won’t generate enough collective heat. Piling them closer together allows them to radiate heat to each other, maintaining a higher temperature. Ensure your briquettes or lump pieces are similar in size. This promotes more uniform burning.
Wind can also cause uneven burning. Strong gusts can make one side of your grill burn hotter than another. Try to position your grill to block strong winds. Your Weber lid can also act as a windbreak. Keep the lid on whenever possible to maintain consistent internal temperatures.
Finally, check your vents again. If the top vent is completely closed, it can starve the fire of oxygen and cause it to burn poorly. Always keep the top vent at least partially open to allow for proper airflow and heat circulation. Sometimes, a simple adjustment to the vents is all it takes to get your coals burning just right.
Frequently Asked Questions About Lighting Charcoal Grills
How much charcoal do I need for grilling?
The amount of charcoal depends on your grill size and what you are cooking. For direct grilling, cover the entire charcoal grate with a single layer of briquettes. For indirect cooking, create two piles on opposite sides. A full chimney starter is usually enough for most standard grilling sessions. Adjust based on the heat required for your recipe.
How long does it take for charcoal to be ready?
It typically takes 15-20 minutes for charcoal to be ready after lighting. You know the charcoal is ready when it is mostly covered in a light gray ash. The briquettes will glow orange underneath this ash layer. Lump charcoal may be ready slightly faster due to its irregular shape and higher surface area.
Can I use regular wood in my Weber charcoal grill?
You should not use regular firewood as your primary fuel in a charcoal grill. Firewood burns differently and can produce too much ash. Use charcoal as your main fuel source. You can add small chunks of smoking wood, such as hickory or applewood, to your lit charcoal for extra flavor. These are different from regular firewood logs.
How do I control the temperature once the charcoal is lit?
You control your Weber grill’s temperature by adjusting the air vents. Open the bottom vents wider to increase heat, as this lets in more oxygen. Close them partially to decrease heat. The top vent mainly helps with airflow and smoke exhaust. Keep it at least partially open for proper circulation.
Is lighter fluid bad for charcoal grilling?
Lighter fluid is not inherently bad if used correctly. However, it can impart a chemical taste to food if not completely burned off before cooking. Always allow the fluid to burn until flames subside and charcoal is ashed over. Using a charcoal chimney starter or an electric starter avoids the need for lighter fluid altogether.
Conclusion: Master Your Weber Grill
Lighting your Weber grill with charcoal does not have to be difficult. You now have the knowledge to do it confidently. We covered preparing your tools and using a chimney starter, lighter fluid, or an electric starter. We also discussed how to arrange coals and control temperature with vents.
Remember that safety is always key. Practice these steps, and you will soon master the art of how to light your Weber grill with charcoal. This skill opens up a world of delicious outdoor cooking. Get ready to enjoy smoky flavors and perfect grill marks. Grab your favorite charcoal, fire up that Weber, and start grilling your next masterpiece today!
- charcoal grilling
- Weber grill
- grill lighting
- outdoor cooking
- BBQ tips
- charcoal starter
- grilling safety

Tessa Winslow
Cleaning Expert
With years of hands-on experience in home care and a love for transforming everyday spaces, I specialize in making cleaning feel approachable and even enjoyable. I share smart, sustainable solutions that blend cleaning, organization, and decor—so your home not only looks good, but feels good too. Whether you're tackling weekend chores or taking on a full DIY refresh, I’m here to help you create a cleaner, cozier space you’ll love coming home to.