· Tessa Winslow · Home Appliances · 18 min read
How To Fix Detergent Dispenser In Dishwasher
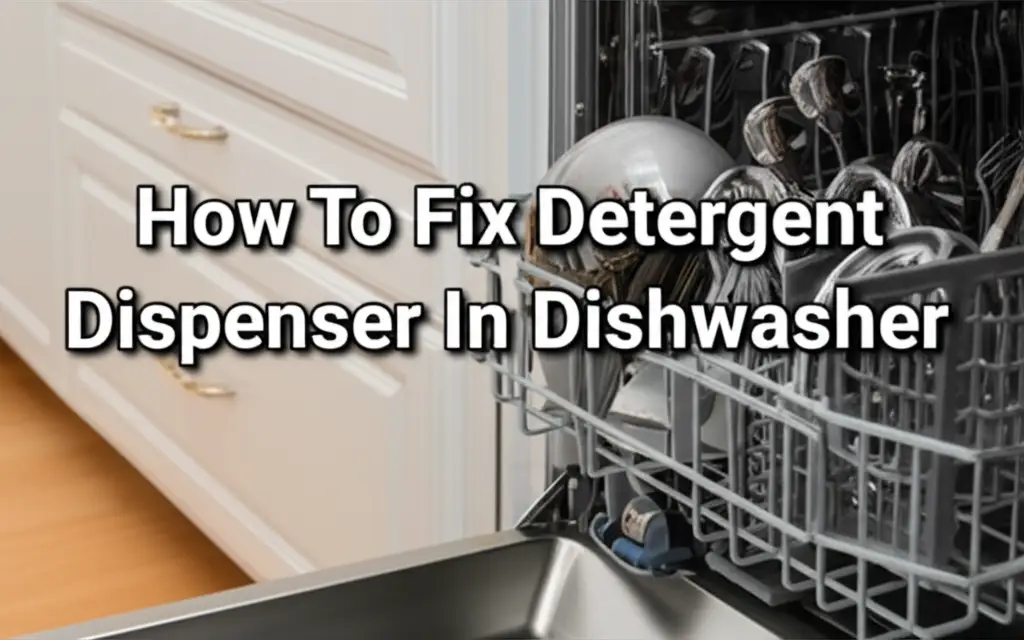
Fix Your Dishwasher Detergent Dispenser for Spotless Dishes
Imagine loading your dishwasher, adding the soap, and running a cycle. You open the door, expecting sparkling clean dishes, only to find them still covered in food debris. The culprit? Often, a faulty detergent dispenser. This common appliance problem can be frustrating. It wastes water and energy, and leaves your dishes dirty.
A non-working detergent dispenser means your dishwasher cannot properly clean. This issue prevents soap from releasing into the wash cycle. Understanding why this happens saves you time and money. You avoid costly service calls and ensure your dishes always come out spotless. This article will guide you through diagnosing and fixing your dishwasher’s detergent dispenser. We will explore common issues, provide step-by-step troubleshooting, and help you restore your dishwasher’s cleaning power.
Takeaway
- Check the Basics: Ensure correct detergent use, proper loading, and adequate water temperature.
- Clean Regularly: Remove soap residue and debris from the dispenser and surrounding areas.
- Inspect Mechanical Parts: Look for obstructions or damage to the dispenser door and latch.
- Test Electrical Components: Diagnose the wax motor and bimetal switch if mechanical issues are absent.
- Consider Professional Help: Know when the repair is beyond DIY capabilities or requires specific tools.
Main Query Answer
To fix a dishwasher detergent dispenser, first check basic issues like detergent type, dispenser clogs, or blocked spray arms. If these are clear, inspect the dispenser latch and door for physical damage. Next, test electrical components like the wax motor and bimetal switch that control the dispenser release.
Understanding Why Your Dishwasher Detergent Dispenser Fails
It is incredibly frustrating when your dishwasher runs a full cycle and your dishes remain dirty. Often, a malfunctioning detergent dispenser is the cause. This component is crucial for releasing soap at the right time during the wash cycle. When it fails, your detergent does not reach the dishes. This leaves food particles and grime behind.
Several factors can cause a detergent dispenser to fail. We often see simple issues. These include using the wrong type of detergent or overloading the dishwasher. Sometimes, the problem is more complex. It might involve a faulty mechanical latch or electrical components. Identifying the specific reason is the first step towards a successful repair. Understanding these potential causes helps you approach the fix systematically.
My experience tells me that patience and a methodical approach save a lot of headaches. Before you even think about complex repairs, always start with the most basic checks. Many common problems have simple solutions. This approach avoids unnecessary part replacements. It also ensures you address the root cause effectively. Let’s explore the most frequent reasons why your detergent dispenser might not be working as it should.
Common Reasons for Detergent Dispenser Problems
- Incorrect Detergent Type or Amount: Using liquid hand soap, too much detergent, or a non-dishwasher specific product can create excessive suds. These suds prevent the dispenser from opening. Always use detergent formulated for dishwashers. What Detergent Is Recommended For Bosch Dishwasher is a good resource for choosing the right type.
- Clogged Dispenser: Detergent residue or foreign objects can build up. This blocks the dispenser from opening or closing properly. Over time, soap can harden inside the compartment. This physically obstructs the release mechanism.
- Blocked Spray Arms: If dishes are loaded improperly, they might block the spray arms. The water jets from these arms often hit the dispenser door to trigger its release. Blocked arms mean the water cannot reach the dispenser.
- Low Water Temperature: Dishwashers need hot water to properly dissolve detergent. If the water entering your dishwasher is not hot enough, the detergent may not dissolve. It can remain caked in the dispenser.
- Faulty Dispenser Latch or Spring: The mechanical components that hold the dispenser door shut can wear out. A broken spring or a sticky latch will prevent the door from popping open. This means the detergent stays inside.
- Electrical Malfunction (Wax Motor/Bimetal Switch): Many modern dispensers use an electrical component, like a wax motor or bimetal switch, to open the door. If this component fails, it will not trigger the door release. This is a more technical issue, but often fixable.
- Overloading the Dishwasher: Piling too many dishes into the dishwasher can block the dispenser door. This prevents it from fully opening during the cycle. Make sure nothing obstructs the dispenser.
Understanding these common issues will help you narrow down the potential culprits. This prepares you for the detailed troubleshooting steps ahead. It is often surprising how a small issue can cause a big problem.
Troubleshooting Dispenser Issues: Initial Checks
When your dishwasher detergent dispenser is not opening, it is easy to panic. You might immediately think of complex electrical problems. However, many dispenser issues stem from simple oversights or general maintenance needs. I always recommend starting with the easiest fixes first. These basic checks often resolve the problem without needing tools or replacement parts. Taking a few minutes to confirm these basics can save you a lot of time and effort.
Your dishwasher depends on several conditions to function properly. The detergent needs to be right. Water must be hot. Dishes must not block the dispenser. My first thought is always to confirm these simple points. They are very common culprits. Skipping these steps might lead you to dismantle parts unnecessarily. This could even create new problems.
Let’s walk through the initial, easy-to-check items. These steps are foundational. They address the most frequent reasons for dispenser failure. Confirming each of these points ensures you cover all simple causes. This makes your troubleshooting process efficient and effective.
Essential First Steps for Dispenser Repair
- Check Detergent Type and Freshness:
- Verify Dishwasher Detergent: Ensure you are using detergent specifically designed for dishwashers. Using common liquid dish soap, like Dawn, creates excessive suds. These suds can prevent the dispenser from opening. Always use automatic dishwasher detergent. Learn more about this by reading Can You Use Dishwasher Liquid In Dishwasher and What To Do If You Put Dawn In Dishwasher.
- Check Detergent Freshness: Dishwasher detergent can clump or lose effectiveness if it is old or exposed to humidity. Old or clumpy detergent may not dissolve properly. It could even prevent the dispenser door from opening. Store your detergent in a cool, dry place.
- Inspect Dishwasher Loading:
- Avoid Overloading: Too many dishes, especially tall items, can physically block the dispenser door. Make sure no plates, bowls, or cutlery baskets are in the path of the dispenser door. This prevents it from swinging open freely.
- Ensure Spray Arm Clearance: The water spray from the wash arms often triggers the dispenser’s release. If dishes block the spray arms, water may not reach the dispenser. This prevents it from opening. Run a quick check to see if the spray arms spin freely before starting a cycle.
- Verify Water Temperature:
- Hot Water is Key: Dishwasher detergents need hot water to activate and dissolve properly. If the water entering your dishwasher is not hot enough (ideally around 120°F or 49°C), the detergent may not release or dissolve.
- Run Hot Water at Sink: Before starting the dishwasher, run the hot water at your kitchen sink. Let it run until it is hot. This ensures hot water is immediately available to the dishwasher. This simple trick can make a big difference.
- Check for Residue and Obstructions:
- Inspect Dispenser Cavity: Look inside the dispenser compartments for any hardened detergent residue or foreign objects. Sometimes, small food bits or pieces of plastic can get lodged in the dispenser. This prevents the door from opening.
- Clean the Dispenser: Use a damp cloth or a small brush to clean any visible buildup. You might need to gently scrape away dried detergent. This ensures the dispenser mechanism moves freely.
By addressing these initial checks, you eliminate the most common and simplest causes of dispenser failure. If the problem persists after these steps, you can move on to more detailed inspections.
Cleaning Your Dishwasher Detergent Dispenser
A common reason for a detergent dispenser malfunction is accumulated residue. Over time, soap particles, rinse aid drips, and hard water deposits can build up inside the dispenser. This sticky grime can prevent the door from opening smoothly. It can also block the release mechanism. Regular cleaning of your detergent dispenser is a critical maintenance step. It ensures proper function and prolongs the life of this component. I have seen many instances where a thorough cleaning completely resolved dispenser issues.
Cleaning the dispenser is a straightforward process. It does not require any special tools. This simple task can often prevent the need for more complex repairs. Think of it as preventative medicine for your dishwasher. This routine helps maintain your appliance’s peak performance. It also ensures every wash cycle delivers sparkling clean dishes.
Let’s go through the steps for effectively cleaning your dishwasher detergent dispenser. This will clear any obstructions and allow the soap to release properly. This step should be a part of your regular dishwasher maintenance. It keeps your appliance running smoothly. You will be surprised how much of a difference a clean dispenser makes.
Steps to Clean a Clogged Detergent Dispenser
- Empty and Power Off the Dishwasher:
- Remove Dishes: First, empty the dishwasher completely. You need clear access to the dispenser.
- Disconnect Power: For safety, always unplug the dishwasher or turn off its circuit breaker. This prevents accidental activation during cleaning.
- Inspect for Visible Obstructions:
- Examine Compartments: Open the detergent and rinse aid dispenser doors. Look closely inside both compartments. Check for any large pieces of hardened detergent, food debris, or foreign objects.
- Check the Latch Area: Pay attention to the edges of the dispenser door and the latch mechanism. Sometimes, residue builds up here, causing the door to stick.
- Clean with Warm Water and a Brush:
- Prepare Cleaning Solution: Mix a small amount of warm water with a mild dish soap. You can also use a mixture of white vinegar and water. Vinegar helps dissolve mineral deposits and soap scum. Learn more about using vinegar to clean your appliance by checking out Where To Put Vinegar In Dishwasher To Clean.
- Scrub the Dispenser: Dip a small, soft brush (like a toothbrush) or a cotton swab into the cleaning solution. Gently scrub the inside of the detergent and rinse aid compartments. Pay extra attention to corners and crevices where residue might accumulate.
- Clean the Door and Latch: Scrub the edges of the dispenser door. Also clean the area where the latch engages. Ensure no residue prevents the latch from moving freely.
- Remove Stubborn Buildup:
- Use a Non-Abrasive Tool: For very stubborn, hardened detergent, you might need a non-abrasive plastic scraper or a wooden toothpick. Gently chip away the hardened residue. Be careful not to scratch or damage the plastic components.
- Apply Vinegar Soak (Optional): For severe buildup, you can soak a paper towel in white vinegar. Then, place it directly over the affected area in the dispenser. Let it sit for 15-30 minutes to help soften the grime. Then, scrub again.
- Rinse and Test:
- Wipe Clean: Use a clean, damp cloth to wipe away all cleaning solution and loosened residue. Ensure the dispenser is dry before proceeding.
- Manual Test: Manually open and close the dispenser door several times. It should move freely and smoothly. The latch should click securely into place.
- Run a Test Cycle: Plug the dishwasher back in. Run an empty rinse cycle or a light wash cycle. Monitor the dispenser to see if it opens. You can put a small amount of a new, fresh detergent in it to check.
Regularly cleaning your dishwasher, including the filter and interior, is also vital for overall performance. These practices prevent many common issues, including dispenser problems. For example, knowing How Often Should You Clean Your Dishwasher Filter can help you maintain optimal wash conditions.
Inspecting and Repairing the Dispenser Latch
Once you have ruled out simple issues and cleaned the dispenser, the next step is to examine the mechanical latch. The latch is the physical mechanism that holds the detergent dispenser door closed. It releases it at the appropriate time during the wash cycle. If this latch is faulty or obstructed, the dispenser door will not open, regardless of whether other components are working. My experience shows that mechanical failures of the latch or its spring are quite common. They are often due to wear and tear or physical damage.
Checking the latch requires a bit more hands-on inspection. You need to look for any visible signs of damage or misalignment. Sometimes, a part of the latch mechanism can simply be bent or broken. This prevents it from operating correctly. This step is a critical part of diagnosing your dishwasher’s dispenser problem. It bridges the gap between simple cleaning and more complex electrical checks.
Let’s walk through how to inspect and, if possible, repair the dispenser latch. This involves careful observation and sometimes minor adjustments. You might need to consider replacing the entire dispenser assembly if the latch is severely broken.
Steps to Inspect and Repair the Dispenser Latch
- Power Off and Open the Dispenser:
- Safety First: Always ensure the dishwasher is unplugged from the power outlet. Alternatively, turn off the circuit breaker for the dishwasher before any physical inspection.
- Open Dispenser Door: Open the main dishwasher door. Then, open the detergent dispenser door manually. You need a clear view of the latch mechanism.
- Visual Inspection of the Latch and Spring:
- Examine the Latch Hook: Look at the small hook or tab that holds the dispenser door closed. Check if it is bent, broken, or misaligned. It should appear straight and intact.
- Check the Spring (if visible): Some dispenser latches have a small spring that helps them snap open. Look for this spring. See if it is stretched, detached, or broken. A spring problem often prevents the door from popping open.
- Look for Obstructions: Even after cleaning, a tiny piece of plastic or a food particle could be lodged within the latch mechanism. Use a flashlight to get a good view.
- Test the Latch Mechanism Manually:
- Engage and Release: With your finger, gently try to engage the latch. Then, try to release it. It should move smoothly without sticking. It should also secure the door firmly.
- Feel for Resistance: If the latch feels stiff, sticky, or does not engage fully, there might be internal debris or wear.
- Lubrication (Optional, for Sticking Latches):
- Use Silicone Grease: If the latch mechanism feels sticky but not broken, a small amount of food-grade silicone grease can sometimes help. Apply it sparingly to the moving parts of the latch. This can improve its movement. Avoid using petroleum-based lubricants. They can damage plastic.
- Addressing Misalignment:
- Gently Adjust: If the latch hook appears slightly bent, you might be able to gently bend it back into position with needle-nose pliers. Be very careful not to break it. This is a delicate process.
- Check Door Alignment: Ensure the dispenser door itself is not warped or misaligned. A warped door might not allow the latch to engage properly.
- Consider Replacement if Broken:
- Irreparable Damage: If the latch mechanism is clearly broken, cracked, or the spring is missing/severely damaged, replacement is often the best option.
- Dispenser Assembly: Often, the latch is an integral part of the entire detergent dispenser assembly. This means you might need to replace the whole unit. You can typically find replacement parts by searching your dishwasher’s model number.
- Installation: Installing a new dispenser usually involves removing the inner door panel of the dishwasher. It then requires disconnecting wires and mounting screws. Follow your appliance’s specific service manual for detailed instructions.
A functioning latch is essential for timely detergent release. Taking the time to inspect and potentially repair it can get your dishwasher back to doing its job.
Diagnosing Electrical Components: Wax Motor and Bimetal Switch
If your detergent dispenser is clean, the latch is intact, and basic checks yield no solutions, the problem likely lies with an electrical component. Modern dishwasher detergent dispensers often rely on a wax motor or a bimetal switch to open the dispenser door. These components receive an electrical signal at a specific point in the wash cycle. This signal activates a small mechanism that releases the latch. Troubleshooting these parts requires a multimeter and some comfort with electrical testing. I have found that these components, while small, are crucial to the dispenser’s operation.
A faulty wax motor or bimetal switch means the electrical signal never translates into mechanical action. The door simply stays shut. Diagnosing these requires careful testing. Always prioritize safety when working with electrical components. Disconnecting power is non-negotiable.
Let’s explore how to test these specific electrical parts. This will help you pinpoint whether one of them is the reason your detergent dispenser is failing. If you are not comfortable with electrical testing, it may be time to consider professional help.
Testing the Wax Motor
The wax motor is a small cylinder with a pin. When electricity heats the wax inside, it expands. This pushes the pin out, which then triggers the dispenser latch.
- Access the Wax Motor:
- Locate the Dispenser: The wax motor is usually mounted on the back of the detergent dispenser assembly.
- Remove Inner Door Panel: To access it, you will likely need to open the main dishwasher door. Then, remove the inner door panel. This usually involves unscrewing several screws around the perimeter of the inner door liner. Be careful with wiring.
- Identify the Wax Motor: It will be a small, often cylindrical, component connected to the dispenser door mechanism by wires.
- Disconnect Wires: Carefully disconnect the electrical wires leading to the wax motor. Note their position if they are not color-coded.
- Perform a Continuity Test:
- Set Multimeter: Set your multimeter to the Rx1 (ohms) setting for continuity.
- Test Terminals: Touch one probe of the multimeter to each terminal of the wax motor.
- Read Results: A good wax motor should show continuity (a low resistance reading, often 1000-2000 ohms). If the multimeter shows no continuity (an open circuit), the wax motor is likely faulty and needs replacement.
- Perform a Resistance Test (Ohms Test):
- Set Multimeter: Set your multimeter to a resistance range appropriate for the motor (usually around 2000 ohms).
- Test Terminals: Place the probes on the motor’s terminals.
- Read Results: Check your dishwasher’s service manual for the expected resistance value. If the reading is significantly different or shows “OL” (overload/open circuit), the motor is bad.
- Check for Physical Movement (if possible):
- Apply Voltage (Caution!): With extreme caution and proper safety measures (isolated power source, knowing correct voltage), you can temporarily apply the specified voltage (usually 120V AC) directly to the wax motor terminals.
- Observe Pin: A working wax motor’s pin should extend within seconds. If it does not, it is defective. This test is only for those very comfortable with electrical work.
Testing the Bimetal Switch (Thermal Actuator)
Some older or different dishwasher models use a bimetal switch, also known as a thermal actuator, to release the dispenser. This switch works based on temperature. It bends when heated, releasing the latch.
- Access the Bimetal Switch:
- Location: Like the wax motor, the bimetal switch is typically mounted on the back of the dispenser assembly, behind the inner door panel.
- Identify: It might look like a small, flat metal disc or strip with wires connected to it.
- Disconnect Wires: Carefully disconnect the wires leading to the bimetal switch.
- Perform a Continuity Test (Cold State):
- Set Multimeter: Set your multimeter to the continuity setting.
- Test Terminals: Touch one probe to each terminal of the bimetal switch.
- Read Results: In its cold state, a bimetal switch typically shows continuity (a very low resistance reading, indicating a closed circuit). If it shows no continuity when cold, it is likely faulty.
- Perform a Continuity Test (Heated State, Optional):
- Heat Gently: If the switch shows continuity when cold, you can gently warm it with a hair dryer (do not overheat).
- Retest: As it heats, a working bimetal switch should eventually break continuity (open circuit). If it remains closed, it is defective.
- Resistance Test (Ohms Test):
- Set Multimeter: Set your multimeter to the lowest resistance setting.
- Test Terminals: Place probes on the terminals.
- Read Results: A good bimetal switch should have very low resistance (near 0 ohms) when cold. If it reads high resistance or “OL”, it is faulty.
If either the wax motor or bimetal switch fails these tests, it needs to be replaced. These parts are usually specific to your dishwasher’s make and model. Order the correct replacement part from an appliance parts supplier. Replacing these components involves simply unmounting the old one, connecting the new one, and reassembling the door panel.
Remember, if electrical testing feels daunting, or you are unsure about the steps, it is always safer to consult a qualified appliance technician. General dishwasher troubleshooting, like fixing error codes or buzzing noises, might indicate deeper issues. For example, knowing How To Fix Samsung Dishwasher Error Code 4c or understanding Why Is My Dishwasher Buzzing can sometimes lead to related problems affecting the dispenser.
Addressing Rinse Aid Dispenser Problems
While often overlooked, the rinse aid dispenser works hand-in-hand with the main detergent dispenser. A problem with the rinse aid dispenser can sometimes give the impression that the detergent dispenser is failing. Or, it can contribute to poor wash results. This issue might also leave residue. This residue could then block the detergent dispenser. Rinse aid is crucial for preventing water spots and helping dishes dry. If it is not dispensing, your dishes will look cloudy.
A common issue is the rinse aid dispenser being clogged or not refilling correctly. This is usually due to dried rinse aid, hard water deposits, or a faulty cap/valve. My experience shows that keeping the rinse aid dispenser clean is as important as cleaning the detergent dispenser. It ensures overall dish cleanliness.
Let’s explore common problems with rinse aid dispensers. Then, we will discuss how to fix them. Addressing this secondary dispenser often improves your dishwasher’s overall performance.
Common Rinse Aid Dispenser Issues and Fixes
- Rinse Aid Not Dispensing:
- Check Fill Level: First, ensure the rinse
- dishwasher repair
- detergent dispenser fix
- appliance troubleshooting
- DIY home repair
- dishwasher maintenance

Tessa Winslow
Cleaning Expert
With years of hands-on experience in home care and a love for transforming everyday spaces, I specialize in making cleaning feel approachable and even enjoyable. I share smart, sustainable solutions that blend cleaning, organization, and decor—so your home not only looks good, but feels good too. Whether you're tackling weekend chores or taking on a full DIY refresh, I’m here to help you create a cleaner, cozier space you’ll love coming home to.