· Mason Everett · DIY Crafts · 15 min read
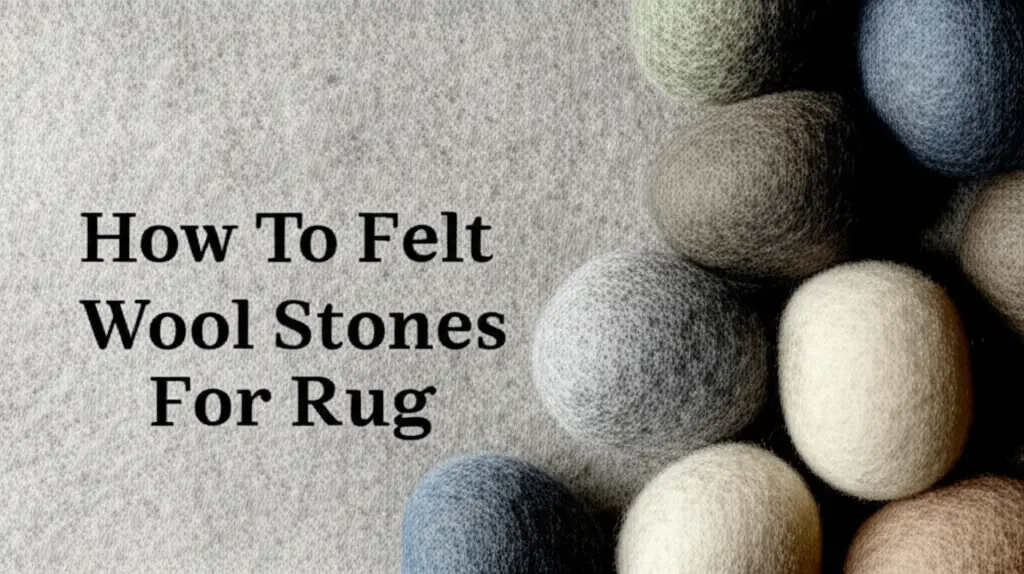
How To Felt Wool Stones For Rug
Felt Wool Stones: A Guide to Unique Rugs
Have you ever considered making a rug that looks straight out of a serene forest floor or a peaceful riverbed? It is possible to create such a thing. You can use felted wool stones to make a one-of-a-kind rug. This method transforms soft wool fibers into firm, stone-like shapes. The process offers a wonderful way to bring natural textures into your home.
Creating a rug with felted wool stones is a rewarding craft project. It lets you add a personal touch to your living space. We will explore everything from choosing the right wool to assembling your finished rug. I will guide you through each step. Get ready to make a beautiful, tactile piece of art for your home.
Takeaway:
- Wool felting turns soft wool into durable, stone-like shapes for unique rugs.
- You can use either wet felting or needle felting methods to create the stones.
- Assembling the rug involves arranging and attaching the felted stones to a sturdy backing.
- Felted wool stone rugs add natural beauty, texture, and a personal touch to any room.
Felting wool stones for a rug involves shaping wool roving into durable, stone-like forms using water, soap, and agitation (wet felting), or barbed needles (needle felting). These unique wool elements are then attached to a rug backing. This creates a textured, one-of-a-kind rug that mimics natural river stones.
Why Create Felt Wool Stone Rugs?
Making a rug from felt wool stones offers many benefits. These rugs are not just floor coverings; they are pieces of art. They bring a unique aesthetic to any room. I find them very calming to look at and touch.
Felted wool is naturally durable and long-lasting. Wool fibers interlock tightly during the felting process. This creates a strong, resilient material. Your handmade rug will stand up to daily use. It offers a soft, yet firm, surface underfoot.
Another great reason is the connection to nature. Wool stones mimic real river stones or pebbles. They introduce an organic, calming element into your home. This type of rug can transform a plain room into a peaceful sanctuary. It provides a grounding feel.
Lastly, crafting a felt wool stone rug is an eco-friendly choice. Wool is a renewable resource. Felting uses natural materials and minimal energy. You create something beautiful and sustainable. This aligns with a conscious living approach.
These rugs offer a tactile experience. The varying shapes and sizes of the wool stones create an interesting texture. Walking on such a rug feels different. It stimulates the senses and adds a layer of comfort. This truly makes your space unique.
Essential Tools and Materials for Felting Wool Stones
Starting any craft project requires the right supplies. Felting wool stones is no different. Gathering everything before you begin helps the process run smoothly. I always make a checklist to ensure I have all my items. This prevents interruptions once I start.
Your main material will be wool roving. This is unspun wool, often sold in long, soft strands. Choose merino wool for its softness and ease of felting. Different colors allow you to create natural-looking variations, just like real stones. I suggest buying a good amount, as it compacts a lot.
For wet felting, you will need liquid soap. Dish soap or olive oil soap works well. Make sure it is gentle and free of harsh chemicals. Warm water is also crucial. It helps the wool fibers to open up and interlock. You will use a spray bottle to apply water evenly.
A bamboo mat or bubble wrap provides a good surface for rolling and agitating the wool. This friction is vital for felting. Old towels are also necessary for absorbing excess water. I always keep a stack ready. A basin or tub for rinsing is also helpful.
If you choose needle felting, you will need felting needles. These needles have barbs that entangle the wool fibers. A foam mat or brush mat serves as a protective surface. It keeps the needles from breaking or damaging your workspace. I find a multi-needle tool speeds up the process.
For assembling the rug, you will need a sturdy backing material. Felt fabric, non-slip rug pad material, or canvas works well. A strong adhesive, like fabric glue or hot glue, will secure the stones. Sewing thread and a needle are alternatives for attachment. Proper preparation makes the creative process enjoyable.
Mastering Wet Felting Techniques for Stone Shapes
Wet felting is a traditional method. It uses water, soap, and friction to transform wool fibers. This technique is perfect for creating the dense, solid form of wool stones. I find it very satisfying to feel the wool change under my hands.
First, you prepare your wool. Take a handful of wool roving. Gently pull it apart and form a loose, egg-like shape. Think about the size of the stone you want to create. Make sure there are no hard edges; keep it fluffy. This initial shape is important.
Next, apply warm, soapy water. Use a spray bottle to lightly dampen the wool form. Add a small drop of liquid soap onto the wool. Gently rub your hands together to spread the soap. The wool should be moist, not soaking wet. Too much water slows felting.
Begin to gently roll and press the wool. Start with very light pressure, as if you are gently coaxing the fibers. As the wool starts to compact, you can increase the pressure. Roll the wool stone between your palms. Change direction often to make a round shape. I like to vary the pressure.
The key is friction and continued agitation. You can also roll the wool stone on a bamboo mat or bubble wrap. This adds more texture and helps the fibers interlock faster. Keep rolling and pressing. You will notice the wool shrinking and becoming firmer. It will lose its fluffiness.
When the stone feels solid and firm, it is ready for rinsing. Rinse the felted stone under cool water. Squeeze out all the soap. You can tap it gently on a hard surface to remove more water. Let the stone air dry completely. This might take a day or two.
Consider making various sizes and shades of stones. This creates a natural, organic look for your rug. You can add small bits of darker wool roving to mimic natural stone markings. This detail adds realism to your creations. Patience is important during this stage. Cleaning a handwoven wool rug shares insights on caring for similar natural fiber items, reminding us that felted wool requires gentle treatment too.
Exploring Needle Felting for Realistic Wool Stones
Needle felting offers another way to create wool stones. This method uses special barbed needles. These needles interlock wool fibers without water or soap. I often use needle felting for precise details or smaller stones. It provides great control over the shape.
To start, take a piece of wool roving. Shape it into a loose, round, or oval form. This will be the basic shape of your stone. Place this wool form on a foam mat. The mat protects your work surface and the needle tips. I find starting with a slightly larger piece of wool is best, as it compacts significantly.
Next, begin to stab the wool with your felting needle. Push the needle straight into the wool and pull it straight out. The barbs on the needle catch the fibers and push them together. Work evenly over the entire surface of your wool form. Rotate the wool as you work to create a consistent shape.
As you stab, the wool will start to condense and harden. Apply more pressure and stab more frequently in areas you want to make denser. To create a more rounded shape, focus on the edges and corners. You can use multiple needles at once for faster felting. Multi-needle tools are excellent for this.
For a realistic look, add different colors of wool roving. You can layer small pieces of darker or lighter wool on the surface. Then, felt them into the main stone. This creates natural patterns and textures. Think about the variations you see in real stones. This technique allows for fine detail.
The needle felting process is complete when your wool stone feels firm and holds its shape. It should not feel squishy or loose. Test its firmness by pressing it gently. If it springs back, it needs more felting. This method allows you to refine shapes easily.
Needle felting is less messy than wet felting. It can take more time for larger pieces. However, it offers precise control. This allows for intricate designs and realistic stone textures. Combining both wet and needle felting techniques can yield unique results. Understanding how to clean a rug by hand can also give you useful context for handling delicate textile projects like these felted creations.
Assembling Your Wool Stone Rug: Design and Attachment
Once you have a collection of felted wool stones, the fun part begins. Now you get to assemble your unique rug. This step turns individual felted pieces into a cohesive, functional art piece. I love seeing the design come to life on the backing.
First, choose a suitable backing material. A sturdy felt sheet, a non-slip rug pad, or a piece of durable canvas works well. The size of your backing depends on your desired rug size. Ensure it is slightly larger than your intended stone arrangement. This provides a border for attachment.
Lay your backing material flat on a clean surface. Now, arrange your felted wool stones. Play with different layouts. You can create a dense cluster of stones or space them out for a more open look. Mix sizes, shapes, and colors for a natural, organic feel. I like to mimic how pebbles scatter on a beach.
Once you are happy with the arrangement, it’s time to attach the stones. There are several ways to do this. A strong fabric glue is one popular option. Apply glue to the bottom of each felted stone. Press it firmly onto the backing. Hold it in place for a few seconds. Allow ample drying time as per the glue instructions.
Another method is sewing. You can use strong thread and a large needle. Stitch each stone to the backing. This provides a very secure attachment. For a nearly invisible stitch, pass the needle through the core of the stone and then through the backing. This method is labor-intensive but offers great durability.
For added security, you can combine both methods. Glue the stones in place first. Then, add a few stitches to each stone for extra reinforcement. This ensures your rug will withstand foot traffic over time. Pay attention to edges and corners.
Consider the edges of your rug. You can leave the backing exposed as a border. Or, you can trim the backing to follow the shape of the stone arrangement. Some people add a binding around the edge for a finished look. Your felt wool stone rug is now ready to admire. Proper care, much like cleaning an area wool rug, will keep your unique creation beautiful for years.
Caring for Your Felt Wool Stone Rug
Caring for your felt wool stone rug is important. Proper care ensures its beauty and longevity. Wool is a durable fiber. However, it needs gentle handling to stay in good condition. I always remind myself that handmade items require a bit more love.
Regular maintenance helps keep your rug clean. Vacuum your felt wool stone rug gently. Use a low suction setting. Avoid beater bars, as they can pull at the felted fibers. A handheld vacuum or an upholstery attachment works well. Lightly go over the stones and the spaces between them.
For spills, act quickly. Blot wet spills immediately with a clean, dry cloth. Do not rub, as this can spread the stain. For tougher stains, use a mild wool cleaner or a tiny amount of gentle soap mixed with water. Apply it sparingly to a clean cloth. Dab the stain carefully. Rinse the area by dabbing with a damp cloth. Make sure all soap residue is gone.
Deep cleaning is rarely needed for these rugs. If your rug becomes very dirty, professional cleaning is the best option. Look for cleaners experienced with wool or delicate textiles. Avoid machine washing or harsh chemicals. These can damage the felted structure.
Protect your rug from direct sunlight if possible. Prolonged exposure can fade the wool colors. Rotate your rug periodically. This helps ensure even wear. Placing a rug pad underneath also protects the rug. It adds cushioning and prevents slipping.
Pests like moths can be an issue with wool products. Inspect your rug periodically for signs of moth activity. If you store the rug, ensure it is clean and dry. Store it in a breathable bag. You can use natural moth deterrents, like cedar or lavender sachets. For more guidance on protecting wool items, consider resources like how to get rid of moths in wool rugs. This helps ensure your beautiful creation stays pest-free.
Creative Variations and Design Inspiration
Your felt wool stone rug does not have to be just brown and gray. There are so many ways to be creative with this project. I love experimenting with different colors and layouts. This makes each rug truly unique.
Consider a vibrant color palette. Use bright blues, greens, or even purples for your wool stones. Imagine a rug that looks like a collection of precious gems. These colorful stones can add a playful touch to a child’s room or a bold statement in a living area. You can dye wool roving yourself for specific shades.
Vary the size and shape of your stones. Make some very large and others tiny. Combine perfectly round stones with elongated or irregular shapes. This mimics the natural diversity found in real rock formations. A mix of shapes adds visual interest. It also provides different tactile experiences.
Think about patterns. You do not have to randomly scatter stones. Arrange them in a swirl, a spiral, or even a geometric pattern. You could create pathways or borders within your rug design. This adds a level of sophistication to the piece. Sketch your ideas on paper first.
Introduce other felted elements. Besides stones, you could felt leaves, flowers, or even small creatures. Incorporate these into your rug design. This turns the rug into a miniature landscape. It tells a story and sparks imagination. This is particularly fun for nurseries or playrooms.
Consider the final use of the rug. A smaller, very dense rug can be a wonderful mat for a meditation corner. A long, narrow one could serve as a runner in a hallway. A large, circular rug makes a statement in a living room. The possibilities are endless.
You can also combine different felting techniques. Use needle felting for very detailed stone markings. Then, use wet felting for the overall solid shape. This dual approach gives you maximum control. It allows for realistic textures and patterns. Let your imagination guide you.
Frequently Asked Questions About Felt Wool Stone Rugs
How long does it take to felt wool stones for a rug?
The time varies based on stone size and felting method. Wet felting one stone takes about 15-30 minutes of active work. Needle felting can take longer, around 30-60 minutes per stone. Making enough stones for a rug requires many hours or days. The assembly also adds time.
Can I use any type of wool for felting stones?
No, not all wool is suitable. Merino wool is best due to its fine fibers. These fibers felt easily and create a smooth, dense finish. Coarser wools can be used. However, they might not felt as tightly or feel as soft. Always choose wool roving for best results.
Are felt wool stone rugs durable for high-traffic areas?
Felt wool stone rugs are quite durable. They can withstand moderate foot traffic. However, for very high-traffic areas, they may show wear faster than commercial rugs. Regular cleaning and careful use will extend their life. The dense felting makes them resilient.
How do I clean my felt wool stone rug?
Clean your felt wool stone rug by gently vacuuming with a low suction setting. Spot clean spills immediately with a clean cloth and mild wool soap. Avoid rubbing. Do not machine wash. For deep cleaning, professional wool rug cleaning is recommended. Gentle care is key.
Can I make a non-slip felt wool stone rug?
Yes, you can make a non-slip felt wool stone rug. Use a non-slip rug pad as your backing material. Many commercial rug pads have a rubberized or silicone coating. This provides grip on hard floors. You can also sew or glue non-slip material to a regular fabric backing.
Is felting wool stones safe for children?
Wet felting is generally safe for children with supervision. It involves soap and water. Needle felting uses very sharp barbed needles. It is not suitable for young children. Older children can try needle felting with strict adult guidance. Always prioritize safety.
Conclusion
Creating a rug from felted wool stones is a deeply rewarding project. It allows you to transform simple wool fibers into a beautiful, textured floor covering. You bring natural beauty and a unique artistic touch into your living space. This guide showed you the complete journey. It covered everything from choosing your materials to caring for your finished piece.
Whether you prefer the tactile experience of wet felting or the precision of needle felting, the result is a truly special item. These felt wool stone rugs offer durability, natural aesthetics, and a personal connection to your home decor. I encourage you to gather your supplies and start this creative adventure. Your home will feel more personal with this unique, handmade addition.
- wool felting
- handmade rugs
- DIY home decor
- natural fibers
- wet felting

Mason Everett
Senior Writer
With a deep-rooted love for hands-on projects and over a decade in DIY home solutions, I focus on making home improvement accessible for everyone. At Cosy Home Creation, I share tried-and-true tips for enhancing your space—whether you're remodeling a room, upgrading your storage, or just making things a little more functional. My goal is simple, help you build a home that feels good to live in, one practical project at a time.