· Tessa Winslow · Cooking Guides · 12 min read
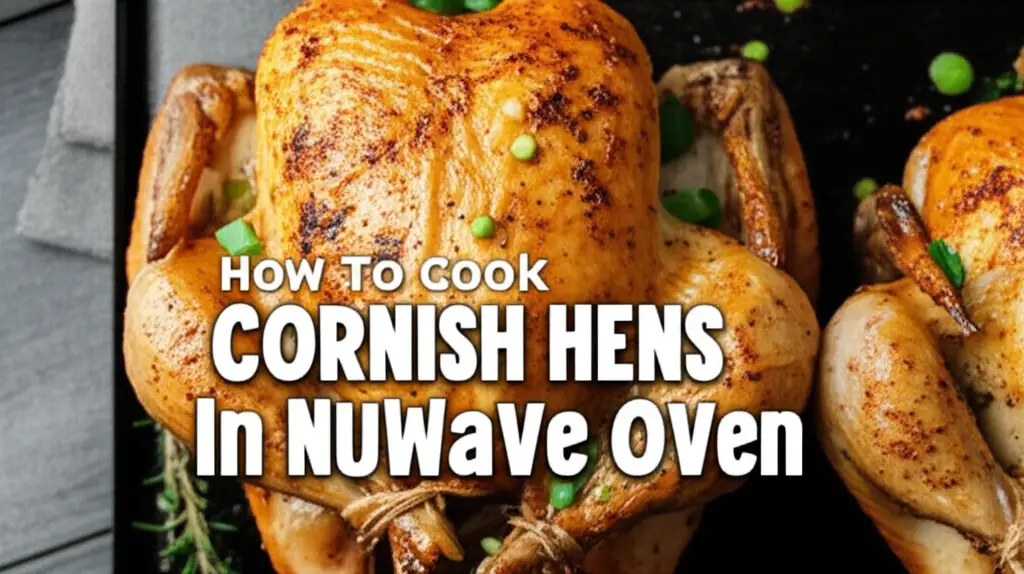
How To Cook Cornish Hens In Nuwave Oven

Unlock Flavor: Cooking Cornish Hens in Your Nuwave Oven
Cooking delicious meals at home brings joy. You can create something special for family and friends. Today, we look at how to cook Cornish hens in a Nuwave oven. This appliance makes the process simple and efficient.
Cornish hens are small, individual portions of chicken. They are perfect for a fancy dinner or a quick weeknight meal. The Nuwave oven cooks food evenly and quickly. It uses infrared, conduction, and convection heat. This combination ensures your hens come out juicy inside with crispy skin. This article will guide you through each step. You will learn everything from preparation to serving these delightful birds.
Takeaway
- Prepare hens properly by thawing, rinsing, and patting dry.
- Season well with herbs, spices, and oil for best flavor.
- Set your Nuwave oven to 375°F (190°C) for optimal cooking.
- Cook until the internal temperature reaches 165°F (74°C).
- Rest the hens after cooking for juicy meat.
How do you cook Cornish hens in a Nuwave oven?
You cook Cornish hens in a Nuwave oven by preheating it to 375°F (190°C). Prepare the hens with seasoning and a light oil coating. Place them on the rack and cook for about 45-60 minutes. Cook time depends on size. Ensure the internal temperature reaches 165°F (74°C) at the thickest part.
Choosing and Preparing Your Cornish Hens
Picking the right Cornish hens is the first step to success. Look for hens that are uniform in size. This helps them cook evenly. Most Cornish hens come frozen. You must thaw them completely before cooking.
Thawing Methods for Safe Preparation
Thawing your Cornish hens safely prevents bacteria growth. The refrigerator is the best place to thaw them. This takes time, usually 24 hours for one hen. Plan ahead for this step.
- Refrigerator Thawing: Place frozen hens in a shallow dish. Put the dish on the bottom shelf of your fridge. This prevents drips onto other foods. Let them thaw for at least 24 hours. Larger hens may need more time.
- Cold Water Thawing: For faster thawing, use a leak-proof bag. Put the hen in the bag and submerge it in cold water. Change the water every 30 minutes. This method is quicker but needs constant attention. Cook hens immediately after this thawing method.
Once thawed, remove the hens from their packaging. Rinse them inside and out under cold water. Pat them very dry with paper towels. Dry skin helps achieve a crispy finish. Remove any giblets from the cavity if present. Some people like to truss the hens, tying the legs together. This helps the hens cook more evenly and hold shape. It is an optional step.
The Perfect Seasoning for Flavorful Hens
Seasoning is key to delicious Cornish hens. A good rub adds flavor to the meat and helps crisp the skin. You can use simple ingredients or complex spice blends. Experiment to find your favorite taste.
Crafting Your Own Spice Rub
Creating your own spice rub is fun. You control the flavors precisely. A basic rub includes salt, black pepper, and garlic powder. From there, you add other herbs and spices.
- Basic Herb Blend: Mix dried thyme, rosemary, sage, and oregano. Add a pinch of paprika for color and mild flavor.
- Citrus Zest Boost: Grate orange or lemon zest into your rub. The citrus brightens the flavor of the hen. It also adds a fresh aroma.
- Garlic and Onion Punch: Use garlic powder and onion powder. These add deep, savory notes. They pair well with almost any meat.
After mixing your spices, rub them all over the hens. Make sure to get some under the skin, especially on the breast. This infuses flavor directly into the meat. You can also put some aromatics inside the cavity. Try lemon wedges, onion quarters, or fresh herb sprigs. This adds moisture and flavor as the hens cook. A little olive oil or melted butter helps the seasoning stick. It also promotes browning.
Mastering Nuwave Oven Settings for Poultry
The Nuwave oven is a versatile appliance. Understanding its settings helps you cook Cornish hens perfectly. It uses a combination of heat sources. This ensures even cooking from all sides.
Optimal Temperature and Time
For Cornish hens, a consistent temperature is important. Most recipes suggest 375°F (190°C) to 400°F (200°C). I find 375°F (190°C) works well. This temperature allows the hens to cook through without drying out. It also gives the skin time to crisp.
- Preheating the Oven: Always preheat your Nuwave oven. This ensures the oven is at the correct temperature when you put the hens inside. Preheating typically takes about 5-10 minutes. It helps with consistent cooking.
- Power Levels: Some Nuwave models have power levels. For roasting poultry, use the high power setting. This delivers full heat output. It helps cook the hens efficiently.
- Rack Placement: Place the Cornish hens on the lower rack in your Nuwave oven. This gives enough space between the hen and the top heating element. It prevents the top from burning before the inside cooks. You want enough air circulation around the hens for even cooking.
- Initial Cooking: Start with the hens breast-side up. This helps the breast meat cook well. After about half the cooking time, you might turn them for even browning.
Using the Nuwave oven correctly gives great results. It cooks more efficiently than a traditional oven. It also uses less energy. If you own an air fryer, you might find the process for cooking similar foods, like bread, to be quite different. A toaster oven can also bread items, but a Nuwave oven offers more space and specific cooking capabilities. For general oven usage, understanding your appliance is key. You can find out how to bake in a Wolf oven if you have one. This will give you insights into different oven types.
Cooking Time and Internal Temperature Guidance
Knowing the correct cooking time and how to check for doneness is crucial. It ensures your Cornish hens are safe to eat and taste good. Overcooked hens become dry. Undercooked hens are unsafe.
Achieving Perfect Doneness
The time it takes to cook Cornish hens varies. It depends on their size and your oven’s exact heat. Most Cornish hens weigh between 1.25 and 2 pounds. Smaller hens cook faster.
- General Cooking Time: For a 1.5-pound Cornish hen, expect to cook it for about 45-60 minutes at 375°F (190°C). If your hens are larger, add more time. Small hens may finish quicker.
- Using a Meat Thermometer: This is the most accurate way to check doneness. Insert the thermometer into the thickest part of the thigh. Do not touch the bone. The internal temperature must reach 165°F (74°C). This temperature ensures the meat is fully cooked and safe.
- Visual Cues: The skin should be golden brown and crispy. Juices should run clear when you pierce the thigh. Do not rely on visual cues alone. Always use a thermometer for safety.
Checking the temperature at multiple spots ensures even cooking. Sometimes, one part cooks faster than another. The Nuwave oven’s even heating helps reduce this problem. If your oven seems to be running too hot, you might need to investigate. Learning oven is too hot troubleshooting can help resolve such issues. This ensures accurate cooking temperatures.
Achieving Crispy Skin and Juicy Meat
Everyone wants crispy skin and juicy meat. This is the goal when cooking any poultry. The Nuwave oven excels at this. Its design helps circulate heat, which promotes browning.
Tips for Perfect Texture
Several factors contribute to crispy skin and juicy meat. Proper preparation and cooking techniques work together.
- Pat Dry Thoroughly: Before seasoning, make sure the hen’s skin is very dry. Moisture on the skin prevents crisping. Use paper towels to absorb all surface water. This is a simple step with big results.
- Light Oil Coating: Brush the hens with a thin layer of olive oil or melted butter. This helps the skin crisp up and get a beautiful golden color. The oil also helps seasonings stick.
- High Heat Start (Optional): Some people start at a higher temperature for the first 10-15 minutes (e.g., 400°F / 200°C). Then, they reduce the heat to finish cooking. This can help crisp the skin faster. Be careful not to burn the skin.
- Basting (Use Sparingly): Basting the hens with pan juices can add flavor. However, too much basting can make the skin less crispy. If you baste, do it sparingly. Try basting only once or twice during the last 20 minutes of cooking. This keeps the skin from getting soggy.
- Air Circulation: Ensure there is enough space around the hens in the Nuwave oven. Do not overcrowd the oven. Good air circulation is essential for crispy skin. It allows the hot air to reach all surfaces.
The Nuwave oven’s fan-assisted cooking helps circulate hot air around the hens. This hot air flow dries out the skin. It makes it crisp and golden. This is similar to how an air fryer works. After cooking, cleaning your oven is important. You can learn how to clean an air fryer oven to keep it in top condition. This ensures your appliance is ready for the next meal.
Resting, Carving, and Serving Your Cornish Hens
The cooking process does not end when you take the hens out of the Nuwave oven. Resting the meat is a very important step. It makes a big difference in how juicy the hens are. Carving and serving also matter for presentation.
Post-Cooking Steps for Best Results
Giving the hens time to rest allows the juices to redistribute. If you cut into the hen too soon, all the juices will run out. This leaves the meat dry.
- Resting Time: Once the hens reach 165°F (74°C), remove them from the oven. Place them on a cutting board. Tent them loosely with aluminum foil. Let them rest for 5-10 minutes. This resting period lets the meat relax. Juices soak back into the muscle fibers.
- Carving: Cornish hens are small. You can serve them whole, especially if they are smaller hens. For larger hens, or if you want to make them easier to eat, you can carve them. Use a sharp knife. Cut along the breast bone to separate the breasts. Then, separate the leg and thigh quarter from the body. You can also separate the drumstick from the thigh.
- Presentation: Arrange the carved pieces on a plate. You can also serve whole hens. Garnish with fresh herbs like parsley or rosemary. Add lemon wedges for a bright touch. Serve with your favorite side dishes. Roasted vegetables, mashed potatoes, or a fresh salad all pair well.
Serving warm, juicy Cornish hens will impress your guests. They are a delightful alternative to a full-sized chicken. They are perfect for individual servings. Enjoy your perfectly cooked Cornish hens.
Troubleshooting Common Nuwave Cornish Hen Issues
Even with careful planning, sometimes cooking issues happen. Do not worry if your Cornish hens do not come out perfect the first time. Knowing how to fix common problems helps. The Nuwave oven is a great appliance, but learning its quirks helps.
Addressing Cooking Challenges
Different factors can affect your cooking results. These include hen size, initial temperature, and oven calibration.
- Hens Not Crispy Enough:
- Problem: Skin is not golden or crisp.
- Solution: Ensure hens were very dry before cooking. Increase the temperature to 400°F (200°C) for the last 10-15 minutes. Check if the oven was too crowded. Good air circulation is key for crisping.
- Hens Are Dry:
- Problem: Meat lacks moisture.
- Solution: You might have overcooked them. Always use a meat thermometer. Pull them out exactly at 165°F (74°C). Ensure you rested them properly after cooking.
- Uneven Cooking:
- Problem: One part of the hen is more cooked than another.
- Solution: Rotate the hens halfway through cooking. Make sure hens are of similar size. If one hen is much larger, cook it separately or adjust its position.
- Smoke from the Oven:
- Problem: Excessive smoke during cooking.
- Solution: This usually means drippings are burning. Add a little water or chicken broth to the bottom pan. This catches drippings and prevents smoke. Also, ensure your oven is clean before starting. If you have concerns about oven temperatures, you can look up resources on how to reset a Bosch oven or other appliance-specific guides.
By understanding these common issues, you can improve your next cooking session. The Nuwave oven makes cooking easier. A little troubleshooting helps you become a master.
FAQ Section
How long does it take to cook Cornish hens in a Nuwave oven?
Cooking Cornish hens in a Nuwave oven typically takes 45 to 60 minutes. This time is for hens weighing around 1.5 pounds. Always check the internal temperature with a meat thermometer. The temperature should reach 165°F (74°C) in the thickest part of the thigh.
What temperature should I set my Nuwave oven for Cornish hens?
Set your Nuwave oven to 375°F (190°C) for cooking Cornish hens. This temperature helps the hens cook through evenly. It also promotes crispy skin development. Some recipes might suggest 400°F (200°C) for a faster crisp.
Do I need to thaw Cornish hens before cooking in a Nuwave oven?
Yes, you must thaw Cornish hens completely before cooking them. Thawing ensures even cooking and food safety. You can thaw them in the refrigerator for 24 hours. You can also use cold water, changing it every 30 minutes.
Should I cover Cornish hens while cooking in the Nuwave oven?
Do not cover Cornish hens while cooking in the Nuwave oven. Covering them prevents the skin from becoming crispy. The Nuwave oven’s design provides even heating. This cooks the hens without needing a cover. If you notice too much browning, you can tent them lightly with foil for the last part of cooking.
Can I cook frozen Cornish hens in a Nuwave oven?
It is not recommended to cook Cornish hens from frozen in a Nuwave oven. Cooking frozen poultry can lead to uneven cooking. The outside cooks before the inside thaws. This can cause dryness and food safety issues. Always thaw hens fully for best results.
Conclusion
Cooking Cornish hens in your Nuwave oven opens up a world of simple, delicious meals. We have covered every step. You now know how to prepare, season, and cook these lovely birds. The Nuwave oven makes cooking them easy. It gives you juicy meat and crispy skin every time.
Remember to thaw your hens properly. Season them well for maximum flavor. Set your Nuwave oven to the right temperature. Always check the internal temperature to ensure safety. Resting the hens after cooking helps them stay juicy. With these tips, you can enjoy perfect Cornish hens. They are great for a family dinner or a special occasion. Go ahead and try cooking Cornish hens in your Nuwave oven tonight!


