· Elira Thomsen · Home Maintenance · 17 min read
How To Clean Toilet Tank
How to Clean Your Toilet Tank for Optimal Hygiene
Have you ever looked inside your toilet tank? It often holds a hidden world of grime, mold, and mineral deposits. Many people clean the toilet bowl regularly, but they forget the tank. Cleaning your toilet tank is crucial for a truly clean bathroom. It improves hygiene, prolongs your toilet’s life, and ensures efficient flushing.
This guide will show you how to clean your toilet tank thoroughly. We will cover the tools you need and simple, step-by-step instructions. You will learn about different cleaning solutions. We will also discuss how to prevent future buildup. By the end, you will have a sparkling toilet tank and a fresher bathroom.
Takeaway
- Gather essential tools like gloves, brushes, and sponges before you start.
- Always shut off the water supply and drain the tank completely.
- Use natural cleaners like vinegar or borax for safe and effective cleaning.
- Scrub all internal components to remove mold, mineral deposits, and grime.
- Rinse the tank thoroughly before refilling and testing the flush.
- Implement regular maintenance to prevent future buildup.
Quick Answer: Cleaning a Toilet Tank
To clean a toilet tank, first turn off the water supply and drain the tank. Then, scrub all internal surfaces and components with a brush and an appropriate cleaner like vinegar or borax. Let the solution sit to dissolve buildup. Finally, rinse the tank thoroughly, turn the water back on, and flush the toilet several times.
Why Your Toilet Tank Needs Cleaning (and How Often)
The toilet bowl gets all the attention, but its hidden partner, the toilet tank, often goes unnoticed. The tank holds the water that flushes your toilet. This water sits still for long periods. It can develop problems. Over time, sediment, hard water minerals, mold, and bacteria build up inside. This buildup looks unsightly. It also affects how your toilet works.
Ignoring the tank can lead to a less efficient toilet. Mineral deposits can clog the small jets that push water into the bowl. Mold and bacteria create odors. They also spread germs with each flush. A dirty tank can even shorten the life of internal parts like the flapper or fill valve. Regular cleaning keeps your toilet healthy and hygienic.
Understanding the Buildup
Water entering your home carries many things. It contains minerals like calcium and magnesium, especially if you have hard water. These minerals settle at the bottom of the tank. They also stick to the sides and internal parts. This creates a hard, crusty layer known as mineral buildup or limescale. This buildup is often white, brown, or green.
Mold and mildew also thrive in the dark, damp environment of a toilet tank. They appear as black, pink, or green slimy patches. Bacteria can grow too, adding to the grime. Rust stains might appear if you have old pipes or iron in your water. All these contaminants reduce water quality. They also make your toilet less effective.
Recommended Cleaning Frequency
How often you clean your toilet tank depends on a few factors. If you live in an area with very hard water, you might need to clean it more often. Generally, cleaning your toilet tank once or twice a year is a good starting point. This schedule helps prevent severe buildup. It keeps your toilet operating smoothly.
If you notice colored water, strange odors, or a weaker flush, clean it sooner. These are signs of significant buildup. You can also do a quick check every few months. Simply lift the tank lid and look inside. If you see visible grime, mold, or mineral deposits, it is time for a cleaning session. Regular checks prevent big cleaning jobs.
Essential Tools and Materials for Tank Cleaning
Before you start cleaning your toilet tank, gather all your supplies. Having everything ready makes the process smoother. You do not want to stop midway to search for a tool. Proper tools ensure you can tackle any type of grime or buildup. They also keep you safe during the cleaning process.
I always prepare my workspace before I begin. This helps me stay organized. It also ensures I complete the task efficiently. Make sure you have enough space around the toilet. Lay down old towels or newspapers if you are worried about spills. Being prepared saves time and effort.
Gathering Your Supplies
Here is a list of the basic tools and materials you will need:
- Rubber Gloves: Protect your hands from grime and cleaning solutions.
- Safety Goggles: Shield your eyes, especially when using strong cleaners or if splashing occurs.
- Large Sponge or Scrub Brush: For scrubbing the tank walls and bottom. A sturdy kitchen brush or a dedicated toilet brush works well.
- Old Toothbrush or Small Detail Brush: Essential for reaching tight spaces around the internal components and hardware.
- Bucket: To hold water when draining the tank or for rinsing.
- Old Towels or Rags: For wiping surfaces and soaking up spills.
- Cleaning Solutions: We will discuss options like vinegar, borax, and bleach in the next section.
- Optional: A wet/dry vacuum for quick water removal.
Safety First
Cleaning solutions can be strong. Always wear rubber gloves to protect your skin. Goggles protect your eyes from splashes. If you use bleach or other harsh chemicals, ensure good ventilation. Open a window or turn on a bathroom fan. Never mix bleach with other cleaners, especially ammonia or vinegar. This creates dangerous fumes.
Read the labels on all cleaning products. Follow their safety instructions carefully. If you have sensitive skin, consider wearing long sleeves too. Keeping safety in mind helps you clean without harm. Your well-being is important during any cleaning task.
Step-by-Step Guide: Draining and Preparing the Tank
Preparing your toilet tank correctly is the first vital step. You cannot clean it effectively if it is full of water. Draining the tank allows you to access all surfaces and components. It also ensures that your cleaning solutions are not diluted too much. This makes them more effective.
I find that taking my time with this preparation phase saves trouble later. Rushing can lead to spills or incomplete draining. A well-prepared tank is a clean tank. Follow these steps carefully to set yourself up for success.
Turning Off the Water Supply
Locate the water supply valve behind your toilet. It is usually a small knob or lever coming out of the wall. Turn this valve clockwise as far as it will go. This action stops water from entering the tank. If you cannot find a valve, or if it does not turn, you might need to turn off the main water supply to your house. This is rare for a toilet, but it can happen in older homes.
After turning off the valve, flush the toilet. This will empty most of the water from the tank into the bowl. You will notice that the tank does not refill. This confirms the water supply is off. If it refills, the valve is not fully closed or needs repair.
Emptying the Tank Completely
Even after flushing, some water remains at the bottom of the tank. You need to remove this standing water. Use a sponge or an old towel to soak up the remaining water. Wring it out into a bucket. Repeat this process until the tank bottom is mostly dry. For faster removal, a wet/dry vacuum works wonderfully if you have one.
Once the tank is dry, you can clearly see the grime and mineral buildup. This empty state provides the best access for cleaning. Inspect the inside closely. Note areas with heavy staining or mold. This helps you focus your cleaning efforts.
The Best Cleaning Solutions for Your Toilet Tank
Choosing the right cleaning solution is important for effective toilet tank cleaning. Different problems require different solutions. You might need to tackle mineral deposits, mold, or general grime. I prefer using natural solutions whenever possible. They are often safer for your home and the environment.
However, sometimes a stronger cleaner is needed for tough buildup. Always consider what type of grime you are fighting. Also, think about the materials of your toilet tank components. Most are durable, but strong chemicals can damage rubber seals over time.
Vinegar: The Natural Powerhouse
White vinegar is an excellent choice for cleaning toilet tanks. It is natural, non-toxic, and effective against mineral deposits, mildew, and some bacteria. Vinegar contains acetic acid, which dissolves limescale and rust stains. It also deodorizes. I use distilled white vinegar for most household cleaning.
Pour several cups of undiluted white vinegar into the empty toilet tank. Ensure the vinegar covers the waterline stains and touches all internal components. Let it sit for at least 4-6 hours, or even overnight for heavy buildup. The longer it sits, the better it works on dissolving mineral deposits. For tips on using vinegar for cleaning, you might find this guide helpful: where to put vinegar in dishwasher to clean.
Borax: A Gentle Abrasive
Borax is another great natural cleaner for toilet tanks. It helps to loosen dirt, stains, and even kill mold. Borax is a natural mineral compound. It is often found in laundry boosters. It works well as a gentle abrasive.
Sprinkle about 1/2 cup of borax into the empty toilet tank. Use a wet scrub brush to spread it around. Make sure it coats all surfaces. Let it sit for at least 2-3 hours. For stubborn stains, mix the borax with a little vinegar to form a paste. Apply the paste directly to the stained areas. This combination boosts the cleaning power.
Bleach: For Serious Mold and Disinfection
Bleach is a powerful disinfectant and stain remover. It is very effective against mold, mildew, and bacteria. Use bleach only if you have severe mold growth or need to sanitize the tank completely. Use it sparingly and with extreme caution. Never mix bleach with vinegar, borax, or other cleaners. This creates dangerous gases.
Pour 1/2 to 1 cup of household bleach into the empty tank. Use a brush to spread it around, ensuring all affected areas are covered. Let it sit for no more than 30 minutes. Prolonged exposure to bleach can damage rubber components in your toilet. After the dwell time, proceed quickly to rinsing.
Commercial Tank Cleaners
Various commercial toilet tank cleaners are available. These often come in tablet form or liquid concentrates. Some are designed specifically for hard water. Others target mold and bacteria. Read labels carefully for instructions and safety warnings. These products can be convenient. However, I often find natural solutions just as effective for typical issues. Choose products that are safe for your toilet’s internal mechanisms.
Deep Cleaning Your Toilet Tank: Scrubbing Away Grime
Once your chosen cleaning solution has had time to work, the real scrubbing begins. This is where you physically remove the loosened grime, mold, and mineral deposits. It requires some effort, but the results are worth it. Focus on all surfaces and components inside the tank.
I find that getting into the right mindset helps. Think of it as restoring your toilet to its best condition. Put on your gloves and get ready to transform your tank. This step is crucial for thorough cleaning.
Scrubbing Internal Components
Start by scrubbing the internal components. These include the flapper, fill valve, overflow tube, and float ball. These parts are often covered in slime or mineral buildup. Use your scrub brush or sponge to clean the larger surfaces of these parts. Pay close attention to the flapper, as mineral buildup here can prevent a proper seal. This causes leaks.
For tight spots and intricate parts, use an old toothbrush or a small detail brush. Get into the crevices around the nuts, bolts, and hinges. You will be surprised how much grime collects in these hidden areas. The more thorough you are, the cleaner your tank will be. This also helps these parts function better.
Tackling Stains and Buildup
Next, scrub the inner walls and bottom of the toilet tank. Use your scrub brush or sponge. Apply firm pressure to remove all loosened grime, mold, and mineral deposits. If you used vinegar or borax, you should see the buildup breaking down. For stubborn stains, reapply a small amount of your cleaner. Let it sit for a few more minutes. Then scrub again.
Rust stains can be particularly tricky. Vinegar or a specialized rust remover works best. Mold and mildew usually wipe away easily after the cleaner has had time to work. Don’t forget the waterline. This area often collects a ring of grime. Scrub vigorously around the water line and the sides of the tank to ensure all stains disappear. A clean tank means clean water going into your toilet bowl. You might also want to clean the toilet rim for a complete refresh; here’s a guide: how to clean under toilet rim.
Rinsing, Refilling, and Final Checks
After all the scrubbing, rinsing is a crucial step. You need to remove all the loosened grime and cleaning solution from the tank. A thorough rinse prevents any remaining chemicals from affecting the new water. It also ensures no loose debris will interfere with the toilet’s mechanisms.
This part of the process brings us closer to seeing the sparkling results. I always take my time with rinsing. It guarantees a truly clean tank. Then, it’s time to bring your toilet back to life.
Thorough Rinsing Process
Once you have finished scrubbing, use your bucket to pour clean water into the tank. Swish the water around. This helps to rinse off any remaining cleaning solution and loose debris. Flush the toilet several times. Each flush will send the dirty rinse water into the toilet bowl and down the drain. You will likely see some murky water in the first few flushes. This is normal.
Continue flushing until the water coming from the tank into the bowl runs clear. You might need to refill the tank a few times with your bucket and flush again. This process ensures all residue is gone. Make sure to wipe down any splatters on the outside of the tank.
Restoring Water Supply and Testing
Now, turn the water supply valve back on. Turn it counter-clockwise until it is fully open. The toilet tank will begin to refill. Watch the tank as it fills. Make sure the water level stops at its normal height. Also, check for any leaks. You should hear the sound of water filling the tank.
Once the tank is full, flush the toilet a few more times. Listen for any unusual sounds. Observe the flush power. It should be stronger and more efficient than before. Check the water in the bowl to ensure it is clear and clean. If everything looks good, you have successfully cleaned your toilet tank.
Preventative Measures: Keeping Your Tank Clean Longer
Cleaning your toilet tank is a significant task. You will want to keep it clean for as long as possible. Implementing preventative measures saves you effort in the long run. Small, regular actions can make a big difference. They reduce the speed at which grime and mineral deposits build up.
I believe in proactive maintenance. It is always easier to prevent a problem than to fix a big one. These tips will help maintain your newly cleaned toilet tank. They ensure it stays hygienic and efficient.
Regular Maintenance Tips
- Weekly Bowl Cleaning: While this article focuses on the tank, cleaning the bowl and under the rim regularly helps overall toilet hygiene. A clean bowl means fewer chances for grime to travel back into the tank. Here’s a helpful guide for cleaning the rim: how to clean under toilet rim.
- Avoid Drop-in Tablets: Many people use blue drop-in tablets for continuous cleaning. These tablets often contain harsh chemicals like bleach or chlorine. Over time, these chemicals can damage the rubber and plastic components inside your toilet tank. They can also void your toilet’s warranty. It is better to avoid them.
- Vinegar Flush: Every few months, you can add one cup of white vinegar to your toilet tank overnight. Do not flush until morning. This helps to lightly descale components and prevent significant buildup. It is a simple, proactive step.
- Check for Leaks: A leaking flapper causes the toilet to run more often. This introduces more water and minerals into the tank. Check for leaks by adding a few drops of food coloring to the tank water. If the color appears in the bowl without flushing after 15-20 minutes, you have a leak. Fix it promptly.
Addressing Hard Water Issues
Hard water is a primary cause of mineral buildup in toilet tanks. If you live in a hard water area, consider these additional steps:
- Water Softener: Installing a whole-house water softener is the most effective solution for hard water. It removes minerals before they enter your plumbing system. This prevents buildup in all appliances, including your toilet tank.
- Magnetic Descalers: Some people use magnetic descalers. These devices attach to your water pipe. They claim to alter mineral crystals to prevent them from sticking. Their effectiveness is debated, but some users report positive results.
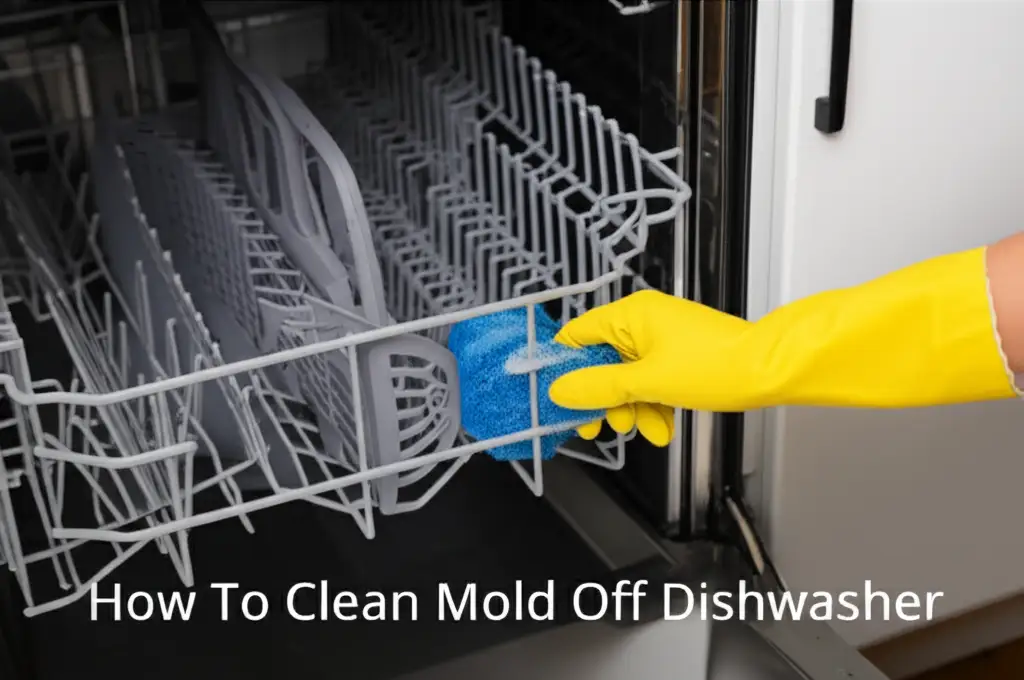
- Regular Vinegar Treatments: As mentioned, regular overnight vinegar treatments become even more important with hard water. They help to break down mineral deposits before they become too stubborn. You can also clean with other natural methods, such as those used for how to clean mold off dishwasher if you encounter mold in the tank.
These preventative measures will help keep your toilet tank cleaner for longer periods. They ensure your toilet functions optimally and maintains better hygiene.
Frequently Asked Questions About Cleaning Your Toilet Tank
Cleaning a toilet tank can bring up several questions. Many people wonder about safety, frequency, and specific products. I have compiled answers to common queries to help you further understand this important cleaning task. These answers provide quick, clear information.
Q1: How often should I clean my toilet tank?
You should clean your toilet tank at least once or twice a year. If you have hard water, or if you notice visible mold, mineral buildup, or a strange odor, clean it more frequently. Regular checks every few months help you decide if it needs attention sooner. Proactive cleaning prevents severe issues.
Q2: Can I use toilet bowl cleaner in the tank?
No, you should not use toilet bowl cleaner in the tank. Most toilet bowl cleaners contain harsh chemicals designed for porcelain. These chemicals can damage the rubber and plastic components inside your toilet tank. They can also void your toilet’s warranty. Stick to vinegar, borax, or bleach (with caution) for the tank.
Q3: Is bleach safe for my toilet tank?
Bleach is safe for occasional use in your toilet tank for disinfection or severe mold. Use it sparingly, no more than 1/2 to 1 cup. Do not let it sit for longer than 30 minutes. Prolonged exposure can degrade rubber parts like the flapper. Always ensure good ventilation and never mix bleach with other cleaners.
Q4: What causes pink/black mold in the toilet tank?
Pink or black mold in the toilet tank is caused by bacteria and fungi thriving in the dark, damp environment. Pink slime is often Serratia marcescens, a common airborne bacterium. Black mold is typically Stachybotrys chartarum or other fungal species. Both indicate an unhealthy environment and need cleaning.
Q5: Will cleaning the tank improve flushing?
Yes, cleaning the toilet tank can significantly improve flushing. Mineral buildup and grime can restrict water flow through the toilet’s internal mechanisms and rim jets. Removing these obstructions ensures a stronger, more efficient flush. A clean tank helps the entire toilet system work as intended.
Q6: Can I clean the tank without draining it?
You can do a light cleaning without fully draining the tank by adding a cleaning solution like vinegar and letting it sit. However, for a thorough cleaning, you must drain the tank. Draining allows you to scrub all surfaces and components effectively. It ensures you remove all accumulated grime and mineral deposits.
Conclusion
Cleaning your toilet tank might seem like a chore, but it is a vital part of home maintenance. By understanding how to clean your toilet tank, you ensure a healthier, more efficient bathroom. We covered why cleaning is necessary, the tools you need, and the simple steps to take. You learned about effective cleaning solutions like vinegar and borax. You also gained tips for preventing future buildup.
A clean toilet tank means clean water for flushing. It reduces unpleasant odors and extends the life of your toilet’s parts. This project does not require special skills. Anyone can do it with a little time and effort. Take action today. Dedicate an hour or two to this essential task. You will enjoy the benefits of a truly clean and smoothly functioning toilet. Your bathroom will thank you!
- toilet tank cleaning
- bathroom hygiene
- mineral buildup removal
- mold removal
- toilet maintenance
- natural cleaning solutions
- hard water stains
- descaling


