· Elira Thomsen · Kitchen Appliances · 16 min read
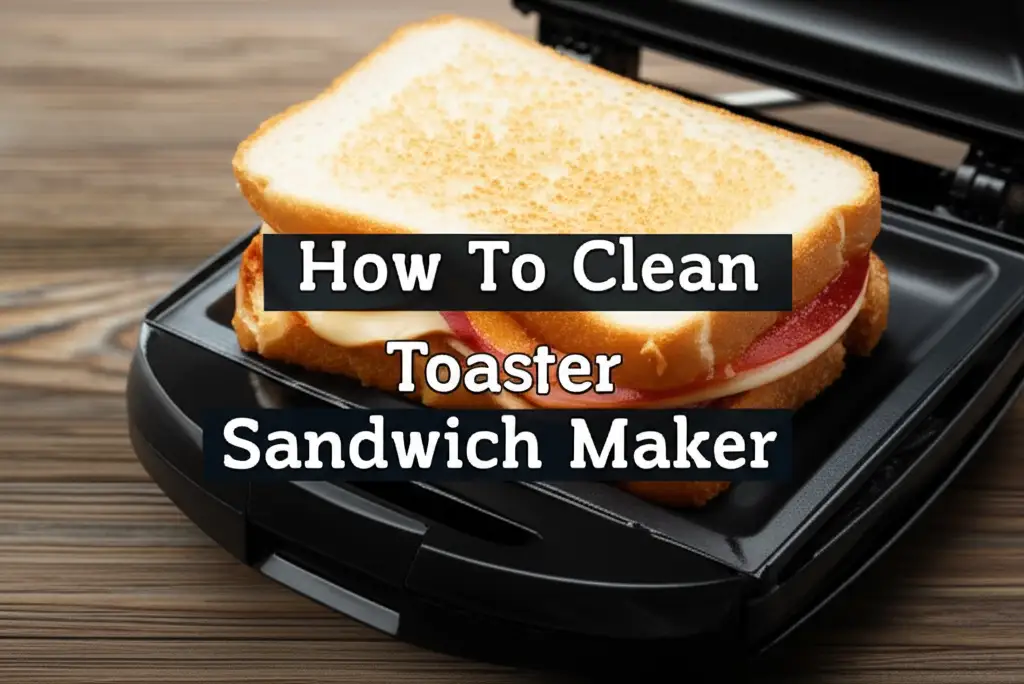
How To Clean Toaster Sandwich Maker
How To Clean Your Toaster Sandwich Maker Effectively
Making a warm, gooey sandwich in your toaster sandwich maker is a joy. These handy kitchen appliances create crispy, delicious meals quickly. However, over time, cheese melts, bread crumbs fall, and fillings stick to the plates. A dirty sandwich maker does not perform well. It can even become a breeding ground for bacteria or cause foul odors.
You want your sandwiches to taste fresh and clean. Cleaning your toaster sandwich maker regularly keeps it hygienic and working like new. It also extends the life of your appliance. A clean machine cooks food more evenly. You will avoid burnt smells and unpleasant tastes. This guide will walk you through the simple steps to clean your sandwich maker thoroughly. We will cover routine maintenance and deep cleaning tips. Get ready to enjoy perfectly clean and delicious sandwiches every time you cook.
Takeaway
- Always unplug your toaster sandwich maker before cleaning.
- Wait for the appliance to cool completely before you start.
- Use gentle methods and avoid abrasive cleaners or tools.
- Regular cleaning prevents buildup and extends appliance life.
- Clean promptly after each use for easiest results.
How do you effectively clean a toaster sandwich maker?
To effectively clean a toaster sandwich maker, unplug it and let it cool completely. Use a damp cloth to wipe away crumbs and food residue. For stuck-on bits, dampen a paper towel with warm, soapy water and let it sit. Gently scrub with a non-abrasive sponge or soft brush. Finish by wiping with a clean, dry cloth.
Why Keeping Your Toaster Sandwich Maker Clean Matters
A clean toaster sandwich maker does more than just look good. It plays a big role in food safety and appliance longevity. When food residue builds up, it creates a hospitable environment for bacteria. This can lead to foodborne illnesses. You do not want harmful germs in your delicious sandwiches. Regular cleaning stops these germs from growing.
Burnt food particles also affect the taste of your meals. Imagine biting into a fresh sandwich that tastes faintly of old, burnt cheese. Not appetizing, right? A clean surface ensures your food tastes exactly as it should. It enhances the flavor of your ingredients.
Maintaining cleanliness also protects your appliance. Food stuck on heating plates can cause uneven cooking. It can even damage the non-stick coating over time. This makes your sandwich maker less effective. By cleaning it regularly, you preserve the non-stick surface. This allows for easy food release and extends the life of your machine. It is a simple step that saves you money and trouble in the long run.
Essential Supplies for Cleaning Your Sandwich Maker
Gathering your cleaning supplies before you start makes the process smooth. You likely have most of these items in your kitchen already. You do not need harsh chemicals or specialized tools. Gentle cleaning agents work best for delicate non-stick surfaces. Using the right supplies protects your appliance.
Here is a list of what you will need:
- Soft cloths or sponges: Microfiber cloths or soft kitchen sponges are ideal. They absorb well and will not scratch surfaces.
- Paper towels: These are great for initial wiping and soaking up excess moisture.
- Mild dish soap: A small amount of dish soap mixed with warm water creates an effective cleaning solution. Avoid strong detergents.
- Warm water: Essential for mixing with soap and for rinsing.
- Soft-bristled brush (optional): A clean toothbrush or a pastry brush can reach tight corners. It helps remove stubborn crumbs without scratching.
- Rubber spatula or wooden spoon (optional): These can gently scrape off dried, stuck-on food. Use them with care to avoid damaging the plates.
- Baking soda or white vinegar (for deep cleaning): These natural cleaners tackle tough stains and odors. They are safe for most surfaces when used properly. You can learn more about using natural cleaners by reading our guide on where to put vinegar in dishwasher to clean.
- Cotton swabs or toothpicks (for crevices): Perfect for getting into small grooves and hinges.
Always check your appliance’s manual for specific cleaning recommendations. Some models have removable plates that are dishwasher safe. Others require hand-washing only. Knowing your model’s features helps you clean it properly.
Before You Start: Safety First and Preparation
Before you begin any cleaning, safety is paramount. Working with electrical appliances requires caution. You must take specific steps to protect yourself and your machine. Ignoring these steps can lead to damage or injury. A little preparation goes a long way.
First and most importantly, unplug your toaster sandwich maker. Make sure the power cord is completely disconnected from the wall outlet. This eliminates any risk of electric shock. Never clean an appliance that is plugged in, even if it is turned off. Electricity and water do not mix safely.
Next, allow the appliance to cool completely. Sandwich makers get very hot during use. Cleaning a hot surface can cause burns. It can also damage the non-stick coating. The sudden temperature change could warp the plates. Give your machine at least 15-20 minutes to cool down. You want it to be completely cool to the touch. Patience here prevents accidents and preserves your appliance.
Once cooled, open the sandwich maker. Use a paper towel or a soft dry cloth to remove any loose crumbs or large food pieces. This initial sweep makes the rest of the cleaning easier. It prevents crumbs from spreading further when you introduce water. A small pastry brush can also help with this step.
If your sandwich maker has removable plates, take them out now. This allows for easier and more thorough cleaning. Follow your manual’s instructions for removing the plates. Some simply unclip, while others may have latches. This separation lets you clean each part individually. Remember to keep the main unit away from water if its plates are not removable.
Step-by-Step Guide to Cleaning Your Toaster Sandwich Maker
Cleaning your toaster sandwich maker is a straightforward process. The method varies slightly based on whether your unit has fixed or removable plates. We will cover both scenarios. Follow these steps for a sparkling clean appliance.
Cleaning Toaster Sandwich Makers with Fixed Plates
Most basic sandwich makers have fixed heating plates. These plates are attached to the unit. You cannot submerge the entire unit in water.
- Wipe Loose Debris: Once cooled and unplugged, open the sandwich maker. Use a dry paper towel or a soft cloth to wipe away all loose crumbs. You can also use a soft-bristled brush to sweep them into a trash can.
- Prepare Cleaning Solution: Mix a few drops of mild dish soap with warm water in a small bowl. Dampen a soft cloth or sponge with this solution. Wring out excess water. The cloth should be damp, not dripping wet.
- Wipe Down Plates: Gently wipe the non-stick heating plates with the damp, soapy cloth. Focus on areas with food residue. Do not scrub hard. The goal is to loosen grime, not scratch the surface.
- Tackle Stuck-On Food: For stubborn, stuck-on food, lay a warm, very damp paper towel over the affected area. Close the lid gently for 5-10 minutes. The steam will help soften the food. Then, use a rubber spatula or a soft-bristled brush to gently scrape off the softened bits. Avoid metal utensils.
- Rinse and Dry: Dip a clean cloth in plain warm water. Wring it out well. Wipe the plates again to remove any soap residue. Repeat this step if necessary. Finally, use a dry, clean cloth to thoroughly dry the plates and the exterior. Ensure no moisture remains before storing or using. This helps prevent rust and mold, similar to how you would keep other kitchen appliances clean, like when you clean the refrigerator.
Cleaning Toaster Sandwich Makers with Removable Plates
Removable plates make cleaning much simpler.
- Remove Plates: Ensure the unit is unplugged and cool. Carefully unclip and remove the heating plates from the main unit.
- Soak (Optional): For heavily soiled plates, you can soak them in warm, soapy water for 10-15 minutes. This loosens baked-on food.
- Wash Plates: Wash the plates by hand using a soft sponge and mild dish soap. Scrub gently to remove all food residue. If your plates are dishwasher safe, you can place them in the dishwasher. Always check your manual first.
- Rinse Thoroughly: Rinse the plates under running water to remove all soap.
- Dry Completely: Dry the plates completely with a clean towel. Air dry them for a bit to ensure no water spots remain.
- Clean Main Unit: While the plates dry, wipe down the exterior of the main unit. Use a slightly damp cloth to clean the outside casing. Be careful not to let water get into electrical components. Dry it completely.
- Reassemble: Once both the plates and main unit are dry, reattach the plates. Your sandwich maker is now ready for its next use!
Deep Cleaning Your Toaster Sandwich Maker
Sometimes, your toaster sandwich maker needs more than just a quick wipe. Stubborn stains, burnt-on food, or lingering odors call for a deep cleaning. You can use natural household items like baking soda and white vinegar for effective results. These methods are powerful yet gentle on your appliance.
Using Baking Soda for Stubborn Grime
Baking soda is a mild abrasive and a natural deodorizer. It works wonders on dried, sticky residue.
- Make a Paste: Mix a small amount of baking soda with just enough water to form a thick paste. The consistency should be like toothpaste.
- Apply the Paste: Spread the baking soda paste over the stubborn stains on the cooled plates. Make sure the entire affected area is covered.
- Let it Sit: Allow the paste to sit for about 15-20 minutes. For very tough stains, you can leave it for up to an hour. The baking soda will help break down the grime.
- Gently Scrub: Use a soft-bristled brush or a non-abrasive sponge to gently scrub the paste. You will see the loosened food particles coming off.
- Wipe Clean: Wipe away the paste and residue with a damp cloth. Rinse the cloth and wipe again until all baking soda is gone. Dry thoroughly with a clean cloth. This method is effective for various tough stains, similar to how one might clean mold off dishwasher.
Using White Vinegar for Odors and Greasy Buildup
White vinegar is excellent for cutting grease and neutralizing odors. It is also a natural disinfectant.
- Dilute Vinegar (Optional): For very light cleaning, you can dilute white vinegar with an equal part of water. For tougher grease, use undiluted white vinegar.
- Apply to Plates: Dampen a soft cloth with vinegar. Wipe down the heating plates. For greasy spots, let the vinegar sit for a few minutes.
- Wipe and Rinse: Use a clean, damp cloth to wipe away the vinegar and loosened grease. Repeat with plain water to ensure all vinegar residue is gone.
- Dry Completely: Dry the plates and exterior completely with a dry cloth. The vinegar smell will dissipate as it dries.
Remember to always test a small, inconspicuous area first if you are unsure about using baking soda or vinegar on your specific model. These methods are generally safe for non-stick surfaces, but caution is always wise.
Dealing with Common Cleaning Challenges
Even with regular cleaning, some issues can arise. Burnt cheese, stuck bread, and sticky residue are common challenges. Knowing how to tackle these specific problems makes cleaning easier. Do not despair if you encounter them. Simple solutions exist.
Tackling Burnt Cheese or Baked-On Food
Burnt cheese is a common culprit for difficult cleaning. It hardens and sticks firmly to the non-stick surface.
- Softening is Key: The best approach is to soften the burnt cheese first. Unplug the sandwich maker and let it cool slightly, but not completely. A little warmth helps.
- Damp Paper Towel Method: Lay several layers of very damp paper towels over the burnt cheese. Close the lid gently. Let it sit for 10-15 minutes. The steam and moisture will rehydrate and loosen the burnt food.
- Gentle Scrape: Once softened, use a rubber spatula or a wooden spoon to gently scrape the softened cheese away. Never use metal utensils, as they will scratch the non-stick coating.
- Wipe and Clean: Wipe the area clean with a damp, soapy cloth. Rinse with a clean damp cloth and dry thoroughly.
Removing Sticky Residue
Sometimes, certain ingredients leave a sticky film behind. Sugar from fillings or butter can create this residue.
- Warm, Soapy Water: A cloth dampened with warm, soapy water usually works well. The warmth helps dissolve the stickiness.
- Baking Soda Paste: If simple soap and water do not work, apply a thin layer of baking soda paste (baking soda mixed with a little water) to the sticky area. Let it sit for 5-10 minutes.
- Gentle Scrub and Wipe: Gently scrub with a soft sponge or cloth. The mild abrasive action of baking soda will help lift the stickiness. Wipe clean with a damp cloth and dry.
Cleaning Crumb Trays and Exterior
Many sandwich makers do not have removable crumb trays like some toaster ovens. If yours does, empty it regularly. For most sandwich makers, crumbs gather in the grooves or around the edges.
- For Grooves: Use a soft-bristled brush, a clean toothbrush, or even a toothpick to dislodge crumbs from tight crevices.
- For Exterior: Wipe the exterior of your sandwich maker with a damp cloth and mild soap. This includes the handle and hinges. Avoid getting water into any electrical openings. Dry the exterior completely with a clean, dry cloth. Keeping all your toaster appliances clean ensures better performance and appearance.
By using these methods, you can keep your sandwich maker looking and performing its best, even after the messiest meals.
Maintenance and Prevention Tips
Cleaning your toaster sandwich maker after it gets dirty is one thing. Preventing it from getting excessively dirty is even better. Regular maintenance and simple preventive measures save you time and effort. A little proactive care goes a long way in keeping your appliance in top condition.
Clean After Every Use
This is the golden rule for any kitchen appliance. As soon as the sandwich maker cools down, give it a quick wipe. Fresh food residue is much easier to remove than dried, baked-on grime. A quick wipe with a damp cloth often suffices. This simple habit prevents buildup from becoming a major cleaning project. It also ensures hygiene for your next meal.
Use Parchment Paper or Foil
A smart trick to minimize mess is to use parchment paper or aluminum foil. Before placing your sandwich inside, line the bottom plate with a piece of parchment paper. Then, place your sandwich, and cover it with another piece of parchment paper before closing the lid. This creates a barrier between your food and the heating plates.
- Parchment paper works best for keeping everything clean and prevents sticking. It also allows for nice browning.
- Aluminum foil can also be used, but be careful not to puncture it. It works better for messier, saucier sandwiches.
This method catches any cheese drips, bread crumbs, or filling leaks. After cooking, simply remove and discard the paper or foil. Your plates will remain remarkably clean. This makes daily cleanup a breeze.
Avoid Overfilling Your Sandwiches
Overfilling your sandwiches is a primary cause of messy spills. When you put too much filling, it squishes out the sides when you close the lid. This leads to cheese, sauces, and other ingredients spilling onto the hot plates. This creates burnt, difficult-to-clean spots.
- Moderate Portions: Use reasonable amounts of filling. Aim for enough to fill the bread, but not so much that it bulges excessively.
- Contain Runny Ingredients: If using very runny sauces or cheese, try to keep them towards the center of the sandwich. This helps prevent them from oozing out.
By being mindful of how much you put in your sandwich, you can significantly reduce the amount of cleanup needed later. These small habits ensure your toaster sandwich maker stays cleaner longer.
Frequently Asked Questions (FAQ)
Can I immerse my toaster sandwich maker in water for cleaning?
No, you must not immerse the main unit of a toaster sandwich maker in water. Most models have electrical components that water can damage. Submerging it poses an electric shock risk. Only removable plates, if specified as dishwasher safe by the manufacturer, can be fully washed. Always consult your appliance’s manual for specific cleaning instructions.
How often should I clean my toaster sandwich maker?
You should ideally clean your toaster sandwich maker after every single use. A quick wipe-down prevents food residue from drying and hardening. For a more thorough deep clean, aim for once a month or as needed, depending on how often you use it and how messy your sandwiches are. Regular cleaning ensures hygiene and better performance.
What should I do if food is really stuck and burnt on?
For heavily stuck or burnt-on food, let the sandwich maker cool down first. Then, place a warm, damp paper towel directly over the burnt area. Close the lid gently and let it sit for 10-15 minutes. This creates steam that softens the residue. Afterwards, gently scrape with a rubber spatula or soft brush. Avoid metal tools that can scratch.
Is it safe to use abrasive cleaners or scouring pads?
No, it is not safe to use abrasive cleaners, scouring pads, or steel wool on your toaster sandwich maker. These materials can scratch and damage the non-stick coating on the heating plates. Once scratched, the non-stick surface becomes less effective, and food will stick more easily. Always use soft cloths, sponges, or mild-bristled brushes.
Can I put the removable plates in the dishwasher?
Some toaster sandwich maker models have removable plates that are dishwasher safe. However, this is not true for all models. You must check your appliance’s user manual to confirm if its plates are dishwasher safe. If the manual says yes, you can place them in the dishwasher. If not, wash them by hand using warm, soapy water.
What is the best way to prevent future messes in my sandwich maker?
The best way to prevent future messes is to use parchment paper or aluminum foil. Line both the top and bottom heating plates with these materials before placing your sandwich inside. This creates a barrier that catches any drips, spills, or crumbs. Also, avoid overfilling your sandwiches, which can cause ingredients to ooze out onto the plates.
Conclusion
Keeping your toaster sandwich maker clean is a simple habit with big rewards. We have walked through why cleaning matters, what supplies you need, and the step-by-step process. Whether you have fixed or removable plates, now you know the best way to tackle food residue. We covered deep cleaning techniques using natural solutions like baking soda and vinegar. Dealing with common issues like burnt cheese or sticky messes is also straightforward with the right approach.
Remember the key takeaways: always unplug and cool your appliance, use gentle methods, and prioritize regular care. By following these guidelines, you will not only extend the life of your toaster sandwich maker but also ensure every sandwich you make is hygienic and delicious. So, go ahead, clean your appliance, and get ready for perfectly cooked, mess-free meals. Your taste buds and your appliance will thank you!
- Toaster Sandwich Maker
- Appliance Cleaning
- Kitchen Maintenance
- Home Cleaning Tips
- Sandwich Maker Care

Elira Thomsen
Home Organization & DIY Living Expert
I'm Elira Thomsen, a lifelong enthusiast of clean, beautiful, and functional homes. With over a decade of hands-on experience in DIY home decor, smart cleaning solutions, and practical organization, I help everyday homeowners turn clutter into calm. Whether it's transforming a neglected nook into a cozy reading spot, mastering budget-friendly storage hacks, or refreshing a space with seasonal décor, I'm here to guide you every step of the way. My mission is simple — make home care easier, more inspiring, and truly rewarding.