· Elira Thomsen · Home Cleaning · 21 min read
How To Clean Brass Candlesticks
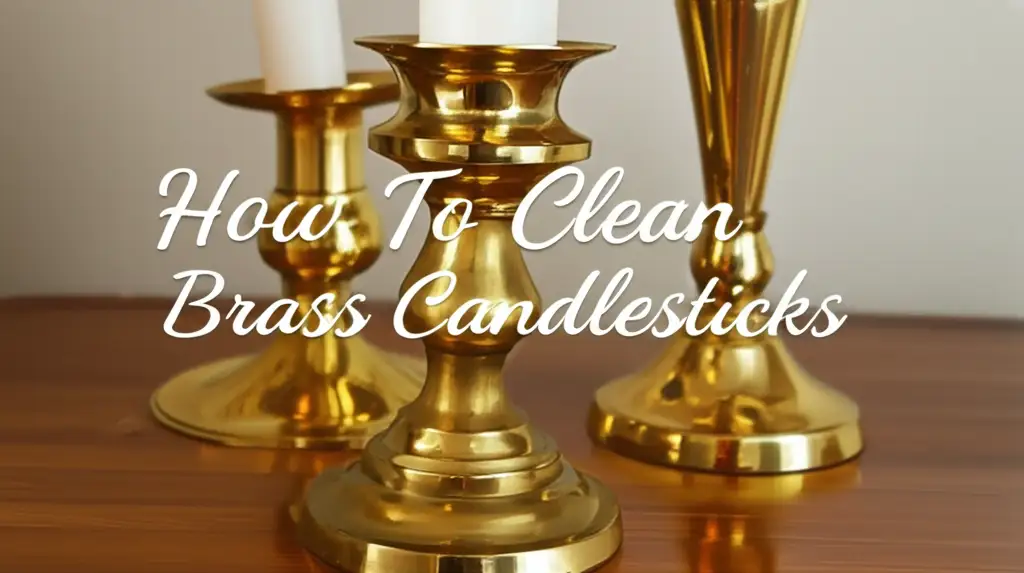
Restore Their Glow: How To Clean Brass Candlesticks
Brass candlesticks bring warmth and classic beauty to any home. Over time, these lovely items often lose their shine. Tarnish, a dull film, develops on the surface. This happens because brass reacts with air and moisture. Cleaning brass candlesticks helps them look their best. It also protects the metal itself. You can bring back their original luster with simple tools and methods. We will explore various ways to clean and protect your cherished brass pieces.
Takeaway:
- Identify if your item is solid brass or plated.
- Always test cleaning methods on a small, hidden area first.
- Use gentle methods for light tarnish, like soap and water.
- Employ homemade solutions such as vinegar, salt, and flour for more tarnish.
- Consider commercial polishes for stubborn stains or heavily tarnished pieces.
- Protect cleaned brass with a lacquer or wax coating to slow down future tarnishing.
To clean brass candlesticks, first determine if they are solid brass. Then, choose a method based on the tarnish level. You can use gentle soap and water, homemade paste from vinegar, salt, and flour, or a specialized commercial brass polish. Always test a small, hidden area first to prevent damage.
Understanding Brass and Tarnish: Why Your Candlesticks Need Cleaning
Brass is an alloy. It contains copper and zinc. This metal is popular for its golden color and durability. However, brass reacts with elements in the air. This reaction creates tarnish. Tarnish appears as a dull, sometimes greenish-brown layer. It reduces the shine of your brass items.
Over time, this tarnish can become very thick. It might even start to corrode the surface. Regular cleaning prevents permanent damage. It also keeps your candlesticks looking beautiful. Many people enjoy the rich, aged look of slightly tarnished brass. But heavy tarnish hides the true beauty of the metal. Cleaning removes this buildup. It reveals the bright, warm glow underneath. Understanding why brass tarnishes helps us choose the right cleaning method. This knowledge prepares us for effective cleaning.
What Causes Brass to Tarnish?
Oxygen and moisture in the air are the main culprits. They cause brass to oxidize. This oxidation forms the tarnish layer. Fingerprints, dirt, and candle wax also speed up this process. Cooking fumes, especially from sulfur-containing foods, can also contribute. Even certain cleaning products can cause brass to tarnish faster. For example, harsh chemicals can strip protective layers. Humidity is another big factor. Humid environments often lead to quicker tarnishing. This is why bathroom brass fixtures can tarnish quickly.
Identifying Solid Brass vs. Brass Plated Items
Before you clean, you must know if your candlestick is solid brass or brass plated. Solid brass is brass throughout. Plated items have a thin layer of brass over another metal. Often, this other metal is steel or zinc. Cleaning methods for solid brass can harm plated items. Strong abrasives might scratch off the thin brass layer. This reveals the metal underneath.
A simple test can help you identify solid brass. Use a magnet. Brass is not magnetic. If the magnet sticks to your candlestick, it is likely brass plated. You must use very gentle cleaning methods for plated items. These methods protect the thin brass layer. If the magnet does not stick, you likely have solid brass. This means you can use a wider range of cleaning options. Always confirm the material first. This step saves you from potential damage. It ensures safe cleaning.
Essential Tools and Preparations for Cleaning Brass Candlesticks
Cleaning brass candlesticks requires proper preparation. Gathering your tools beforehand makes the process smooth. You want to protect both your hands and your workspace. This setup ensures a safe and effective cleaning session. Many items you need are probably already in your home.
Start by laying down old newspapers or towels. This protects your table or counter from drips. Cleaning solutions can sometimes stain surfaces. Having a designated workspace helps contain any mess. Ensure the area is well-ventilated. Some cleaning products have strong fumes. Good airflow keeps you safe. Wear gloves to protect your hands from chemicals. Even natural cleaners can irritate skin.
Basic Supplies You Will Need
You need a few basic items to get started. These include mild dish soap and warm water. Soft cloths are essential. Microfiber cloths work well. They do not scratch the brass. You will also need a soft-bristled brush. An old toothbrush is perfect for detailed areas. You might need cotton swabs for tiny crevices.
Consider a polishing cloth specifically for metals. These cloths help bring out a high shine. Make sure you have a drying cloth ready. Drying the brass thoroughly prevents new water spots. A bowl or basin for mixing solutions is also useful. For tougher jobs, you might need a small, non-abrasive scrubbing pad. Remember, gentle tools protect your brass. Avoid anything that could scratch the surface.
Safety Precautions Before You Begin
Safety is key when cleaning. Always work in a well-ventilated area. Open windows or use a fan. This helps disperse fumes from cleaners. Wear rubber gloves to protect your skin. Some people also wear eye protection. This is especially important if you use commercial polishes. Many of these products contain strong chemicals.
Never mix different cleaning products together. This can create dangerous fumes. Store all cleaning supplies away from children and pets. If you are cleaning antique brass, be extra careful. Very old pieces might have a natural patina that you want to preserve. Research the item’s history if you are unsure. Always test any cleaning method on a small, hidden spot first. This helps ensure the cleaner will not damage the brass. It prevents unwanted reactions.
Gentle Cleaning Methods for Lightly Tarnished Brass
Sometimes, brass candlesticks only have a light layer of dust or minor tarnish. For these cases, gentle cleaning methods are best. Harsh cleaners are not necessary. They can even remove the desirable patina on older pieces. These simple steps help maintain their shine without much effort. You can easily incorporate them into your regular home cleaning routine.
This approach preserves the character of your brass. It removes just the surface dirt. You will find that regular gentle cleaning prevents heavy tarnish buildup. This saves you time and effort in the long run. Keeping your brass items clean makes them last longer.
Soap and Water Wash
This is the simplest way to clean brass. It works well for dust, fingerprints, and very light tarnish. You need warm water and mild dish soap. Fill a basin with warm water. Add a few drops of dish soap. Mix it until suds form.
Place your brass candlesticks into the soapy water. Let them soak for a few minutes. This helps loosen any dirt. Use a soft cloth or sponge to gently wipe the surface. For intricate designs, use a soft-bristled brush. An old toothbrush works well for small details. Rinse the candlesticks thoroughly under clean, warm water. Make sure no soap residue remains. Soap can leave streaks if not fully rinsed.
Drying and Polishing for a Gentle Shine
After rinsing, drying is a critical step. Water spots can form quickly on brass. Use a clean, soft towel to dry the candlesticks immediately. Do not let them air dry. This prevents new tarnish from forming. Buff the brass gently as you dry it. This helps enhance the shine.
For an extra sparkle, use a dry microfiber cloth. Buff the entire surface in circular motions. This brings out a natural luster. This method removes minor smudges. It leaves your brass looking fresh. Regular dusting and occasional soap and water washes keep your brass in good condition. This simple routine is effective for daily care.
Removing Candle Wax from Brass Candlesticks
Candle wax often drips onto candlesticks. It can be stubborn to remove. Do not scrape it off with sharp objects. This can scratch the brass. Instead, try a different approach.
First, let the wax harden completely. You can even place the candlestick in the freezer for about 15-30 minutes. The cold makes the wax brittle. Once the wax is very hard, gently chip it off with your fingernail. You can also use a dull plastic scraper. Be very careful not to scratch the brass. If some wax remains, use a hairdryer on a low setting. Direct the warm air at the wax. The wax will soften. Wipe it away with a soft cloth. Follow up with a gentle soap and water wash. This removes any greasy residue.
Homemade Solutions: Effective Natural Brass Cleaners
You do not always need special products to clean brass. Many common household items make excellent brass cleaners. These natural solutions are often gentler than commercial polishes. They are also cost-effective and environmentally friendly. Using what you already have on hand makes cleaning easier. Always remember to test these solutions on a hidden spot first.
These methods work by using mild acids. These acids react with the tarnish. They help lift the dull layer from the brass surface. Then you can easily wipe it away. Natural cleaners are a great option for those who prefer to avoid harsh chemicals. They are perfect for regular maintenance.
Vinegar, Salt, and Flour Paste
This is a classic homemade brass cleaner. It is highly effective for moderate tarnish. You will need white vinegar, salt, and all-purpose flour. Mix equal parts of salt and flour in a bowl. Slowly add vinegar, stirring constantly. You want to create a thick paste. The paste should be consistent. It should not be too runny.
Apply this paste directly to your brass candlesticks. Use a soft cloth or your gloved hands. Make sure to cover all tarnished areas. Let the paste sit on the brass for 10-15 minutes. For very heavy tarnish, you can leave it on for up to an hour. The acid in the vinegar, combined with the mild abrasive action of the salt and flour, works to break down the tarnish. This method is surprisingly powerful. For other cleaning tasks using vinegar, check out our guide on where to put vinegar in dishwasher to clean.
Lemon Juice and Baking Soda
Another popular natural cleaner uses lemon juice and baking soda. This mixture creates a gentle abrasive paste. It is good for light to medium tarnish. Squeeze fresh lemon juice into a small bowl. Add baking soda gradually. Stir until you form a thick paste. The paste will fizz as you mix it. This is normal.
Apply the paste to your brass candlesticks with a soft cloth. Gently rub the paste onto the tarnished areas. The citric acid in lemon juice helps dissolve the tarnish. Baking soda provides a mild scrubbing action. Let the paste sit for a few minutes. Then, rinse the candlesticks thoroughly with warm water. Dry them immediately with a clean, soft cloth. This method leaves a fresh scent too.
Ketchup or Tomato Paste
This might sound strange, but ketchup or tomato paste can clean brass. Tomatoes contain acids that help remove tarnish. Simply apply a thin layer of ketchup or tomato paste onto the tarnished brass. Spread it evenly over the surface.
Let it sit for about 15-30 minutes. For stubborn tarnish, you can leave it on for an hour. The longer it sits, the more the acid works. After the waiting time, rub the brass with a soft cloth. You will see the tarnish start to lift. Rinse the candlesticks completely with warm water. Dry them thoroughly afterwards. This method is effective and uses a common kitchen item. It is a good option for a quick clean.
Finishing Steps for Homemade Cleaners
After using any homemade paste, thorough rinsing is crucial. Any leftover residue can cause new tarnish or leave streaks. Rinse the brass under warm running water. Ensure all paste is gone from crevices. Then, dry the candlesticks immediately and completely. Use a clean, soft cloth. Buff the surface vigorously to bring out a bright shine. This final buffing step is important. It reveals the true luster of the brass. It also helps prevent water spots. Store your clean brass in a dry place to slow down future tarnishing.
Commercial Brass Polishes: When to Use Them
Sometimes, homemade remedies are not enough. Heavily tarnished brass candlesticks might need a stronger solution. Commercial brass polishes are designed for this purpose. They contain chemicals that effectively remove stubborn tarnish. These products come in various forms, such as creams, liquids, or sprays. Choosing the right one depends on the level of tarnish and your preference.
Commercial polishes often offer a more uniform and quicker shine. They can restore very dull brass to its original brilliance. However, they may be harsher than natural options. Always read the product instructions carefully. Follow all safety warnings. Using them correctly ensures the best results.
Choosing the Right Commercial Polish
There are many types of commercial brass polish available. Look for products specifically labeled for brass. Some polishes are abrasive, meaning they physically scrub off tarnish. Others are chemical-based, dissolving the tarnish. For valuable antiques, choose a non-abrasive polish. This protects the original finish.
Popular brands include Brasso, Wright’s Brass Polish, and Bar Keepers Friend. Read reviews and product descriptions. Some polishes also contain a tarnish inhibitor. This helps keep your brass shinier for longer. Consider the form factor as well. Creams and liquids allow for more controlled application. Sprays are good for large or hard-to-reach areas. Select a polish that matches your cleaning needs.
How to Apply Commercial Brass Polish
Application methods vary by product. Always follow the manufacturer’s instructions. Generally, you will apply a small amount of polish to a clean, soft cloth. Then, rub the polish onto the brass candlestick. Work in small sections. Use firm, circular motions. You will see the tarnish transfer onto your cloth. This means the polish is working.
Continue rubbing until the tarnish is gone and the brass looks shiny. For intricate areas, use a cotton swab or a soft brush. Make sure to get into all the nooks and crannies. Apply more polish to your cloth as needed. Do not use too much polish at once. A little goes a long way.
Buffing and Finishing Touches
After polishing, the brass might look dull or hazy. This is normal. The next step is to buff it. Use a separate clean, dry, soft cloth. A microfiber cloth works best. Vigorously buff the entire surface of the candlestick. Use quick, circular motions. This removes any remaining polish residue. It also brings out the brilliant shine.
Continue buffing until the brass gleams. This final step is crucial for achieving a mirror-like finish. Some polishes require a rinse after application. If so, rinse thoroughly with warm water. Then dry immediately and completely with a clean towel. Proper buffing makes all the difference in the final appearance.
Special Considerations for Lacquered Brass
Many new brass items have a clear lacquer coating. This coating prevents tarnishing. If your brass candlestick has lacquer, it will not tarnish. If it appears dull, it is the lacquer that needs cleaning. Use only mild soap and water for lacquered brass. Never use abrasive polishes or homemade solutions. These can damage or remove the lacquer.
If the lacquer is damaged or peeling, you might see tarnish underneath. In this case, you must remove the old lacquer completely. Special lacquer removers are available. Once the lacquer is off, you can treat the brass as unlacquered. Then you can clean and polish it. You can choose to reapply a new lacquer coat to protect it again.
Cleaning Intricate Brass Candlesticks and Removing Stubborn Stains
Cleaning intricate brass candlesticks presents unique challenges. Their detailed designs can trap dirt and tarnish. Standard wiping methods might not reach all areas. Stubborn stains also require targeted approaches. These can include green spots or dark pitting. With the right tools and techniques, you can restore even the most complex pieces.
Patience is key when cleaning highly decorative items. Rushing can lead to missed spots or damage. Focus on small sections at a time. This ensures thorough cleaning. You will be proud of the results. Your candlesticks will look their best.
Reaching Crevices and Engravings
Intricate designs, like carvings or filigree, accumulate dirt easily. A soft-bristled toothbrush is your best friend here. Dip the brush into your chosen cleaning solution. Gently scrub the bristles into the crevices. Work slowly and carefully. An old toothbrush is perfect because its bristles are soft.
For very tiny spots, use cotton swabs or wooden toothpicks. Wrap a thin cloth around a toothpick for extra precision. These tools can reach areas a cloth cannot. You can also use a small, soft artist’s brush. This helps apply polish into fine details. Take your time to ensure every part of the candlestick gets cleaned. This detailed work makes a big difference.
Addressing Green Spots and Pitting
Green spots on brass often indicate “bronze disease.” This is a form of corrosion. It happens due to chlorides reacting with copper in the brass. It looks like powdery green spots. Pitting is small indentations in the metal surface. Both need special attention.
For green spots, some recommend a paste of baking soda and water. Apply it and let it dry. Then, gently brush it off. For stubborn spots, a commercial cleaner designed for heavy tarnish might be necessary. Some people use a weak ammonia solution (wear gloves and work in a ventilated area). However, ammonia can damage patina. For deep pitting, professional restoration might be needed. You can gently buff areas with fine steel wool (0000 grade) for very tough spots. Do this with extreme care, as it is abrasive. Always test first.
Dealing with Discoloration and Dark Patina
Sometimes, brass develops a very dark, almost black patina. Some collectors value this aged look. If you want to remove it, be gentle. Over-cleaning can strip away valuable antique patina. If the discoloration is just heavy tarnish, the methods already discussed will work. Vinegar and salt paste, or a commercial polish, are effective.
If the dark color is a true patina, a light hand is best. You can try a gentle polish first. If you want to remove all dark patina, use a slightly more aggressive polish. Be prepared that the brass will look very bright and new. Some collectors prefer this. Others want to keep the aged character. Decide what look you prefer before starting.
Professional Cleaning and Restoration
For extremely valuable or heavily damaged brass candlesticks, consider professional help. Restorers have specialized tools and knowledge. They can remove deep pitting. They can repair broken pieces. They can also re-apply protective coatings. This ensures the item’s longevity and value.
A professional cleaning service can handle delicate antique items. They know how to preserve historical value while making the brass look its best. This is especially true for items with intricate details or a known history. Do your research. Find a reputable restorer in your area. This investment protects your cherished pieces.
Maintaining Brass Shine: Polishing and Protection
Cleaning your brass candlesticks is only half the battle. Maintaining their shine is equally important. Once brass is clean, it starts to tarnish again. Air and moisture are always present. Protecting the brass surface helps slow down this process. Regular maintenance keeps your candlesticks looking beautiful for longer periods.
This proactive approach saves you time and effort. You will not have to deal with heavy tarnish as often. Protecting brass also preserves its newly restored luster. It ensures your candlesticks remain elegant additions to your home decor.
Regular Dusting and Light Buffing
The simplest way to maintain brass is regular dusting. Use a soft, dry cloth. Dusting removes airborne particles. These particles can contribute to tarnish buildup. A weekly wipe-down keeps surfaces clean. For items you handle often, like in a clean bedroom, dust more frequently.
Beyond dusting, give your brass a light buffing. Use a clean microfiber cloth. Gently rub the surface in circular motions. This helps to maintain its shine. It also removes any light smudges. This simple action takes only a few minutes. It makes a big difference in preventing heavy tarnish. Consistent care is the secret to lasting beauty.
Applying Protective Coatings
After cleaning and polishing, consider applying a protective coating. This creates a barrier between the brass and the air. It significantly slows down tarnishing. There are two main types of protective coatings: lacquers and waxes.
- Lacquers: A clear lacquer provides a long-lasting protective layer. It prevents tarnish for years. Apply lacquer to clean, dry, tarnish-free brass. You can buy clear brass lacquer sprays or brush-on types. Follow product instructions carefully. Lacquer is a durable solution. However, if it chips or peels, tarnish will start underneath. You must remove the old lacquer before reapplying.
- Waxes: Microcrystalline wax or car wax can also protect brass. Apply a thin layer of wax to the clean brass. Buff it thoroughly. Wax provides a less permanent barrier than lacquer. It needs reapplication every few months. However, wax is easier to apply and remove. It allows the brass to age gracefully underneath. It offers a softer shine than lacquer.
Choose a coating based on how often you want to clean and the desired finish. Lacquer offers ultimate protection. Wax offers easier maintenance and a more natural feel.
Proper Storage for Brass Items
How you store your brass candlesticks affects how quickly they tarnish. Store them in a dry environment. Humidity speeds up tarnishing. Avoid storing brass in damp basements or attics. Keep them away from direct sunlight. Sunlight can also accelerate tarnishing.
You can also use anti-tarnish strips or bags. These products absorb moisture and corrosive gases in the air. Place a strip near your brass items in a display cabinet. Or store smaller candlesticks in anti-tarnish bags. These bags create a protective micro-environment. This helps keep your brass sparkling for longer periods. Proper storage is a simple, effective step.
Integrating Brass Care into Your Home Routine
Caring for brass can become part of your regular home maintenance tasks. Small, consistent efforts prevent large cleaning jobs. Set a schedule for light cleaning. For example, once a month, give your brass items a quick wipe-down. If you have lacquered brass, a simple damp cloth is enough.
For unlacquered brass, a quick buffing with a dry cloth once a week helps. If you see early signs of tarnish, address them immediately. Do not let tarnish build up. This proactive approach saves time. It ensures your brass candlesticks remain shining decorations. Enjoy the beauty they add to your home.
FAQ Section
Q1: Can I use toothpaste to clean brass candlesticks?
A1: Yes, plain white toothpaste can clean brass. It contains mild abrasives that help remove light tarnish. Apply a small amount to the brass with a soft cloth. Rub gently in small circles. Rinse thoroughly with warm water and dry immediately. Avoid gel toothpastes or those with whitening agents, as they may contain chemicals that could harm the brass.
Q2: How often should I clean my brass candlesticks?
A2: The frequency depends on how quickly they tarnish. This varies based on air quality and humidity. For everyday items in a typical home, cleaning every 3-6 months is often enough. If they are lacquered, simply dust them. If they are in a high-humidity area or get heavy use, you might need to clean them more often.
Q3: What is the difference between brass and bronze?
A3: Brass is an alloy of copper and zinc. Bronze is an alloy of copper, typically with tin. Both are copper alloys. Brass has a brighter, more yellow color. Bronze has a more reddish-brown hue. They also tarnish differently. Always identify your metal before cleaning, as some methods are specific.
Q4: Will cleaning antique brass reduce its value?
A4: Aggressive cleaning can reduce the value of antique brass. Many collectors prefer the natural patina that develops over decades. This patina adds character and shows age. If you clean an antique, use the gentlest methods possible. Avoid harsh abrasives or strong chemicals. When in doubt, consult an antique restorer.
Q5: How can I prevent my brass candlesticks from tarnishing quickly?
A5: You can prevent quick tarnishing in several ways. After cleaning, apply a protective coating like clear lacquer or museum-grade wax. Store brass items in a dry, low-humidity environment. You can also use anti-tarnish strips or bags in display cabinets. Regular dusting also helps slow the process.
Q6: Can I put brass candlesticks in the dishwasher?
A6: No, never put brass candlesticks in the dishwasher. The harsh detergents, high heat, and strong water jets can severely damage the brass. It can strip off protective coatings. It can also cause irreversible discoloration and pitting. Always hand-wash brass to preserve its finish.
Conclusion
Cleaning brass candlesticks keeps them looking their best. It also preserves their value and extends their life. We have explored various effective methods. You can choose from gentle soap and water washes to powerful homemade pastes or commercial polishes. Remember to identify your brass type first. This step prevents damage. Always test cleaners on a hidden area.
Regular care like dusting and light buffing prevents heavy tarnish. Consider protective coatings for lasting shine. Whether you prefer natural methods or store-bought solutions, you now have the tools. Restore the radiant glow of your brass candlesticks. They will continue to add warmth and beauty to your home for many years to come. Start cleaning your brass today. Enjoy its renewed brilliance.
- brass cleaning
- candlestick care
- metal polishing
- tarnished brass

Elira Thomsen
Home Organization & DIY Living Expert
I'm Elira Thomsen, a lifelong enthusiast of clean, beautiful, and functional homes. With over a decade of hands-on experience in DIY home decor, smart cleaning solutions, and practical organization, I help everyday homeowners turn clutter into calm. Whether it's transforming a neglected nook into a cozy reading spot, mastering budget-friendly storage hacks, or refreshing a space with seasonal décor, I'm here to guide you every step of the way. My mission is simple — make home care easier, more inspiring, and truly rewarding.