· Elira Thomsen · Home Maintenance · 19 min read
How To Clean Air Vents
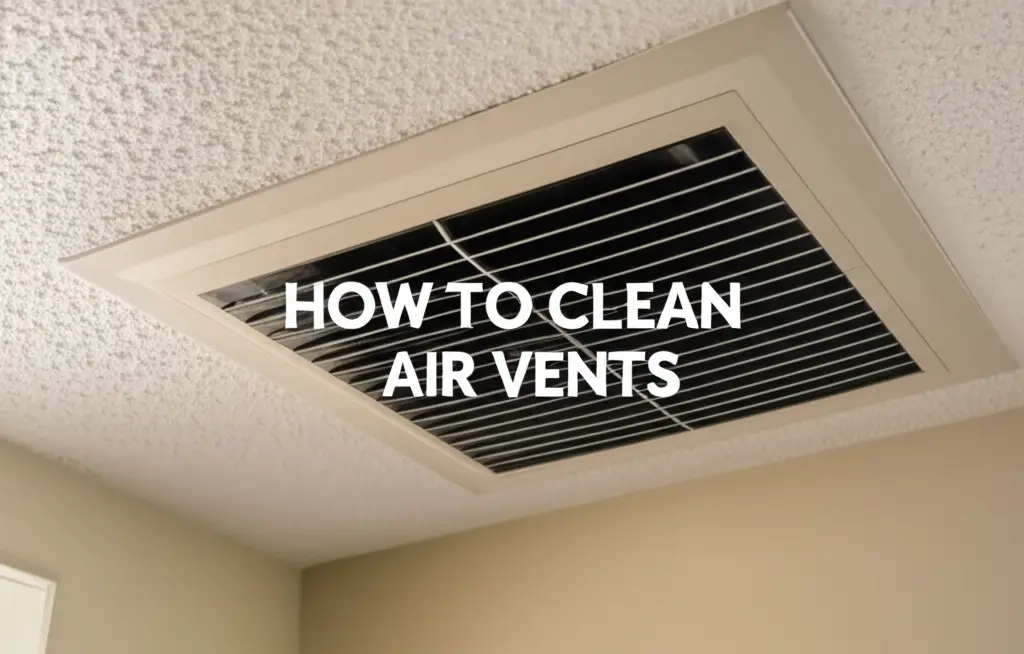
Simple Steps: How to Clean Air Vents for a Fresher Home
Dirty air vents can make your home feel less fresh. They also affect your heating and cooling system’s performance. Learning how to clean air vents properly helps improve indoor air quality. It also makes your HVAC system work better. I know because I have seen the difference clean vents make in my own home. This guide will walk you through easy steps to clean your air vents. We will cover why it matters, what you need, and how to keep them clean.
Takeaway
- Improve Air Quality: Remove dust and allergens from your living space.
- Boost HVAC Efficiency: Help your heating and cooling system work more effectively.
- Extend System Life: Reduce strain on your HVAC unit.
- Prevent Mold Growth: Keep moisture and debris from building up.
- Follow Simple Steps: Use common tools for effective vent cleaning.
Cleaning air vents involves removing dust and debris from the grilles and accessible ductwork. You will use a vacuum, brushes, and mild cleaners. Regular cleaning boosts indoor air quality and helps your HVAC system run smoothly. This process makes your home a healthier place.
Why Cleaning Air Vents Matters for Your Home
Keeping your air vents clean is more important than you might think. These vents are the entry points for conditioned air into your rooms. Over time, dust, pet dander, pollen, and other airborne particles settle inside them. This buildup creates a layer of grime that can affect your health and your home’s energy use.
Dirty vents mean you are breathing in these particles every day. This can cause allergies or worsen respiratory issues. Children and pets are especially sensitive to poor indoor air quality. Regular air vent cleaning helps remove these hidden pollutants. It makes your home’s air cleaner and safer for everyone. Think of it as giving your home a breath of fresh air.
Beyond health, dirty vents cost you money. When vents are clogged, your HVAC system works harder to push air through. This extra effort uses more energy, increasing your utility bills. It also puts stress on your furnace and air conditioner. Over time, this can lead to expensive repairs or a shorter lifespan for your system. Cleaning air vents regularly saves energy and protects your investment. It helps your heating and cooling system run smoothly and efficiently.
Moreover, vents can become breeding grounds for mold or mildew if moisture is present. This is common in humid areas or if your HVAC system has drainage issues. Cleaning helps prevent these harmful growths. It also eliminates musty odors that can spread through your home. A clean home feels more pleasant and smells better. I always notice a huge difference after a good vent cleaning. It really makes a positive impact.
Improve Your Indoor Air Quality Today
Gathering Your Tools: What You Need for Vent Cleaning
Before you start cleaning your air vents, gather all your supplies. Having everything ready makes the job quicker and easier. You likely have most of these items already at home. I always make a list to ensure I do not forget anything before I start. This simple step saves time and effort.
First, you will need a good vacuum cleaner. Make sure it has a hose attachment and various nozzle tools. A brush attachment is very helpful for dislodging dust from vent grilles. A crevice tool can reach into tight spots inside the vent. This primary tool will do most of the heavy lifting.
Next, get some cleaning brushes. A stiff-bristled brush, like a scrub brush, works well for grilles. A smaller, flexible brush, like a bottle brush or a dryer vent brush, can reach a little deeper. You might also want a microfiber cloth or an old rag for wiping surfaces. These cloths pick up dust well without scratching.
You will also need a mild cleaning solution. Warm water mixed with a small amount of dish soap is usually enough. For tougher grime, you can use a diluted all-purpose cleaner. Always check the cleaner’s label to make sure it is safe for the material of your vents. Avoid harsh chemicals that could damage surfaces or release strong fumes. A bucket for your cleaning solution will also be handy.
Finally, think about your safety. A pair of gloves will protect your hands from dust and cleaning solutions. A dust mask is a good idea, especially if you have allergies or if the vents are very dirty. This prevents you from breathing in dust and airborne particles. A sturdy step stool or ladder is also essential for reaching high ceiling vents safely. Do not try to stretch or stand on unstable furniture. Being prepared helps ensure a safe and effective cleaning process.
Step-by-Step Guide: Cleaning Surface Air Vents
Cleaning the visible part of your air vents, the grilles, is a straightforward process. This is where most dust collects. Regular cleaning of these grilles makes a big difference in your home’s cleanliness and air quality. I usually start with the grilles because they are the easiest to tackle.
1. Turn Off Your HVAC System
Before you do anything, turn off your furnace or air conditioner. Go to your thermostat and set it to “Off.” This prevents the system from blowing air while you are cleaning. It also stops any dust from blowing further into your home during the process. This is a crucial safety step.
2. Remove the Vent Grille
Most air vent grilles are held in place by screws. Use a screwdriver to remove these screws carefully. Keep them in a small bag or container so you do not lose them. Gently pull the grille away from the wall or ceiling. Some grilles might just snap into place, requiring a gentle tug. Be careful not to bend or break the grille.
3. Vacuum the Grille and Surroundings
Once the grille is off, take it outside if possible. Use your vacuum’s brush attachment to thoroughly clean both sides of the grille. Pay attention to the slats where dust collects. While the grille is off, use the vacuum’s hose to clean around the opening of the duct. Remove any visible dust, cobwebs, or debris from the surrounding wall or ceiling area. This initial vacuuming removes the loose dirt.
4. Wash the Grille
Fill a bucket with warm water and a few drops of dish soap. If the grille is metal, you can soak it in the soapy water for a few minutes. For plastic grilles, simply wipe them down. Use a scrub brush to clean all surfaces, removing any stubborn dirt or greasy buildup. Make sure to get into all the nooks and crannies of the slats. Rinse the grille thoroughly with clean water.
5. Dry the Grille Completely
It is important to dry the grille completely before putting it back. Use a clean towel to wipe away as much water as possible. Then, let it air dry for a few hours. If the grille is wet when you put it back, it could lead to rust on metal grilles or encourage mold growth. I usually leave mine in a sunny spot to dry quickly.
6. Reinstall the Vent Grille
Once the grille is fully dry, carefully place it back into its opening. Align the screw holes and reinsert the screws. Do not overtighten them, as this can strip the holes or crack the grille. If it is a snap-in grille, gently press it back into place until it is secure. Turn your HVAC system back on after all grilles are reinstalled. You should immediately notice cleaner air.
Deep Clean Your Home with Our Expert Tips
Beyond the Surface: Cleaning Inside the Air Ducts (DIY Methods)
While cleaning the vent grilles is a great start, dust and debris also accumulate inside the air ducts. You can perform some basic duct cleaning yourself without hiring a professional. These methods focus on the accessible parts of the ducts near the vents. Remember, this is not a substitute for a professional deep cleaning, but it helps.
1. Prepare for Deeper Cleaning
Before you begin, make sure your HVAC system is still turned off. This is important for safety and to prevent dust from blowing through your home. Gather your longest vacuum hose attachments. A dryer vent brush or a special long, flexible brush designed for ducts can be very useful here. You will also need a powerful vacuum, preferably a shop vac, as it has stronger suction. Protecting your furniture and floors with drop cloths near the vents can also help contain dust.
2. Vacuum as Far as You Can Reach
With the vent grille removed, insert your vacuum hose attachment into the duct opening. Push the hose as far as it can comfortably go without forcing it. Move the hose in and out, rotating it to reach all sides of the duct. The goal is to suck up any loose dust, dirt, and debris that has settled in the immediate vicinity of the vent. You might be surprised by how much comes out. This step targets the first few feet of the ductwork.
3. Use a Long Brush for Deeper Dislodging
For areas just beyond the vacuum’s reach, use a long, flexible brush. A dryer vent brush is often perfect for this. Gently push the brush into the duct, twisting and pulling it back and forth. This action helps dislodge any stuck-on dust or debris from the duct walls. As you pull the brush out, use your vacuum to suck up the loosened particles. This two-step approach maximizes the amount of dust you can remove. Be gentle; you do not want to damage the ductwork.
4. Clean Return Air Vents Thoroughly
Do not forget your return air vents. These vents pull air into your HVAC system for heating or cooling. They often collect more dust than supply vents. The process for cleaning them is the same: remove the grille, vacuum as far as you can, and use a brush to dislodge deeper dust. Cleaning return vents is especially important for preventing dust from recirculating throughout your home. A clean return air path helps your system function more efficiently.
5. Consider a Video Inspection (Optional)
If you are curious about the condition of your ducts deeper inside, you can buy or rent a small, flexible borescope camera. These cameras attach to your phone and can be fed into the ducts. This lets you see the extent of dirt or potential issues like mold or pests. While not a cleaning step, it can inform your decision on whether to call a professional for a full duct cleaning. This step provides peace of mind.
Remember, these DIY methods are for basic maintenance. They clean the areas you can easily reach. If you suspect significant problems or have not had your ducts professionally cleaned in years, a deeper service might be needed. These steps improve your home’s air quality now.
Learn How to Prevent Allergens at Home
When to Call Professionals: Deep Duct Cleaning
While DIY cleaning helps, there are times when you need professional duct cleaning. Home methods only reach the first few feet of your air ducts. Professional services use specialized equipment to clean the entire duct system. Knowing when to call them saves you money and keeps your home healthier. I always recommend professional cleaning every few years.
1. Visible Mold Growth
If you see mold inside your vents or on your ductwork, professional help is essential. Mold can spread rapidly and release spores into your home’s air. DIY methods cannot effectively remove mold from an entire duct system. Professionals have the right tools and chemicals to safely remove mold and prevent its return. They can also identify and fix the source of moisture causing the mold. This protects your family’s health.
2. Excessive Dust or Debris
Do you notice a lot of dust returning quickly after cleaning your vents? Is there a visible dust cloud when your HVAC system turns on? This indicates a significant buildup in your ducts. Construction dust, renovation debris, or even pest droppings can accumulate deep inside. Professional cleaners use powerful vacuums and rotatory brushes to dislodge and remove this heavy buildup. They ensure all parts of the system are clean.
3. Pest Infestations
Rodents or insects can make nests inside your ductwork. This is a serious issue. They leave behind droppings, nesting materials, and can even die inside the ducts. These materials can cause terrible odors and spread diseases. If you suspect pests in your ducts, call a professional immediately. They can remove the animals, clean the contaminated areas, and seal any entry points. This protects your home from further infestation.
4. Strange Odors
A persistent musty, moldy, or stale smell coming from your vents is a strong sign. It often points to moisture issues, mold, or bacteria growth within the ducts. These odors spread throughout your home every time the system runs. Professional duct cleaning can identify the source of the smell and eliminate it. They use deodorizers and disinfectants safe for your system. This makes your home smell fresh again.
5. Energy Bill Increases
If your energy bills are unusually high, and you cannot find another reason, clogged ducts might be the cause. Dirty ducts restrict airflow. Your HVAC system has to work much harder to heat or cool your home. This increased effort uses more energy. Professional cleaning restores proper airflow, allowing your system to run efficiently. This can lead to noticeable savings on your utility bills. Consider this option if your energy costs are rising.
6. Recent Home Renovations
After major home renovations, especially those involving drywall or sanding, your ducts can fill with fine dust. This dust can be harmful if recirculated. Professional cleaning is highly recommended after such projects. It ensures that your ductwork is free from construction debris. This prevents it from spreading throughout your newly renovated home. It is a good final step after a dusty project.
Get Expert HVAC Maintenance Tips Here
Maintaining Clean Vents: Preventing Future Buildup
Keeping your air vents clean is an ongoing process. Once you have cleaned them, you want to keep them that way. Regular maintenance prevents heavy dust buildup. This saves you time and effort in the long run. I have found that a few simple habits make a big difference.
1. Regular Vacuuming of Vents
Make a habit of vacuuming your air vent grilles weekly or bi-weekly. Use your vacuum’s brush attachment to quickly sweep over the vent openings. This picks up loose dust before it has a chance to settle deeper inside. This simple step takes only a few seconds per vent. It prevents major dust accumulation and keeps your vents looking clean. This is the easiest form of prevention.
2. Change Air Filters Regularly
Your HVAC air filter is the first line of defense against dust entering your ducts. A dirty filter cannot trap particles effectively. This means more dust gets into your air vents and ductwork. Check your air filter monthly and change it every 1-3 months, depending on your filter type and household conditions. If you have pets or allergies, change it more often. A clean filter is key to cleaner air vents and a healthier home.
Choosing the Best Air Filters for Your Home
3. Maintain Overall Home Cleanliness
A clean home means less dust overall. Regularly dust surfaces, vacuum carpets, and mop hard floors. Pay attention to areas where dust collects, like under furniture and behind electronics. Use a damp cloth to capture dust instead of just moving it around. The less dust there is in your living spaces, the less will find its way into your air vents. A consistent cleaning routine directly benefits your air quality.
4. Seal Leaks in Ductwork
Cracks or gaps in your ductwork can pull in unconditioned, dusty air from attics, crawl spaces, or basements. This introduces more dust and allergens into your air system. Inspect visible ductwork for any leaks and seal them with mastic sealant or metallic foil tape. Sealing ducts improves efficiency and reduces dust entry. It also helps prevent pest entry into your system.
5. Use Air Purifiers
Consider using portable air purifiers in rooms where dust is a major concern. Air purifiers with HEPA filters can capture fine particles that might otherwise settle in your vents. They work alongside your HVAC system to improve overall indoor air quality. This adds an extra layer of protection against airborne pollutants. It helps keep the air clean before it even reaches your vents.
6. Control Humidity Levels
High humidity can encourage mold and mildew growth in your ducts and on your vents. Use a dehumidifier in damp areas like basements or during humid seasons. Maintain indoor humidity levels between 30% and 50%. This helps prevent moisture-related issues that lead to mold. It keeps your ducts drier and less hospitable for fungal growth.
By following these maintenance tips, you can significantly reduce how often you need to deep clean your air vents. You will also enjoy cleaner air and a more efficient HVAC system year-round. These small efforts bring big results.
Understand the Benefits of Regular Cleaning
Common Mistakes to Avoid When Cleaning Air Vents
Cleaning air vents seems simple, but some common mistakes can make the job harder or even cause damage. Knowing what to avoid ensures a more effective and safe cleaning process. I have learned from my own mistakes, and now I want to share them with you.
1. Not Turning Off the HVAC System
This is a critical mistake. If your HVAC system is running while you clean, it will blow dust into the air. It can also suck debris deeper into the ductwork. More importantly, it is a safety risk if you are working near electrical components. Always turn off your system at the thermostat before you start any cleaning. This simple step protects you and your home.
2. Using Harsh Chemicals
Avoid using strong, abrasive, or highly acidic cleaners on your vent grilles. These chemicals can damage the finish, corrode metal, or discolor plastic. They can also leave behind harsh fumes that recirculate through your home. A simple mix of warm water and dish soap is usually sufficient. For tougher grime, a diluted all-purpose cleaner is best. Always test a small, hidden area first if you are unsure.
3. Forgetting to Dry Grilles Completely
Putting wet grilles back into the vent openings can lead to problems. Metal grilles can rust, leaving unsightly stains on your walls or ceilings. Moisture also creates an environment for mold and mildew to grow inside the ducts. Always ensure grilles are bone-dry before reattaching them. Air drying in a sunny spot or using a clean towel works well.
4. Ignoring Ductwork Past the Grille
Cleaning only the visible part of the vent is like sweeping only the middle of the floor. Dust and debris accumulate deeper inside the ducts. While professional cleaning is ideal for the whole system, do not ignore the first few feet. Use your vacuum’s hose attachment and a long brush to reach as far as you can. This significantly improves indoor air quality.
5. Damaging the Ductwork
When using brushes or vacuum attachments inside the ducts, be gentle. Forcing tools or being too aggressive can tear flexible ducts or dent metal ducts. Damaged ducts can leak air, reducing system efficiency and pulling in more dust. Use flexible brushes meant for ducts and avoid sharp objects. The goal is to clean, not to cause more problems.
6. Not Wearing Protective Gear
Cleaning can kick up a lot of dust, especially if the vents are very dirty. Failing to wear a dust mask can lead to breathing in allergens and irritants. Gloves protect your hands from dirt and cleaning solutions. Eye protection is also wise, especially if you are working overhead. Prioritize your personal safety during the cleaning process.
7. Neglecting Return Air Vents
Many people focus only on the supply vents where air comes out. However, return air vents often collect more dust because they pull air in. If these are clogged, your system works harder, and dirty air recirculates. Treat return vents with the same thoroughness as supply vents. Cleaning both types ensures a cleaner, more efficient system.
By avoiding these common mistakes, you can clean your air vents effectively and safely. This ensures cleaner air and a healthier home environment.
Frequently Asked Questions
How often should I clean my air vents?
You should vacuum your vent grilles every 1-2 months. A more thorough cleaning, including removing the grilles and cleaning inside the accessible ductwork, should happen every 6-12 months. Professional duct cleaning is recommended every 3-5 years, or more often if you have pets, allergies, or after renovations.
Can dirty air vents make me sick?
Yes, dirty air vents can contribute to poor indoor air quality. They can circulate dust, allergens, pet dander, mold spores, and even bacteria. Breathing these particles can worsen allergies, asthma symptoms, and other respiratory issues. Regular cleaning helps reduce these airborne contaminants.
Is duct cleaning really necessary?
Regular duct cleaning is not always necessary for every home, but it offers benefits. It removes accumulated dust, allergens, and debris from your HVAC system. This improves air quality, reduces odors, and can help your system run more efficiently. It is especially important if you notice visible mold, pest infestations, or excessive dust.
What is the difference between air vents and air ducts?
Air vents are the visible covers or grilles on your walls, floors, or ceilings. They are the openings where air enters or leaves a room. Air ducts are the hidden channels or tubes behind the vents. They carry air throughout your home, connecting your HVAC system to each room’s vents.
Can I clean my entire duct system myself?
No, cleaning your entire duct system yourself is not practical or effective. Home vacuums and brushes only reach a short distance into the ducts. Professional duct cleaners use specialized, powerful equipment and tools. These tools can reach and clean the entire length of your ductwork.
How long does it take to clean air vents?
Cleaning the surface of your air vents (the grilles) might take 5-10 minutes per vent. Removing the grille and cleaning the accessible ductwork might take 15-30 minutes per vent. The total time depends on the number of vents in your home and how dirty they are.
Conclusion
Cleaning air vents is a simple yet vital task for any homeowner. It directly impacts your indoor air quality and the efficiency of your HVAC system. By following these steps on how to clean air vents, you can remove dust, allergens, and other unwanted particles from your home. This creates a healthier and more comfortable living space. Remember to clean your grilles regularly and address deeper duct issues when needed. A clean home breathes better, and so will you. Make vent cleaning a part of your regular home maintenance routine. Your lungs and your wallet will thank you.
- air vent cleaning
- HVAC maintenance
- indoor air quality
- dust removal

Elira Thomsen
Home Organization & DIY Living Expert
I'm Elira Thomsen, a lifelong enthusiast of clean, beautiful, and functional homes. With over a decade of hands-on experience in DIY home decor, smart cleaning solutions, and practical organization, I help everyday homeowners turn clutter into calm. Whether it's transforming a neglected nook into a cozy reading spot, mastering budget-friendly storage hacks, or refreshing a space with seasonal décor, I'm here to guide you every step of the way. My mission is simple — make home care easier, more inspiring, and truly rewarding.