· Elira Thomsen · Home Appliances · 19 min read
Do It Yourself Washing Machine
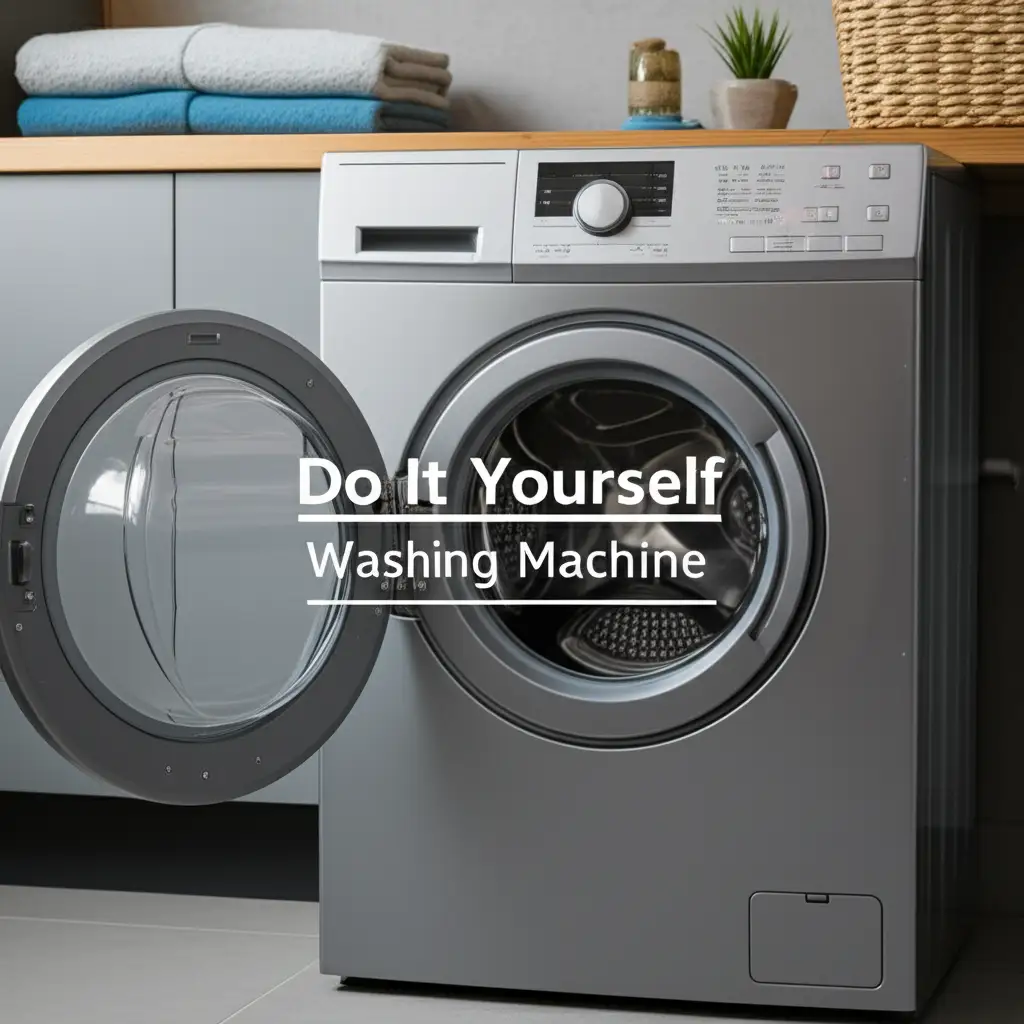
Do It Yourself Washing Machine: Build Your Own Laundry Solution
Are you dreaming of more self-sufficiency in your home? Perhaps you want to cut down on utility bills or reduce your environmental impact. Building a Do It Yourself washing machine can be a rewarding project. It offers a practical alternative to expensive commercial units. I find it empowers you to handle laundry even without traditional power sources.
This article will guide you through the process of creating your own laundry system. We will explore various DIY washing machine types. We will discuss essential components and provide step-by-step building instructions. You will learn how to operate and maintain your homemade washer. I want to show you how easy it is to embrace a more sustainable lifestyle. Join me on this journey to cleaner clothes with a system you built yourself.
Takeaway
- Building a DIY washing machine is possible and offers clear benefits.
- These homemade washers save money and reduce utility use.
- They provide a sustainable, off-grid laundry option.
- Simple designs like bucket-and-plunger systems are easy to create.
- Regular care keeps your DIY washing machine working well.
A Do It Yourself washing machine is a homemade device designed to wash clothes without relying on commercial appliances or grid electricity. It typically uses manual power or simple mechanics to agitate clothes in water, providing a cost-effective and sustainable laundry solution for various situations.
Why Consider a Do It Yourself Washing Machine?
Choosing to build a Do It Yourself washing machine comes with many advantages. It is not just about saving money. It is also about gaining independence. You gain control over your household needs. Many people seek ways to reduce their environmental footprint. A DIY washing machine fits perfectly into this goal.
Imagine doing laundry without a power outlet or a water hookup from the city. This project teaches you practical skills. It helps you understand how appliances work. I believe this knowledge is very valuable today.
Cost-Benefit Analysis
Buying a new washing machine costs hundreds, sometimes thousands, of dollars. Utility bills for water and electricity also add up over time. A Do It Yourself washing machine significantly cuts these expenses. You can build simple models for less than $50. More advanced versions still cost much less than a standard appliance.
Think about the long-term savings. You spend less on repairs. You use less energy and water. This project puts money back into your pocket. It also avoids landfill waste from old appliances.
Environmental Impact
Traditional washing machines use a lot of water and electricity. They have a large carbon footprint. A homemade washing machine helps you reduce this impact. Many DIY designs use minimal water. They often rely on human power.
You conserve natural resources. You lower your energy consumption. This makes your laundry routine much greener. It is a step towards a more sustainable way of living. I feel good knowing I am doing my part for the planet.
Skill Development & Empowerment
Building a Do It Yourself washing machine is a hands-on learning experience. You learn about basic mechanics. You learn about plumbing. You also learn about water management. This project builds your confidence. It shows you that you can create solutions for your home.
This self-reliance is a powerful feeling. You become less dependent on external systems. This empowerment extends to other areas of your life. I have found it incredibly rewarding to complete such projects.
Types of DIY Washing Machine Systems
There are many ways to create a Do It Yourself washing machine. The best type depends on your needs and resources. Some designs are very simple. Others are more complex. Each type offers unique benefits.
Think about how much laundry you do. Consider if you need electricity. Also, think about your budget. I have seen many clever solutions.
Manual Hand-Crank Washers
Manual hand-crank washers are simple and effective. You often use a drum or bucket with a lid. An agitator rod goes through the lid. You turn a handle to move the agitator inside. This cleans your clothes.
These washers do not need electricity. They are portable. They are perfect for camping or off-grid living. They are also very affordable to build. You just need a strong arm for agitation.
Bucket & Plunger Systems
The bucket and plunger system is perhaps the simplest Do It Yourself washing machine. It uses a large bucket and a modified toilet plunger. You fill the bucket with clothes, water, and detergent. Then, you use the plunger to agitate the clothes.
This method is very inexpensive. It is easy to use. It is great for small loads or delicate items. Many people start with this design. I recommend it for beginners.
Bicycle-Powered Washers
Bicycle-powered washers are more advanced. They use the motion of pedaling a bicycle to power an agitator or spin drum. This design requires some mechanical skill. You connect the bike’s rear wheel to a washing mechanism.
These machines are very energy-efficient. They use human power. They are a good workout too! They are perfect for larger loads than basic manual systems. This type can be quite fun to build and use.
Modified Barrel/Drum Washers
You can modify large plastic barrels or drums into washing machines. This involves adding an agitator. You might use a hand-crank or a small motor. These barrels hold more laundry. They are good for family use.
This type requires careful sealing. You need to ensure water does not leak. It provides a robust laundry solution. I have seen impressive barrel designs that work very well.
Essential Components for Your Homemade Washing Machine
When you build a Do It Yourself washing machine, you need certain parts. The components vary based on the design you choose. However, some items are common across most homemade setups. Planning your materials helps the building process go smoothly. I always make a list before I start.
Gathering these parts helps you start strong. You can find many components at hardware stores. Some items might be things you already have around your home.
Container
The container holds your clothes and water. It must be strong and waterproof. Common choices include:
- Large plastic buckets: These are great for small, simple washers. They are inexpensive and easy to find.
- Plastic barrels or drums: These work for larger capacity machines. Make sure they are food-grade if possible.
- Metal tubs: These are durable but can be heavier.
The container needs a tight-fitting lid. This prevents water from splashing out. It also keeps clothes contained during agitation.
Agitation Mechanism
This part moves your clothes through the water. It gets them clean. Different designs use different mechanisms:
- Toilet plunger: A new, clean plunger works well for bucket washers. It pushes water through clothes.
- Wooden paddle: You can shape wood to create a simple agitator. It mimics a traditional washboard action.
- PVC pipe frame: You can build a frame from PVC pipes. This frame can move up and down or rotate.
- Motor with agitator: For electric designs, a small electric motor powers a central agitator or a rotating drum. This is more complex. You might explore how to remove middle part of washing machine if you are thinking about adapting commercial agitator parts.
The agitator needs to be robust. It must withstand water and detergent.
Water Inlet/Outlet
Your Do It Yourself washing machine needs a way to get water in and out. This makes filling and draining easy.
- Hoses: Garden hoses or standard washing machine hoses work well for filling. You can connect them to a spigot. Are washing machine hoses standard size is a good question to consider here, as standard sizes make connections easier.
- Spigots/Valves: Adding a spigot near the bottom of your container allows for easy draining. This is much better than tipping a heavy container.
- Manual pouring: For the simplest systems, you just pour water in and dump it out.
Consider where your water will come from. Also, plan where the used “gray water” will go. Proper drainage is important. You can learn more about general washing machine plumbing needs at what plumbing do you need for a washing machine.
Power Source (if applicable)
Many DIY washers are human-powered. Some advanced ones use motors.
- Hand crank: A simple handle connected to the agitator.
- Bicycle: Connect the pedal power to the washing mechanism.
- Small electric motor: If you have access to power, a small motor can automate agitation. Look for low-power motors.
- Solar panel: For off-grid electric systems, a small solar panel can charge a battery to run the motor.
Choose a power source that matches your needs. Safety is key if you use electricity.
Drainage System
You need to remove dirty water.
- Manual draining: Simply tip the container to pour out water.
- Spigot: As mentioned, a spigot at the bottom makes draining simple.
- Small pump: For larger, more permanent setups, a small submersible pump can move water efficiently. This requires power.
Plan your drainage. You should dispose of gray water responsibly.
Step-by-Step Guide: Building a Basic DIY Washing Machine
Building a simple Do It Yourself washing machine does not have to be hard. I will guide you through creating a basic, yet effective, bucket and plunger system. This design is very popular. It is easy to replicate. It is also very affordable.
Gather your materials first. This makes the building process smoother. You can find most items at a local hardware store.
Materials List
Here is what you will need for a basic bucket and plunger washer:
- One 5-gallon bucket with lid: Choose a sturdy one. Make sure the lid fits well.
- One new, clean toilet plunger: Get one with a flat or bell-shaped head. Avoid plungers with accordion folds, as they trap dirt.
- Drill with a large drill bit: The bit should be slightly wider than the plunger handle.
- Waterproof sealant or rubber grommet: To seal the hole around the plunger handle.
- Measuring tape or ruler.
- Marker or pencil.
- Saw (optional): To shorten the plunger handle if needed.
Assembly Instructions
Follow these steps carefully to build your Do It Yourself washing machine:
- Prepare the Bucket: Ensure your 5-gallon bucket is clean. If it is used, wash it thoroughly. Check for cracks or leaks.
- Prepare the Lid: Place the lid flat on a stable surface. Find the center of the lid. Use your marker to mark this point.
- Drill the Hole: Use your drill with the appropriate bit to drill a hole exactly at the marked center. Make the hole just big enough for the plunger handle to pass through. Test the fit of the plunger handle. It should move freely but not be too loose.
- Insert the Plunger: Push the handle of the clean plunger through the hole in the lid from the top. The plunger head should be on the underside of the lid.
- Seal the Hole: Apply waterproof sealant around the plunger handle where it passes through the lid. This prevents water splashing out during use. Alternatively, insert a rubber grommet first, then push the handle through. Let the sealant dry completely before use.
- Adjust Plunger Handle Length (Optional): Sometimes, the plunger handle is too long. If it hits the bottom of the bucket too early, you can cut a few inches off the top of the handle. Make sure you can still hold it comfortably.
- Test the System: Fill the bucket halfway with water. Put the lid on with the plunger inserted. Move the plunger up and down. Watch for leaks around the lid. Adjust the seal if needed.
Safety Considerations
Building a Do It Yourself washing machine is generally safe. However, always be careful:
- Use new, clean materials: Especially the plunger, to avoid transferring germs to clothes.
- Ensure stability: Make sure your bucket is stable when washing.
- Watch for pinch points: Be aware of moving parts.
- Proper lifting: The bucket will be heavy when full of water and clothes. Lift with your legs, not your back.
- Electrical safety: If you decide to add a motor later, always consult an electrician. Water and electricity are a dangerous combination.
Following these steps creates a reliable and basic washing system. You will be amazed at how well it cleans! You can also check what goes where in a washing machine for general loading and detergent placement advice.
Operating Your DIY Washing Machine Safely and Effectively
Once you build your Do It Yourself washing machine, knowing how to use it properly is key. Operating it safely ensures good results. It also extends the life of your homemade appliance. I have found a simple routine makes laundry day easy.
Remember, this is not a commercial machine. It requires more hands-on effort. But the feeling of self-sufficiency is worth it.
Loading Clothes: Don’t Overload
Always start by loading your clothes. Do not overload your Do It Yourself washing machine. Overloading prevents proper agitation. It also makes your machine less effective. A good rule is to fill the bucket about halfway with clothes. This leaves room for water and movement.
Separate clothes by color, just as you would with a regular machine. This prevents color bleeding. Delicate items might need gentler agitation or separate loads. You can also explore how to clean jeans without washing machine for tips on manual washing for tough fabrics.
Adding Detergent: Proper Amount
Add your chosen laundry detergent after loading clothes. Use less detergent than you would for a standard machine. DIY washers use less water, so too much soap leads to excessive suds. Excessive suds are hard to rinse out.
A small amount, perhaps one or two tablespoons, is usually enough. You can use liquid or powdered detergent. Ensure it dissolves well in the water.
Washing Cycle: Manual Agitation, Timing
Now, add water to your Do It Yourself washing machine. Use warm or cold water based on your clothes’ needs. Fill the bucket until the clothes are fully submerged. Put the lid on with the plunger inserted.
Start the washing cycle. This means manually agitating the clothes. Push the plunger up and down with steady, vigorous strokes. This moves water through the fabric. Aim for 5-10 minutes of agitation for light loads. For heavily soiled items, you might agitate for 15-20 minutes. Some people like to let clothes soak first, a process similar to what does soak mean on a washing machine or what does the soak feature in washing machine.
Rinsing: Drain, Refill, Agitate
After washing, you need to rinse your clothes.
- Drain the dirty water: Carefully remove the lid and plunger. Pour out the soapy water. If you installed a spigot, open it to drain.
- Refill with clean water: Add fresh, clean water to the bucket.
- Agitate again: Replace the lid and plunger. Agitate the clothes for 3-5 minutes. This removes soap residue.
- Repeat (if needed): For very sudsy loads, you might need to repeat the rinse cycle one more time.
Draining: Proper Disposal of Gray Water
Properly dispose of the used rinse water. This “gray water” can often be used for outdoor tasks. You might water non-edible plants with it. Avoid pouring it directly into storm drains. It should not contaminate natural waterways.
Spinning/Drying: Manual Wringing, Line Drying
A Do It Yourself washing machine usually does not have a spin cycle. You need to remove excess water manually.
- Manual Wringing: Take clothes out of the bucket. Twist and squeeze them to wring out as much water as possible.
- Towel Rolling: Lay clothes flat on a clean towel. Roll them up tightly to absorb water.
- Line Drying: Hang clothes on a clothesline or drying rack. This is the most energy-efficient drying method. Choose a sunny, breezy spot for faster drying.
Maintaining Your Homemade Washing Machine
Maintaining your Do It Yourself washing machine keeps it running well. Regular care prevents problems. It also ensures your clothes stay clean. Homemade systems need simple, consistent attention. I have learned that a little effort goes a long way.
Proper maintenance prevents odors. It stops buildup. It also helps you spot small issues before they become big ones.
Regular Cleaning: Prevents Odors, Buildup
After each use, clean your Do It Yourself washing machine.
- Rinse the bucket: Swish clean water around the inside. Pour it out. This removes lint and detergent residue.
- Wipe down surfaces: Use a damp cloth to wipe the inside and outside of the bucket and lid.
- Clean the plunger: Rinse the plunger head thoroughly. Ensure no fabric fibers are stuck to it. You can follow tips like those for how to clean washing machine agitator for this part.
- Dry completely: Let all parts air dry before storing. This prevents mildew and odors. This step is similar to what you would do to how to clean wahsing machine generally.
Checking Components: Hoses, Seals, Moving Parts
Periodically inspect all parts of your Do It Yourself washing machine.
- Hoses: If you use hoses for filling or draining, check for cracks or leaks. Ensure connections are tight.
- Seals/Grommets: Inspect any waterproof seals around the plunger handle or spigots. Replace them if they show signs of wear.
- Moving parts: For more complex designs with cranks or motors, lubricate moving parts as needed. Check for loose screws or connections.
- Container integrity: Look for any new cracks or weak spots in the bucket or barrel.
Catching these issues early saves you time and effort later.
Repairing Common Issues: Leaks, Agitation Problems
Even simple Do It Yourself washing machine designs can have minor issues.
- Leaks: If your bucket leaks, check the source. For holes, use waterproof repair tape or sealant. For leaks around a spigot, tighten the connection or reapply sealant.
- Agitation problems: If the plunger feels less effective, ensure the water level is correct. Check that the plunger head is intact and not damaged. For mechanical agitators, check the connection to the power source.
- Odors: If your machine develops an odor, it means it was not dried properly. Clean it with a solution of white vinegar and water. Then, ensure thorough drying.
Simple repairs keep your machine functional. Do not ignore small problems.
Storage Tips
Store your Do It Yourself washing machine properly when not in use.
- Dry environment: Keep it in a dry place. This prevents mildew growth.
- Away from extreme temperatures: Store away from direct sunlight or freezing temperatures. These can damage plastic components.
- Covered: Place a cover over the bucket to keep dust and pests out.
Proper storage ensures your machine is ready for your next laundry day.
Advanced DIY Washing Machine Concepts & Innovations
Beyond the basic bucket and plunger, the Do It Yourself washing machine concept can expand. People develop more sophisticated systems. These innovations often aim for greater convenience or capacity. They show the creative spirit of DIY enthusiasts. I find these advanced ideas inspiring.
These ideas are for those who want to push their homemade laundry system further. They might involve more complex mechanics or alternative energy sources.
Adding a Pump for Drainage
Manually draining a large barrel or tub can be tough. Adding a small, submersible pump simplifies this task. You place the pump in the dirty water. It pumps the water out through a hose.
- Benefits: Easier, faster draining. No heavy lifting.
- Requirements: A small pump (often 12V or 120V), a power source for the pump, and a drain hose.
- Considerations: Ensure the pump is rated for gray water. Electrical safety is important here.
This upgrade significantly improves usability for larger DIY washers.
Integrating Solar Power for a Small Motor
For a truly off-grid Do It Yourself washing machine, consider solar power. A small solar panel can charge a battery. This battery then powers a low-voltage electric motor. This motor can drive an agitator or a spinning drum.
- Benefits: Fully independent laundry system. Zero energy cost from the grid.
- Requirements: Solar panel, charge controller, deep cycle battery, small DC motor, wiring.
- Considerations: Initial setup cost for solar components. Sizing the system correctly is important for consistent power. You might even consider elements like how to discharge a washing machine capacitor if salvaging motor components.
This is a great step for sustainable living.
DIY Spin Dryer Ideas
After washing and rinsing, clothes are still wet. A spin dryer removes much more water than wringing. While a full spin cycle is complex for DIY, simpler versions exist.
- Salad spinner method: For small, delicate items, a large salad spinner can effectively remove excess water.
- Bucket and net: Use a mesh net bag for clothes inside a bucket. Spin the bag by hand using centrifugal force. This is less efficient than a motor but better than just wringing.
- Modified washing machine drum: Salvage a drum from an old washing machine. Rig it to spin rapidly using a hand crank or small motor. This is a more ambitious project.
A good spin dryer greatly reduces drying time.
Using Recycled Materials Creatively
The spirit of a Do It Yourself washing machine is often about resourcefulness. Look for recycled materials to reduce costs and waste.
- Old bicycle parts: Use wheels, chains, and frames for mechanical parts.
- Plastic containers: Beyond buckets, think about large food-grade containers or barrels.
- Scrap metal/wood: Build frames or supports from salvaged materials.
Creative use of recycled items makes your DIY project even more sustainable.
FAQ Section
Is a DIY washing machine as good as a store-bought one?
No, a Do It Yourself washing machine typically does not match the performance or convenience of a commercial appliance. Store-bought machines offer multiple cycles, automatic filling, and powerful spin drying. DIY versions require more manual effort and are often suited for smaller loads. Their strength lies in their affordability, independence from grid power, and simplicity.
What is the simplest DIY washing machine to build?
The simplest Do It Yourself washing machine to build is the bucket and plunger system. It requires only a 5-gallon bucket with a lid and a new, clean toilet plunger. You simply agitate clothes by hand. This design is very low-cost, easy to assemble, and effective for small to medium loads.
Can a DIY washing machine handle large loads?
Most Do It Yourself washing machine designs are best for small to medium loads. A 5-gallon bucket washer handles a few shirts and a pair of pants. Larger barrel or drum systems can manage more. However, none match the capacity of a standard commercial washing machine. You might need to do multiple loads.
How much does it cost to build a DIY washing machine?
Building a basic Do It Yourself washing machine can cost very little, sometimes under $20-$50. This depends on whether you buy new materials or use salvaged items. More complex designs involving motors or solar power will naturally cost more. Even then, they are usually much cheaper than buying a new commercial unit.
Are DIY washing machines energy efficient?
Manual Do It Yourself washing machine models are extremely energy efficient. They use zero electricity, relying solely on human power. Even motorized DIY versions can be highly efficient if powered by small DC motors or solar panels.
- DIY washing machine
- homemade washer
- build your own washing machine
- laundry solutions
- sustainable living
- off-grid laundry
- washing machine alternatives


