· Liora Benning · Kitchen Care · 20 min read
Can You Put Cast Iron Skillet In The Dishwasher
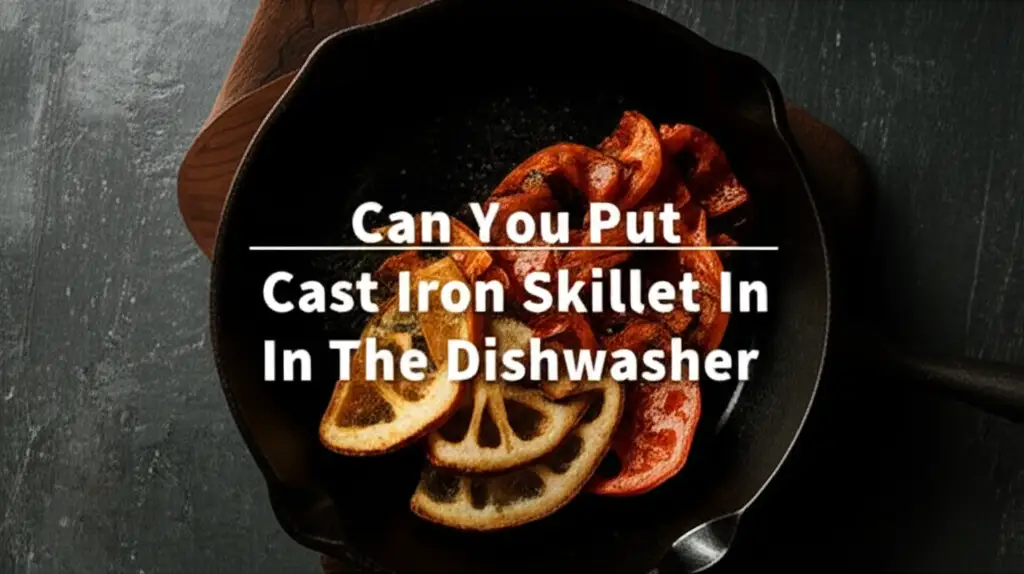
Can You Put Cast Iron Skillet in the Dishwasher?
It’s a question many home cooks ask when faced with a dirty cast iron skillet. You want to save time and effort. You might look at your trusty cast iron pan, then at the open dishwasher door, and wonder if they can go together. This thought is common. Many modern kitchen items can go straight into the dishwasher. However, cast iron is different. It needs specific care to work well and last long. We will discuss why dishwashers are not suitable for cast iron. We will also share the best methods to clean and maintain your skillet. This guide helps you keep your cast iron in top condition for many years of cooking.
Takeaway
- Avoid Dishwashers: Never place a cast iron skillet in the dishwasher.
- Protect Seasoning: Dishwasher detergents strip the skillet’s protective seasoning.
- Prevent Rust: Dishwashers cause cast iron to rust quickly.
- Hand Wash: Always hand wash cast iron with warm water and a stiff brush.
- Dry Immediately: Dry your skillet thoroughly right after washing to stop rust.
- Re-oil: Apply a thin layer of cooking oil after drying to maintain seasoning.
Can you put cast iron skillet in the dishwasher?
No, you should never put a cast iron skillet in the dishwasher. Dishwashers use harsh detergents, hot water, and long cycles. These elements remove the seasoning from your cast iron. Seasoning is a protective layer of polymerized oil. It makes the skillet non-stick and stops rust. Washing cast iron in a dishwasher also causes rust to form very quickly, damaging the pan.
The Core Problem: Why Dishwashers Harm Cast Iron Skillets
Putting a cast iron skillet in the dishwasher causes significant damage. It is a common mistake for new cast iron owners. Dishwashers are very effective at cleaning, but this effectiveness works against cast iron. They use high heat, strong detergents, and powerful water jets. These conditions are bad for the seasoning layer. The seasoning layer is what makes cast iron so special. It needs gentle care, not harsh machine washing. Understanding these core problems helps you avoid them.
The Stripping of Seasoning
Cast iron cookware works best when it has good seasoning. Seasoning is a thin, baked-on layer of oil. This layer gives the pan a natural non-stick surface. It also protects the iron from rust. When you put cast iron in a dishwasher, the hot water and strong detergents strip this seasoning away. Detergents are made to cut through grease. They do their job too well on the seasoning. The seasoning comes off in patches, or completely. This leaves your skillet exposed.
A stripped skillet loses its non-stick quality. Food starts to stick to the pan easily. This makes cooking and cleaning much harder. You will also see a dull, patchy surface instead of a smooth, dark one. Rebuilding seasoning takes time and effort. You must bake thin layers of oil onto the pan over several hours. Avoiding the dishwasher saves you from this extra work. Proper hand washing keeps your seasoning intact. It makes your cooking easier and more enjoyable.
Rust Formation
Once the seasoning is gone, rust is the next problem. Cast iron is iron. Iron rusts when it is exposed to water and air, especially over time. Dishwashers involve long cycles of water exposure. After the wash cycle, skillets often sit inside the damp dishwasher. This creates perfect conditions for rust to form quickly. You might find an orange, rusty mess inside your dishwasher when the cycle finishes. This rust can ruin your skillet’s surface. It makes the pan unusable until you remove the rust and re-season it.
Rust also affects how your food tastes and cooks. It can flake off into your meals. A rusty pan needs a full restoration. This involves scrubbing the rust off, which is a lot of work. Then, you must go through the re-seasoning process. This takes many hours of baking in the oven. Preventing rust is much simpler than removing it. Hand washing and immediate drying prevent rust. It keeps your cast iron ready for your next meal.
Understanding Cast Iron Seasoning: The Key to Longevity
Seasoning is important for cast iron pans. It is not just about making them non-stick. Seasoning helps your cast iron last for generations. Many people inherit cast iron skillets from family members. These pans have decades of seasoning on them. This seasoning makes them perform very well. It also means they do not rust easily. Knowing what seasoning is and why it matters helps you care for your cast iron correctly. A well-seasoned pan is a joy to cook with every time.
What is Seasoning?
Seasoning is not just a coating. It is a layer of polymerized oil. This means oil has been heated until it bonds with the iron surface. When you put oil on a cast iron pan and heat it, the oil changes. It breaks down and forms a hard, slick layer. This layer fills in the tiny pores of the iron. Each time you cook with oil and heat your pan, you add to this layer. Over time, many layers build up. This creates a very durable, non-stick surface. It also gives the pan its dark, shiny look.
A good seasoning layer also protects the iron from moisture. This protection stops rust from forming. Without seasoning, raw iron is vulnerable to water and oxygen. This leads to rust very quickly. Many new cast iron pans come pre-seasoned. This lets you use them right away. But you still need to maintain this seasoning. Regular cooking with oil and proper cleaning builds up the seasoning even more. This makes your pan better with age.
Why Seasoning Matters for Cooking
Seasoning makes cooking with cast iron easy and fun. First, it provides a natural non-stick surface. Eggs slide around the pan without sticking. Pancakes cook evenly and release easily. This means you use less added fat when cooking. Second, seasoning helps conduct heat better. The smooth surface ensures food cooks evenly across the pan. This is especially good for searing meats or frying foods. Third, seasoning helps transfer flavors. A well-seasoned pan holds a subtle history of your meals.
Finally, seasoning protects your investment. Cast iron skillets can last a lifetime or longer. They are very durable. But they need care to stay that way. A strong seasoning layer protects the pan from damage. It prevents rust and makes cleaning simple. Without good seasoning, cast iron pans become difficult to use. Food sticks, and rust appears. Regular care keeps your cast iron working like new. It ensures your pan stays a valuable kitchen tool for years.
Best Practices for Hand Washing Cast Iron Skillets
Cleaning cast iron is simple when you know the right steps. Forget everything you know about cleaning other pans. Cast iron needs a gentle, quick hand wash. This method preserves the seasoning. It also stops rust from forming. You want to remove food bits without stripping the protective layer. I find that a quick wash right after cooking works best. This keeps food from drying onto the pan. It makes the cleaning process much easier overall.
Tools You Need
You only need a few simple tools for cleaning cast iron. You do not need harsh chemicals or abrasive pads. First, get a stiff brush or a pan scraper. These tools help remove stuck-on food without harming the seasoning. Plastic scrapers work well for stubborn bits. Second, you need warm water. Hot water helps loosen food. You can use a small amount of mild dish soap, but many people prefer to avoid it. If you use soap, use it sparingly. Some say soap can break down seasoning. However, modern dish soaps are milder. They generally do not ruin well-established seasoning with quick use.
You also need a clean cloth or paper towels for drying. I always keep a dedicated cloth just for my cast iron. This ensures it is clean and ready. A towel helps you dry the pan completely. This is the most important step after washing. You want to remove all moisture quickly. Having these tools ready makes the cleaning process fast and easy. It also ensures you care for your pan in the best way.
Step-by-Step Cleaning Guide
- Wash Immediately: Clean your skillet soon after cooking. This is when food is still warm and soft. If food cools and dries, it becomes harder to remove. Running warm water into the pan helps loosen any stuck bits. I usually just use warm water for light messes.
- Scrape Off Food: Use your stiff brush or pan scraper to remove food debris. Scrub the pan under warm running water. For stubborn spots, a little salt can act as a gentle abrasive. You can also make a paste with salt and a little oil. Rub it with a paper towel. This helps loosen tough grime.
- Use Mild Soap (Optional): If your pan feels greasy, you can use a very small amount of mild dish soap. Using too much dishwasher liquid can cause problems, as discussed here. Apply it to your brush. Scrub the pan quickly. Rinse it thoroughly. The goal is to clean, not strip. A well-seasoned pan handles a little soap fine.
- Rinse Thoroughly: Make sure you rinse all soap and food bits from the pan. Any leftover residue can affect the seasoning. It can also lead to sticking during your next cooking session. Give the pan a good final rinse under warm water.
- Dry Completely: This step is vital. Do not let your cast iron air dry. Water causes rust. Immediately dry the skillet with a clean towel. For extra dryness, place the pan on the stove over low heat for a few minutes. This evaporates any remaining moisture. I always do this; it prevents any surprises later.
- Apply Oil: Once the pan is dry and still warm, apply a very thin layer of cooking oil. Use a paper towel to rub a small amount of oil all over the inside and outside of the pan. Wipe off any excess. The pan should look lightly shiny, not greasy. This re-oils the seasoning layer. It keeps the pan protected. It also prepares it for your next cooking adventure.
The Essential Step: Drying and Re-oiling Your Cast Iron
Drying and re-oiling are critical steps in cast iron care. Many people clean their cast iron well but forget these last two parts. This can lead to rust even after a good wash. The goal is to remove all moisture and protect the surface. This keeps your cast iron in top working condition. It also adds to the seasoning with each use. I always make sure these steps are done right after washing. It becomes a quick habit that saves my pans.
Immediate Drying is Key
Water is the enemy of cast iron. Iron rusts when exposed to water and oxygen. Cast iron is no exception. After you wash your skillet, water droplets sit on the surface. If these droplets dry naturally, they can leave rust spots. This happens very quickly, sometimes in just a few minutes. Therefore, you must dry your cast iron immediately and completely. Do not let it sit in a sink or on a drying rack. You need to take action right away.
I use a clean, dedicated dish towel to dry my cast iron. I wipe down every surface: the cooking surface, the outside, and the handle. Then, for extra assurance, I put the skillet on the stove burner. I turn the heat to low. I leave the pan there for 2-3 minutes. This heats the pan slightly. It evaporates any moisture that the towel might have missed. You will see a bit of steam come off the pan if there is any water left. This step is a foolproof way to ensure dryness. It is worth the extra minute or two.
Light Oil Application
After drying, applying a light layer of oil is the next essential step. This step maintains the seasoning. It also provides an extra layer of protection against rust. You do not need much oil. A small amount goes a long way. I use a neutral cooking oil like grapeseed, flaxseed, or vegetable oil. Some people prefer specific oils for seasoning. The important thing is to use a very thin amount.
Put a few drops of oil on a paper towel. Rub the oil all over the inside surface of the pan. Then, rub it all over the outside. Wipe the handle too. Make sure to wipe off any excess oil. The pan should look dark and slightly shiny, not greasy or sticky. If you leave too much oil, it can become gummy when stored. It also makes the pan sticky the next time you use it. This thin layer seals the pores of the iron. It keeps the seasoning strong. It also adds to the seasoning layer over time. This practice keeps your cast iron ready for your next cooking task.
Common Mistakes to Avoid in Cast Iron Care
Taking care of cast iron is simple, but there are common pitfalls. Avoiding these mistakes helps your skillet last longer. It also ensures it cooks better. Many people learn these lessons the hard way. I have made some of these mistakes myself. Knowing what not to do is as important as knowing what to do. These tips save you time and prevent damage to your valuable cookware.
- Using a Dishwasher: This is the biggest mistake. As discussed, dishwashers strip seasoning and cause rust. This is a crucial point to remember for cast iron longevity. Remember that different items have different washing needs; for instance, you might wonder about putting other things, like a cafetiere, in the dishwasher, but cast iron is unique.
- Soaking Your Skillet: Do not leave your cast iron skillet to soak in water. Even hand washing should be quick. Soaking allows water to penetrate the seasoning. It can lead to rust formation. If you have stuck-on food, try scrubbing it immediately with hot water and a stiff brush. Do not let it sit in water for hours.
- Using Harsh Abrasives: Avoid steel wool or very harsh scrubbers. These tools can scratch and remove the seasoning. While you want to remove food, you do not want to remove the protective layer. A stiff nylon brush or a pan scraper is usually sufficient. A little coarse salt can also act as a gentle abrasive.
- Air Drying: Never let your cast iron skillet air dry. Every drop of water that remains on the surface can lead to rust. Always towel dry immediately and then heat the pan on the stove for a minute or two. This ensures all moisture is gone.
- Using Too Much Soap: While modern mild dish soap is generally fine for well-seasoned cast iron, using large amounts is still not ideal. Excessive soap can strip the seasoning over time. It is best to use a minimal amount, if any, and rinse quickly. For most daily cleaning, hot water and a stiff brush are enough.
- Storing in Humid Places: Store your cast iron in a dry place. A damp environment encourages rust. Do not store it in a cabinet under a sink where moisture might build up. Make sure the pan is completely dry before storing it. Hanging it or storing it in a well-ventilated cabinet is best.
- Cooking Acidic Foods for Too Long: Cooking highly acidic foods like tomato sauce or lemon juice for extended periods can wear down seasoning. The acid reacts with the metal. This is especially true for newer seasoning. For longer cooking of acidic dishes, consider using an enameled cast iron pot instead.
- Not Re-oiling: After washing and drying, always apply a thin coat of oil. This replenishes the seasoning. It also protects the pan from rust until its next use. Skipping this step leaves the pan vulnerable to rust. It also means your seasoning will not build up as effectively over time.
Avoiding these common mistakes keeps your cast iron in excellent shape. It ensures your pan remains a cherished cooking tool for many years.
Restoring Damaged Cast Iron: A Step-by-Step Guide
Even with the best care, accidents happen. You might find a rusty spot on your cast iron skillet. Perhaps you inherited a pan that was not cared for well. Do not worry. Most damaged cast iron can be saved. Rust looks bad, but it does not mean your pan is ruined. Restoration takes effort but brings your pan back to life. I have restored several rusty pans. It is satisfying to see them transform. This guide helps you fix a neglected skillet.
Removing Rust
Removing rust is the first step. You need to remove all orange discoloration. There are a few ways to do this.
- Scrubbing: For light rust, a stiff brush or steel wool can work. Scrub the rusty areas under warm water. You can use a paste of baking soda and water or a little mild dish soap. Scrub until all visible rust is gone. This needs some elbow grease.
- Vinegar Bath: For heavy rust, a vinegar bath is very effective. Mix equal parts white vinegar and water in a basin. Submerge the rusty cast iron in the solution. Check the pan every hour or so. Vinegar is acidic and can start to eat away at the iron itself if left too long. Once the rust is gone, or mostly gone, remove the pan immediately. This usually takes from 30 minutes to a few hours. Do not leave it overnight.
- Potato and Salt: This is an old trick for lighter rust. Cut a potato in half. Dip the cut side in coarse salt. Rub the potato vigorously over the rusty areas. The oxalic acid in the potato combined with the abrasive salt helps remove rust. Rinse well afterward.
- Grinding or Sanding (Extreme Cases): For very deep pitting or rust that will not come off, you can use a fine-grit sandpaper or a grinder with a wire brush attachment. This is a last resort. It removes metal, so use it carefully. Always wear safety glasses.
After removing the rust, wash the pan thoroughly with warm water and a little soap. Make sure all rust particles are gone. Dry the pan immediately and completely. Place it on a stove burner on low heat for a few minutes to ensure it is bone dry.
Re-seasoning Steps
Once clean and rust-free, your cast iron needs new seasoning. This process builds up the protective layer again. It can take several rounds to get a good base seasoning.
- Preheat Oven: Preheat your oven to 450-500°F (232-260°C).
- Apply Oil: Apply a very thin, even layer of high smoke point oil to the entire skillet. Use a paper towel to rub the oil inside and out. Ensure you cover every surface. Good oils include flaxseed oil, grapeseed oil, or vegetable oil. Make sure to wipe off any excess oil until the pan looks almost dry. Too much oil will result in a sticky, gummy finish.
- Bake Upside Down: Place the oiled skillet upside down on the middle rack of your preheated oven. Put a baking sheet or aluminum foil on the rack below to catch any oil drips.
- Bake for One Hour: Bake the pan for one hour. During this time, the oil polymerizes and bonds with the iron.
- Cool Slowly: Turn off the oven after one hour. Let the skillet cool completely inside the oven. Do not rush this process. This allows the seasoning to harden properly.
- Repeat: For best results, repeat this oiling and baking process 3-5 times. Each layer adds to the durability and non-stick quality. The pan will get darker and smoother with each round.
After re-seasoning, your cast iron skillet will be ready to cook again. Remember to continue hand washing and re-oiling after each use to maintain the new seasoning.
Different Types of Cast Iron and Dishwasher Compatibility
When we talk about cast iron, most people picture the classic black, pre-seasoned skillets. However, there are different forms of cast iron cookware. Not all of them are treated the same way. Understanding these differences is important for proper care. The rules for raw cast iron do not always apply to other types. This helps prevent damage to specialized pieces. Knowing your cast iron type guides your cleaning decisions.
Raw Cast Iron (Uncoated)
This is the traditional cast iron. It is rough to the touch when new, then smooth and dark with seasoning. Most skillets, griddles, and Dutch ovens fall into this category. As we have discussed, raw cast iron never goes into the dishwasher. The harsh detergents and prolonged water exposure destroy the seasoning. They cause rust very quickly. Hand washing and immediate drying are essential for this type. This is the cast iron that needs the most attention to its seasoning.
Even if you have a brand-new, factory-pre-seasoned skillet, it is still raw cast iron underneath. The pre-seasoning is a thin initial layer. You must build on it with your own cooking and care. This means avoiding the dishwasher from day one. Proper care ensures your raw cast iron develops a strong, durable, non-stick surface over many years. This type of cast iron is valued for its heat retention and even cooking.
Enameled Cast Iron
Enameled cast iron is cast iron that has a glass-based coating. This coating is typically colorful and smooth. Brands like Le Creuset and Staub are famous for their enameled cast iron. The enamel layer protects the iron from rust. It also makes the cookware naturally non-stick (though not as slick as well-seasoned raw cast iron). This enamel means you do not need to season the pan. The cleaning rules for enameled cast iron are different.
Most manufacturers state that enameled cast iron is dishwasher safe. The enamel itself is durable and will not rust. However, many experts still recommend hand washing. Dishwasher detergents can be abrasive over time. They might dull the shiny finish of the enamel. They can also cause chipping along the rim or handles, especially if items knock together. While it might survive a dishwasher cycle, hand washing preserves the beauty and lifespan of your enameled pieces best. Always check the manufacturer’s specific care instructions for your enameled cast iron. If you choose to machine wash, place it carefully to avoid contact with other items.
Beyond Cleaning: Proper Storage for Your Cast Iron
Proper storage is as important as proper cleaning for cast iron. After you have washed, dried, and re-oiled your skillet, where do you put it? Storing cast iron correctly prevents future problems like rust or sticky surfaces. It also keeps your kitchen organized. A well-stored skillet is always ready for its next use. I have learned that a little effort in storage saves a lot of trouble later.
Keeping it Dry and Ventilated
The most important rule for storing cast iron is to keep it dry. Any moisture can lead to rust. This means choosing a storage location that is not prone to humidity. Avoid storing cast iron near a sink or in a damp basement. A dry pantry shelf or a cabinet away from water sources is ideal. Good air circulation is also important. This helps ensure any trace moisture evaporates.
If you stack multiple cast iron pans, place a paper towel or a thin cloth between them. This prevents scratching the seasoning. It also allows air to circulate between the pans. This simple step stops moisture from getting trapped. Trapped moisture can create rust spots where the pans touch. I often hang my cast iron skillets on a wall rack. This is a great way to ensure air flow. It also makes them easy to access and adds to the kitchen decor.
Avoiding Gummy Surfaces
Sometimes, a cast iron pan can feel sticky or gummy after storage. This usually happens if you applied too much oil during the re-oiling step. When storing, you want a very thin, almost invisible layer of oil. If the pan feels greasy to the touch before storage, wipe off more oil. The ideal finish is dark and slightly shiny, but not oily.
If your pan does become gummy, you can usually fix it easily. Heat the pan on the stove over medium heat. As it warms up, the sticky oil will loosen. You can
- cast iron care
- cleaning cast iron
- cast iron seasoning
- dishwasher safety
- kitchen tips

Liora Benning
Cleaning Specialist
With a passion for tidy spaces and years of hands-on experience, I specialize in blending deep-cleaning strategies with practical organization and cozy design. I believe every home—no matter the size—can feel both functional and beautiful. At Cosy Home Creation, I share realistic routines, creative DIY projects, and decor tips that make home care feel less like a chore and more like a lifestyle. From sparkling countertops to serene workspaces, I help you build a home that truly works for you.